 |
VOOZH | about |
|
VOOZH | about |
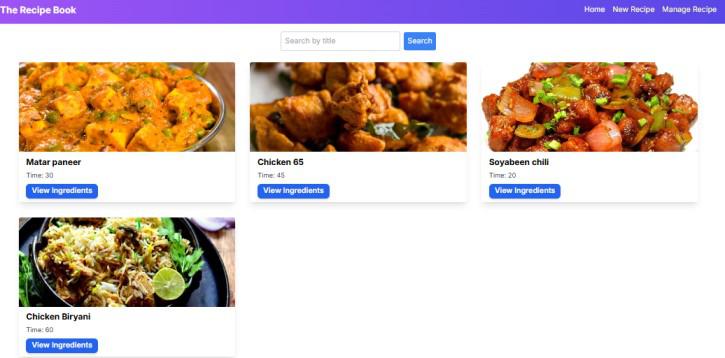
A Recipe Manager is a web application that allows users to manage and share their recipes. This application enables users to add new recipes, view a list of recipes, manage recipe and search for recipes by title. Built with Next.js, this app leverages server-side rendering for better performance. Users can interact with the app through a responsive user interface, making it easy to manage recipes from any device.
Output Preview: Let us have a look at how the final output will look like.
Step 1: Initialized the Nextjs app
npx create-next-app@latest recipe-managerStep 2: It will ask you some questions, so choose as the following bolded option.
√ Would you like to use TypeScript? ... No / Yes
√ Would you like to use ESLint? ... No / Yes
√ Would you like to use Tailwind CSS? ... No / Yes
√ Would you like to use `src/` directory? ... No / Yes
√ Would you like to use App Router? (recommended) ... No / Yes
√ Would you like to customize the default import alias (@/*)? ... No / Yes
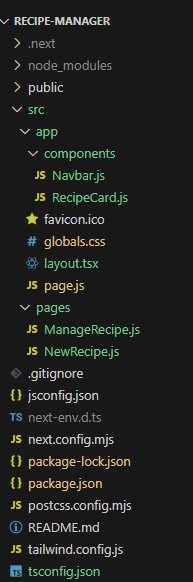
Step 3: Create folder structure as shown below.
The dependencies in package.json file will look like:
"dependencies": {
 "react": "^18",
 "react-dom": "^18",
 "next": "14.2.5"
 },
 "devDependencies": {
 "postcss": "^8",
 "tailwindcss": "^3.4.1"
 }
Example: Create the required files and write the following code.
To start the application run the following command.
npm run dev