 |
VOOZH | about |
|
VOOZH | about |
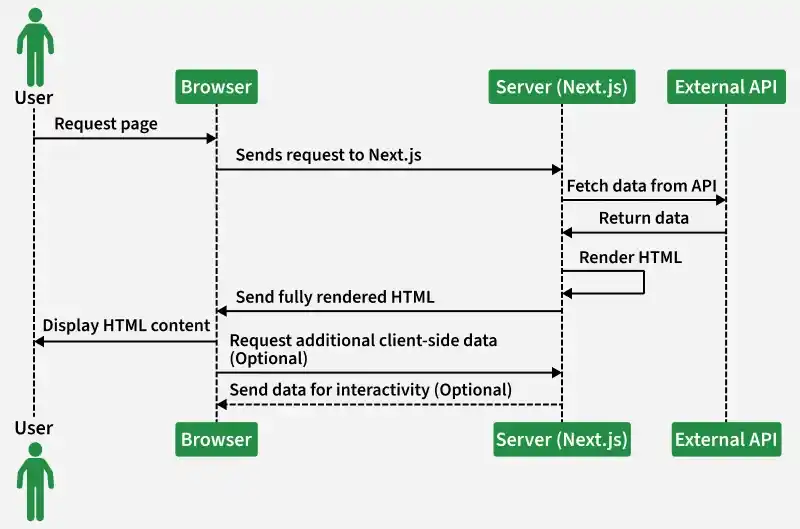
Server-Side Rendering (SSR) in Next.js is a technique where HTML is generated on the server for every incoming request, ensuring users receive fully rendered pages instantly.
export default function Page({ data }) {
 return <>YOU CAN DISPLAY YOUR DATA ACCORDINGLY</>;
}
export async function getServerSideProps() {
 // Your code
 const data = [];

 // Passing data to the Page using props
 return {
 props: { data },
 };
}
Note: In place of data you can take any other name of the variable. Also, you can pass multiple props by separating them with commas ",".
Step 1: Create NextJS Application: You can create a new NextJs project using the below command:
npx create-next-app gfgSo, right now we have a Next Js application named my-awesome-app whose directory structure is shown in the image below:
Step 2: So, let us create a page with endpoint as "/users" by creating a "users.js" in our "pages" folder and then fetching the users from a dummy API and then showing that data in that endpoint.
Dummy api used:
https://jsonplaceholder.typicode.com/usersCreate a users.js file.
Step 3: Add the following code to the "pages/users.js" file:
Step to run the application: Using either of the given 2 commands start the dev server:
npm run devOr
yarn run devOutput: And now go to the "http://localhost:3000/users" to get the output.