 |
VOOZH | about |
|
VOOZH | about |
Optimistic updates enhance user experience by making your Redux application feel more responsive. This technique involves updating the UI before receiving confirmation from the server, assuming that the update will succeed. If the server responds with an error, the application can then revert to the previous state. In this article, we will see how we can implement Optimistic Updates in Redux Application.
Optimistic updates provide immediate feedback to the user by reflecting the changes in the UI as soon as an action is initiated, rather than waiting for the server response. This approach improves the perceived performance and usability of your application.
Developing a React application with Redux for state management, employing optimistic UI updates for responsiveness. Thunk handle asynchronous tasks, such as adding items, ensuring seamless user interactions. The project prioritizes modular components and thorough testing, enhancing reliability and maintainability. Using React hooks and Redux toolkit streamlines development, fostering a scalable and efficient codebase.
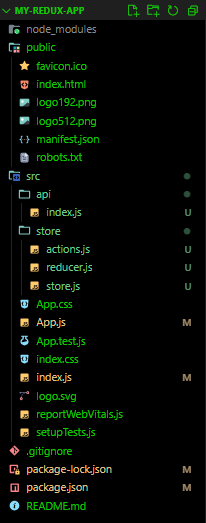
First, create a new React application using Create React App.
npx create-react-app my-redux-appcd my-redux-appInstall the required dependencies: Redux, React-Redux, and Redux-Thunk.
npm install redux
npm install react-redux
npm install redux-thunk
The updated dependencies in package.json file will look like:
 "dependencies": {
 "@testing-library/jest-dom": "^5.17.0",
 "@testing-library/react": "^13.4.0",
 "@testing-library/user-event": "^13.5.0",
 "react": "^18.3.1",
 "react-dom": "^18.3.1",
 "react-redux": "^9.1.2",
 "react-scripts": "5.0.1",
 "redux": "^5.0.1",
 "redux-thunk": "^3.1.0",
 "web-vitals": "^2.1.4"
 }
Update scripts in the package.json:
"scripts": {
 "start": "set NODE_OPTIONS=--openssl-legacy-provider && react-scripts start",
 "build": "set NODE_OPTIONS=--openssl-legacy-provider && react-scripts build",
 "test": "set NODE_OPTIONS=--openssl-legacy-provider && react-scripts test",
 "eject": "react-scripts eject"
}
Go to the correct directory path, then follow the steps below:
Step 1: Open command prompt, enter (For Windows)
set NODE_OPTIONS=--openssl-legacy-providerStep 2:
npm startExample: Illustration to implement optimistic updates in Redux applications.
Step to Run the Application: Run the application using the following command from the root directory of the project
npm startOutput: Your project will be shown in the URL http://localhost:3000/
Here's what the application might look like in action. When you add an item, it appears immediately in the list. If the server responds with an error, the item will be removed.