This article guides you through building an engaging Indian tourism app using React, featuring destination exploration, travel experiences, and a visually appealing image carousel. Users can interact with the app and contact through a form, highlighting the beauty of India.
Preview of final output: Let us have a look at how the final output will look like.
The app is structured with a navbar for easy navigation, a carousel to showcase beautiful images, and various routes for different sections like destinations and contact forms.
React Bootstrap components are seamlessly integrated to enhance the overall user experience.
Steps to Create the React App
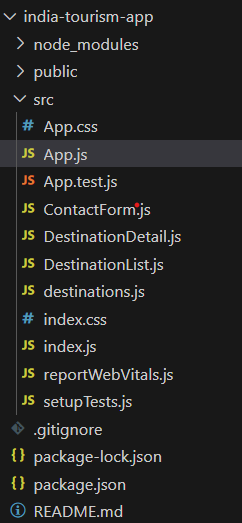
Step 1: Set up a new React project: Use the following command to create project:
npm create vite@latest india-tourism-app --template react
cd india-tourism-app
Step 2: Install React Router and React Bootstrap for enhanced functionality.
Example: Write the following code in respective files.
DestinationDetail.js: The code defines a DestinationDetail component displaying details of a destination based on the provided match object and destination data.
It dynamically fetches the destination details using the destinationId from the URL parameters and renders information such as name, image, description, rating, and best time to visit.
Additionally, it includes a "Book Now" button (currently without functionality) within a styled container for a clean and consistent presentation of destination details.
ContactForm.js: The code defines a ContactForm component using styled components for a styled form container, labels, inputs, textarea, and a submit button.
It creates a simple contact form with fields for name, email, and message, providing a clean and responsive design.
The form lacks a submit functionality, and submitting would typically involve integrating with a backend or API to handle the form data.
DestinationList.js: The code defines a functional component DestinationList that renders a list of destinations using styled components for styling.
It utilizes React Router's Link component to navigate to detailed destination pages and includes a button to add/remove destinations from favorites.
State is managed using the useState hook, keeping track of favorite destinations based on user interaction.
destination.js: The code defines an array of travel destinations, each represented by an object with properties like id, name, description, image, rating, and bestTime.
