 |
VOOZH | about |
|
VOOZH | about |
Auto-scaling Microservices with Eureka and Spring Boot involves leveraging Eureka for the service discovery and Spring Boot for building microservices that can dynamically scale based on the demand. This setup allows for efficient resource utilization and it can ensure that the system can handle varying loads seamlessly.
Eureka is a service registry that allows microservices to self-register and discover new users Spring Boot can simplify the development of microservices by providing features such as embedded servers and dependency injection.
Auto-scaling configures the number of instances of microservices based on metrics such as CPU usage or incoming requests. This dynamic adjustment of resources allows the system to handle varying loads efficiently.
Below are the steps to implement Auto-Scaling Microservices with Eureka and Spring Boot.
Step 1: Create a Spring project using Spring Initializr, and include the following dependencies:
Dependencies:
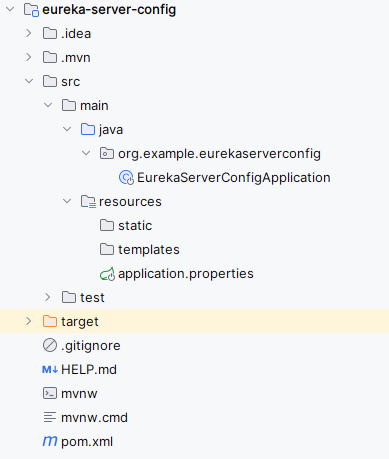
After creating the Spring project, the file structure will resemble the image below.
Step 2: Open the application.properties file and add the following code to configure the server port and Eureka server settings for the project.
spring.application.name=eureka-server-config

server.port=9099
eureka.instance.prefer-ip-address=true
eureka.client.fetch-registry=true
eureka.client.register-with-eureka=true
eureka.client.service-url.defaultZone= http://localhost:9099/eureka
Step 3: In the main class, include the annotation @EnableEurekaServer to activate the Eureka server functionality.
pom.xml:
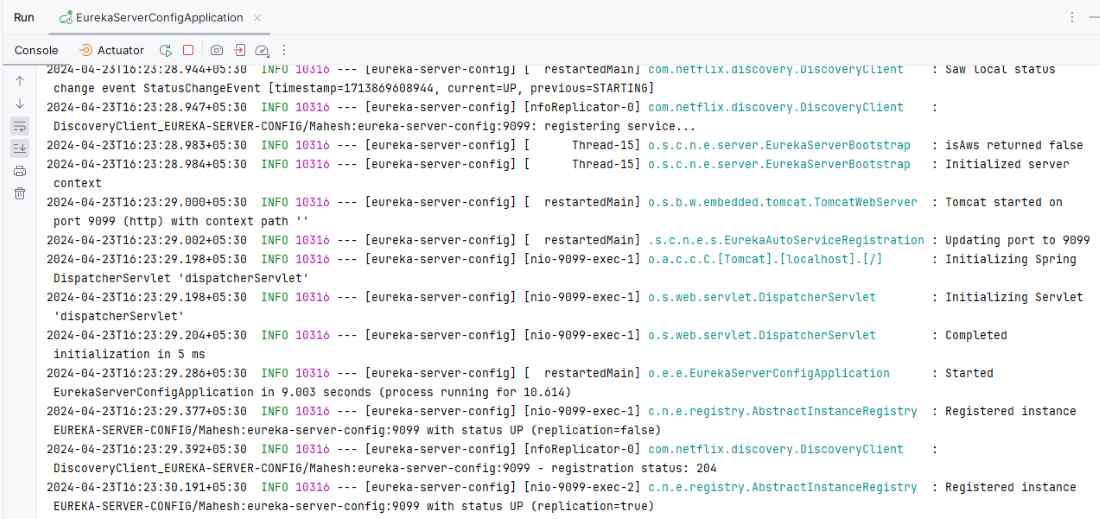
Step 4: Once the Spring project is completed and run as a Spring application successfully, it will start at port 9099.
👁 Eureka Server StartedStep 1: Create the Spring project using Spring Initializr. When creating the project, add the following dependencies:
Dependencies:
After creating the Spring project, the file structure should resemble the image below.
Step 2: Open the application.properties file and insert the following code to configure the server port and Eureka client settings for the project.
spring.application.name=user-service
server.port=8086


management.endpoints.web.exposure.include=*
management.endpoint.metrics.enabled=true
management.prometheus.metrics.export.enabled=true


autoscaler.cpu.threshold=0.75

eureka.instance.prefer-ip-address=true
eureka.client.fetch-registry=true
eureka.client.register-with-eureka=true
eureka.client.service-url.defaultZone= http://localhost:9099/eureka

spring.data.mongodb.uri=mongodb://localhost:27017/demo
Step 3: Create a new package named "model". Within this package, create a new Java class named "User".
Go to src > org.example.userservice > model > User and put the below code.
Step 4: Create the new package and it named as the repository in that package create the new Java class and it named as UserRepository .
Go to src > org.example.userservice > repository > UserRepository and put the below code.
Step 5: Create the new package and it named as the service in that package create the new Java class and it named as UserService.
Go to src > org.example.userservice > service > UserService and put the below code.
Step 6: Create the new package and it named as the service in that package create the new Java class and it named as UserServiceImpl.
Go to src > org.example.userservice > service > UserServiceImpl and put the below code.
Step 7: Create a new Java class named AutoScaler.
Go to src > org.example.userservice > AutoScaler and put the below code.
This AutoScaler class is designed to automatically scale the number of instances of the microservice based on CPU usage.
How Auto-Scaling Works:
autoScale() method checks CPU usage every minute.Enhanced Implementation:
To refine auto-scaling:
To actually create and manage multiple instances, the AutoScaler class could be expanded like this:
Additional Considerations:
To verify auto-scaling:
Step 8: Create a new package named "controller". Within this package, create a new Java class named "UserController".
Go to src > org.example.userservice > Controller > UserController and put the below code.
Step 9: Run the application
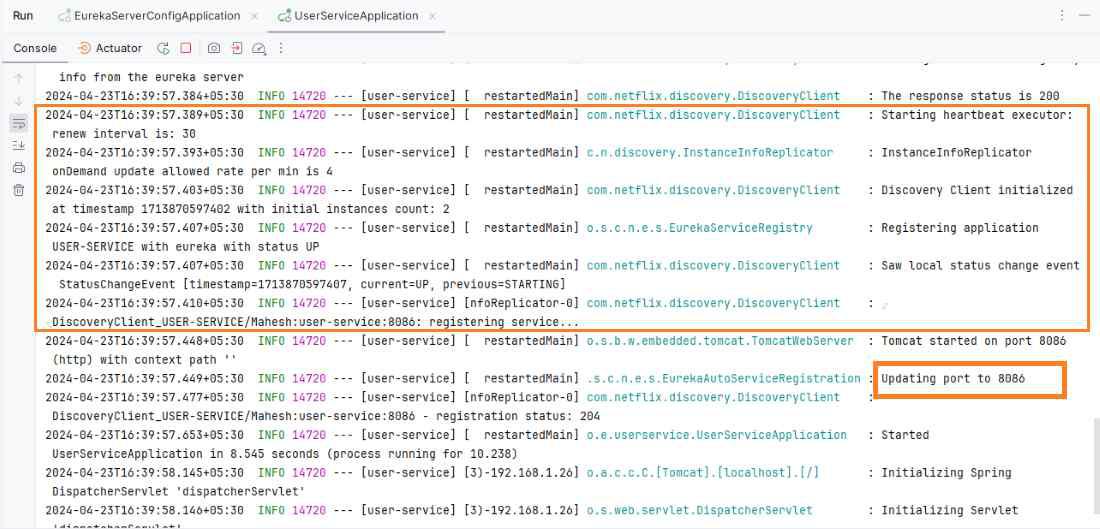
Once completed the project after that run the application once runs the application successfully looks like the below image.
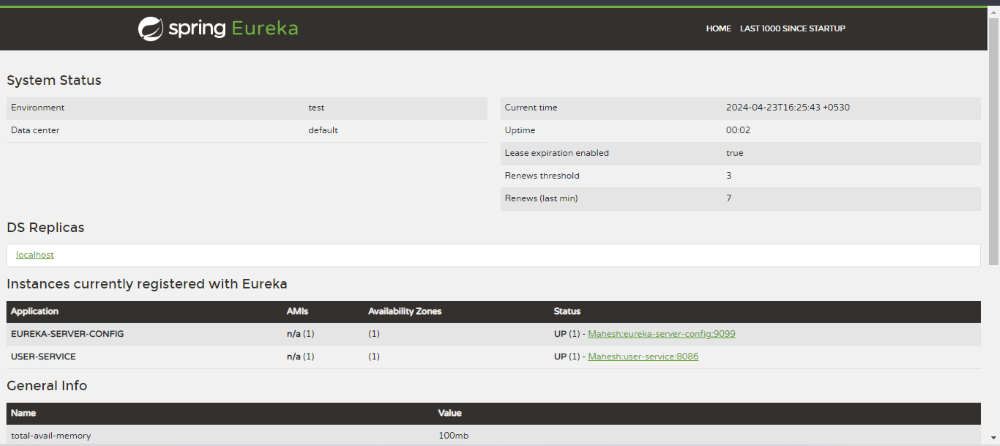
Eureka Dashboard:
Create the user:
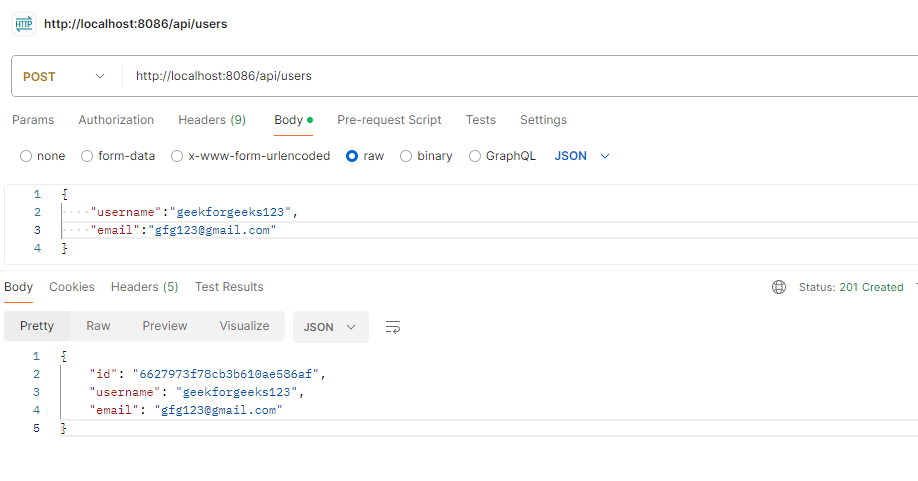
POST http://localhost//8086/api/usersGet the users:
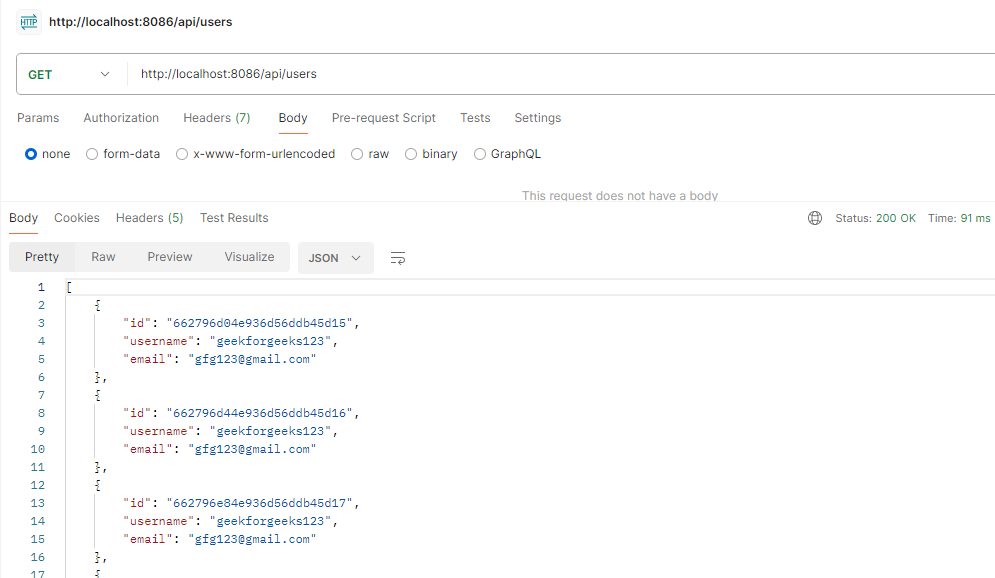
GET http://localhost//8086/api/usersThis implementation covers the basics of setting up auto-scaling for microservices using Eureka and Spring Boot. For a production-ready solution, integrate with container orchestration platforms to handle instance creation and termination dynamically based on load.