 |
VOOZH | about |
|
VOOZH | about |
In Spring Boot, dependency injection is a key feature that allows developers to wire components (beans) together. Often, multiple implementations of an interface may exist, and the application needs to decide which implementation to inject at runtime. This is common when designing modular systems with different strategies, such as payment services or notification services.
In this article, we will learn how to autowire an interface with multiple implementations using the Spring @Qualifier annotation to resolve ambiguity.
In Spring Boot, autowiring refers to the automatic injection of dependencies. When a class depends on an interface, Spring attempts to inject an implementation of that interface. However, when there are multiple implementations of a single interface, Spring needs clarification on which implementation to inject.
For example: A payment system might have several ways to process payments, such as credit cards or PayPal. In such scenarios, Spring doesn’t automatically know which implementation to inject, so we use strategies like the @Qualifier annotation to specify it.
We will walk through a simple project that demonstrates autowiring an interface with multiple implementations in a Spring Boot project.
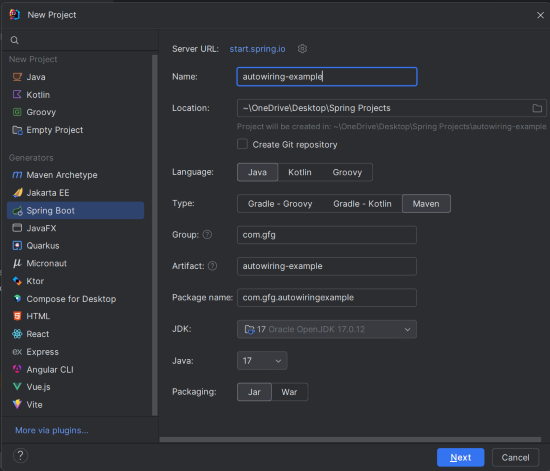
Create a new Spring Boot project using IntelliJ IDEA or any IDE of your choice. Choose the following options:
autowiring-exampleClick on the Next button.
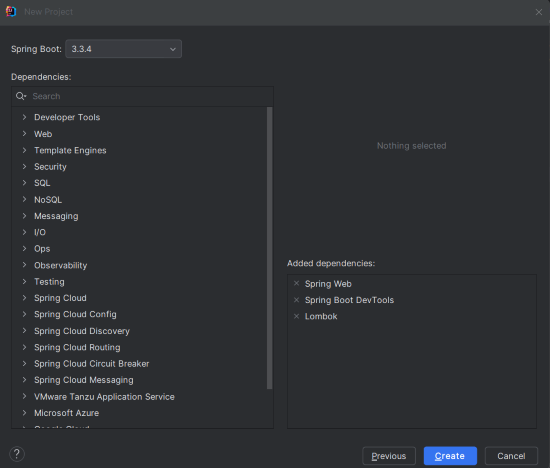
Add the following dependencies into the Spring Boot project.
Click on the Create button.
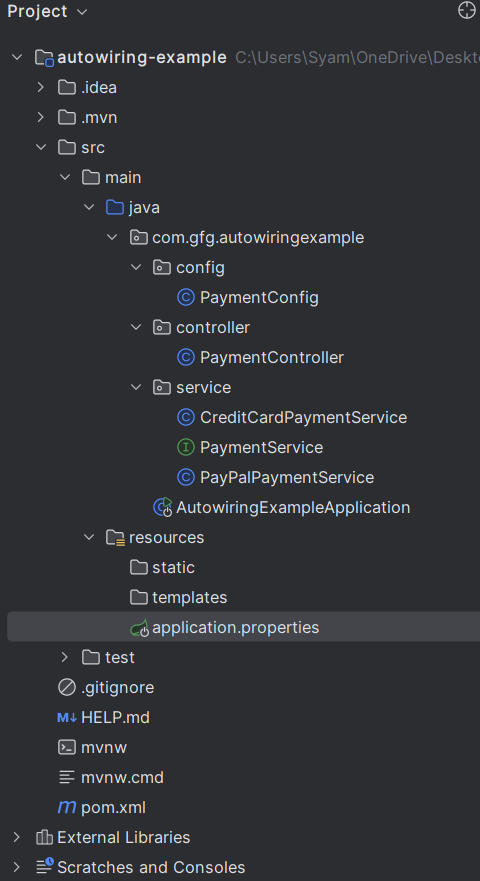
After the project creation done, the project folder structure will look like the below image.
In the application.properties file, set up basic configurations:
spring.application.name=autowiring-example
server.port=8080
This sets the application name and port for the project.
PaymentService InterfaceCreate a common interface, PaymentService, to define the payment methods that multiple services will implement.
PaymentService.java
The PaymentService interface defines a single method processPayment(double amount) that all payment services will implement.
CreditCardPaymentService ClassThis class implements PaymentService for credit card payments.
CreditCardPaymentService.java
The CreditCardPaymentService implements the processPayment method for credit card payments. It is annotated with @Service and given a custom name "creditCardService" to differentiate it from other implementations.
PayPalPaymentService ClassThis class implements PaymentService for PayPal payments.
PayPalPaymentService.java
The PayPalPaymentService provides the processPayment method for PayPal payments and is annotated with @Service("payPalService") to distinguish it from other implementations.
PaymentConfig ConfigurationThe @Qualifier annotation is used to specify which implementation to inject. In this configuration, we can define and qualify beans manually.
PaymentConfig.java
In the PaymentConfig class, we manually register CreditCardPaymentService and PayPalPaymentService beans, each qualified with unique names ("creditCard" and "payPal").
PaymentController ClassIn the controller, we will use the @Qualifier annotation to inject specific implementations.
PaymentController.java
PaymentController class uses constructor-based dependency injection with the @Qualifier annotation to inject the CreditCardPaymentService and PayPalPaymentService implementations./pay for credit card payments and /pay-paypal for PayPal payments.No changes are required in the main class, as Spring Boot will automatically discover the beans.
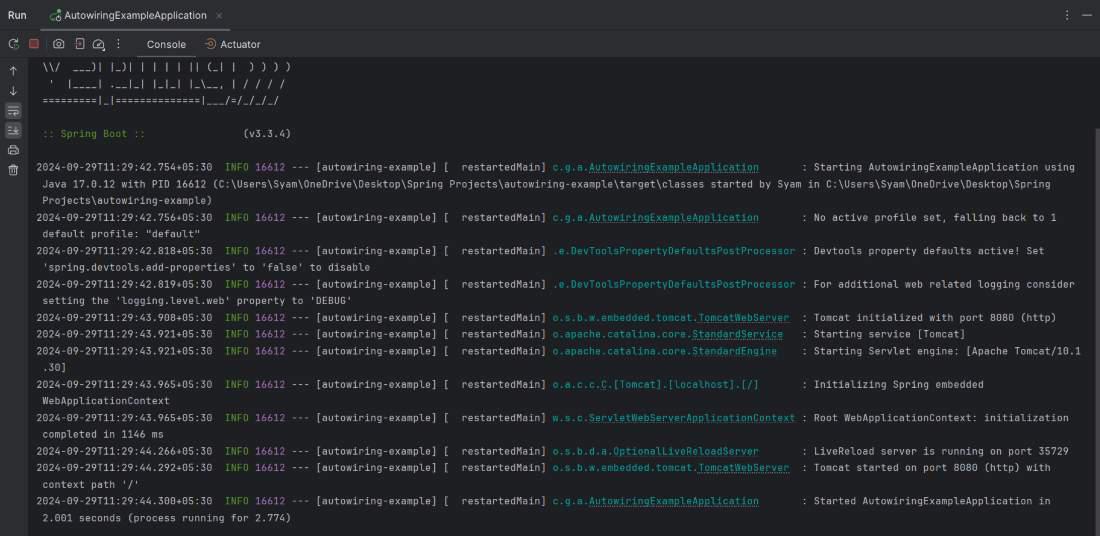
Run the Spring Boot application using your IDE or by using the command:
mvn spring-boot:runIt will start and run at port 8080.
Use Postman or a browser to test the endpoints.
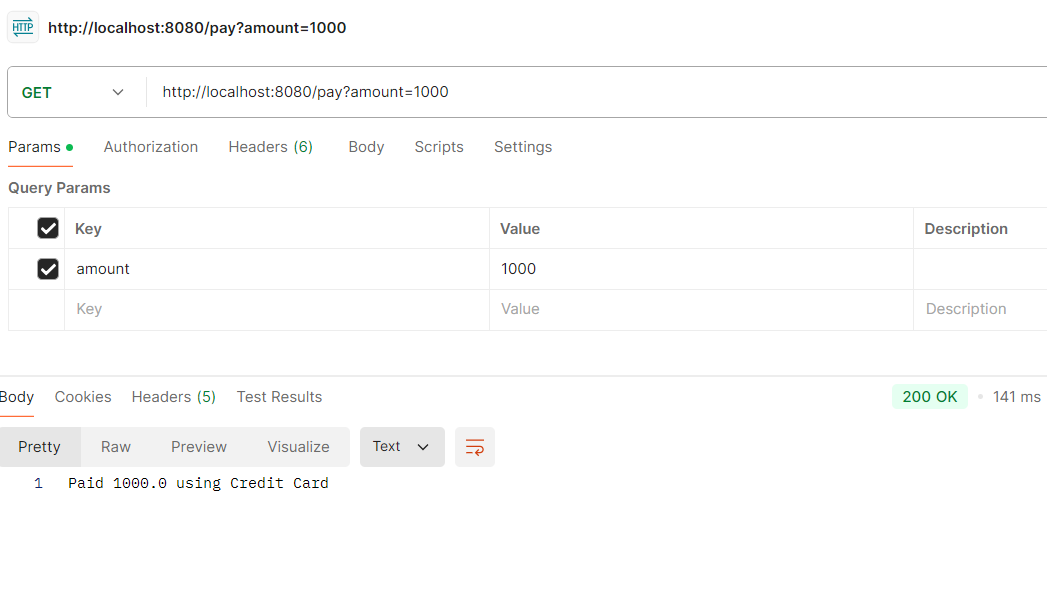
1. Credit Card Endpoint
http://localhost:8080/pay?amount=1000Response:
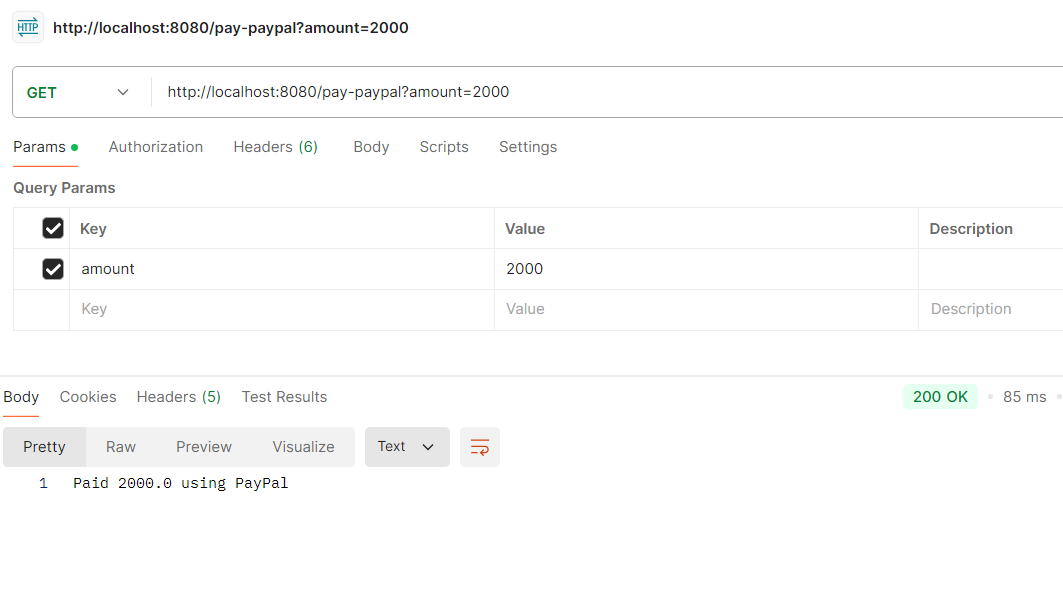
2. PayPal Endpoint
http://localhost:8080/pay-paypal?amount=2000Response:
In this article, we covered how to autowire an interface with multiple implementations in Spring Boot using the @Qualifier annotation. We implemented multiple payment services and injected the specific services into the controller to handle different payment methods. This pattern is useful for scenarios where an application needs to support different strategies or algorithms, giving developers control over which implementation to inject.