 |
VOOZH | about |
|
VOOZH | about |
Concurrency is a vital aspect of web applications and it allows them to handle multiple tasks simultaneously without blocking. Spring WebFlux was introduced in Spring 5. It provides a reactive programming model that enables the non-blocking, asynchronous processing. This approach leverages the reactor library and it allows the developers to build efficient and scalable web applications.
Reactive programming is a programming paradigm that handles asynchronous data streams and the propagation of changes. In Spring WebFlux, this is achieved using Project Reactor which provides two main types:
Spring WebFlux allows us to handle the requests asynchronously and process multiple requests concurrently without blocking the treads. This results in better resource utilization and improved the application performance.
Create a new Spring Reactive Project using Spring Initializr and add the below mentioned dependencies.
Dependencies:
After the project creation done, the structure of the project in the IDE will be look like the below image:
Open the application.properties file and add the below properties for configuration of the MySQL database.
spring.application.name=concurrency-spring
spring.liquibase.enabled=false
spring.datasource.url=jdbc:mysql://localhost:3306/webfluxdb
spring.datasource.username=root
spring.datasource.password=
spring.datasource.driver-class-name=com.mysql.cj.jdbc.Driver
spring.jpa.hibernate.ddl-auto=updateCreate a simple User model class in the model package of the project.
Go to src > main > Java > com.concurrencyspring > model > User and put the below code.
Create the UserRepository interface in the repository package.
Go to src > main > Java > com.concurrencyspring > repository > UserRepository and put the below code.
Create the UserService class in the service package. This class should use reactive types.
Go to src > main > Java > com.concurrencyspring > service > UserService and put the below code.
Create the UserController class in the controller package. This class should also use reactive types.
Go to src > main > Java > com.concurrencyspring > controller > UserController and put the below code.
No changes are required in the main class of the application.
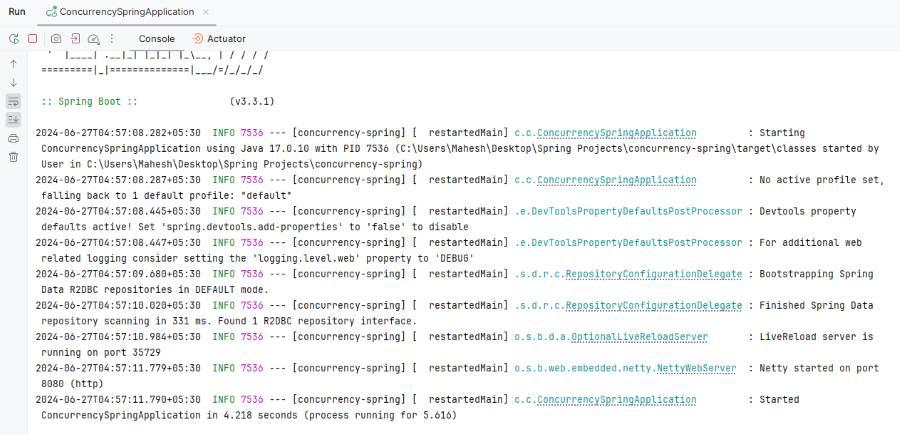
Run the applicationand it will start on port 8080 Refer the below image for better understanding.
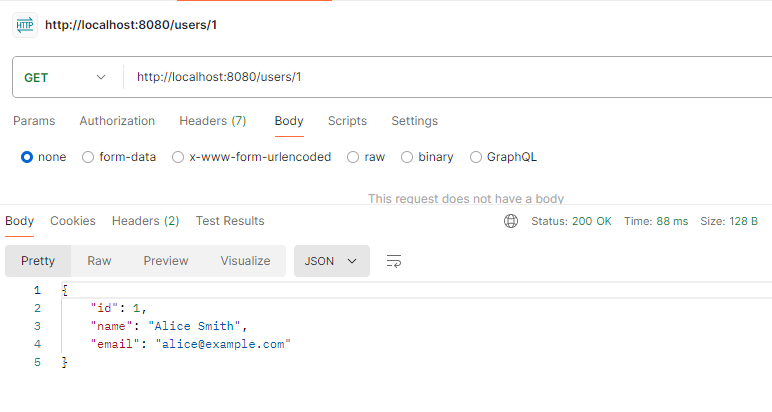
Now, we will test the endpoints by using Postman tool.
POST http://localhost:8080/usersGET http://localhost:8080/users/1This example project demonstrates how to implement the concurrency in Spring WebFlux application. The key aspects include the setting up the reactive web service and defining the reactive data model and creating the non-blocking controllers and services.