 |
VOOZH | about |
|
VOOZH | about |
In Spring Boot, Event-driven architecture is a paradigm, and it can be software component communication through the production, detection, and consumption of events. Spring Cloud Stream is a popular framework built on top of Spring Boot that can be used to simplify the development of event-driven microservices and provide the abstractions and tools to build, deploy, and scale event-driven applications effortlessly.
The Spring Cloud stream can abstract the complexities of the messaging middleware by providing a simplified programming model and introducing concepts like binder, binding, and channels.
We can develop a simple event-driven application using RabbitMQ messaging middleware. In this, we can create the course and the student publisher sends the message through the RabbitMQ broker and the receiver can receive the queue message.
Step 1: We can create the spring project using InteljIdea on creating the project add the below dependencies into your project.
Dependencies:
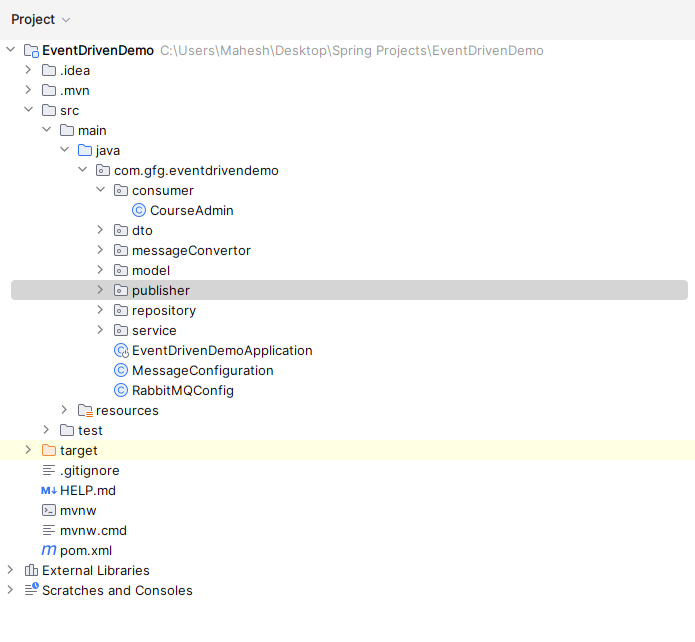
Once create the spring boot project your project file structure looks like the below image.
File Structure:
Step 2: Open the application.properties file and put the code below for the mongodb database and RabbitMQ server configuration.
application.properities file:
spring.data.mongodb.uri=mongodb://localhost:27017/EventDemo
server.port=8081
#RabbitMQ connection properties
spring.rabbitmq.host=localhost
spring.rabbitmq.port=5672
spring.rabbitmq.username=guest
spring.rabbitmq.password=guest
spring.rabbitmq.virtual-host=/
Step 3: If you want to work with RabbitMQ message broker we need to download and install into your system.
RabbitMQ Download using this link
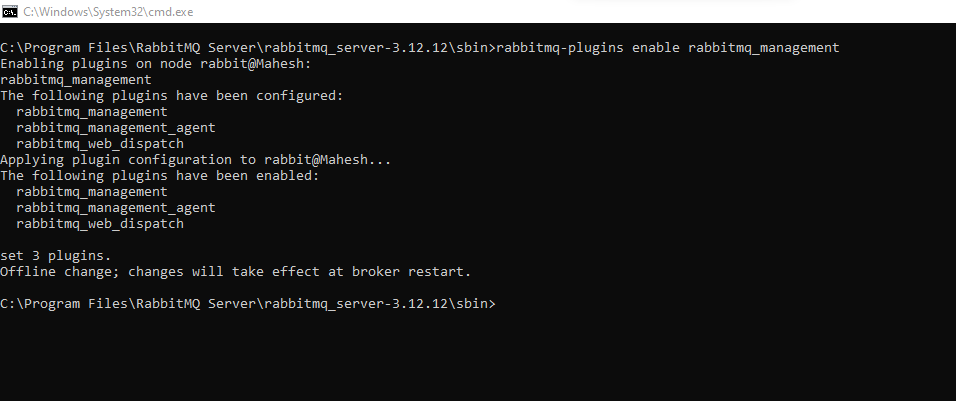
Step 4: Once download the rabbit open the server sbin path and using the below command to enable the RabbitMQ plugins into your system.
Command:
rabbitmq-plugins enable rabbitmq_managementRefer the below image for better understanding:
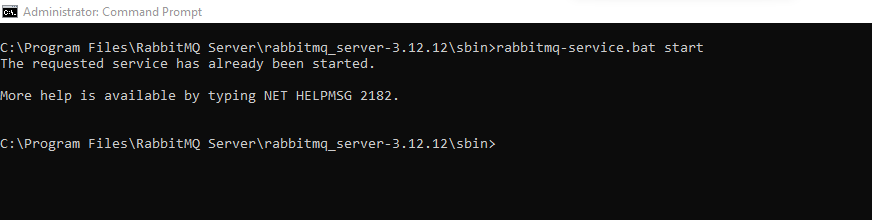
Once enable the RabbitMQ plugins using below the command and run the server into your system.
service.bat startRefer the below image:
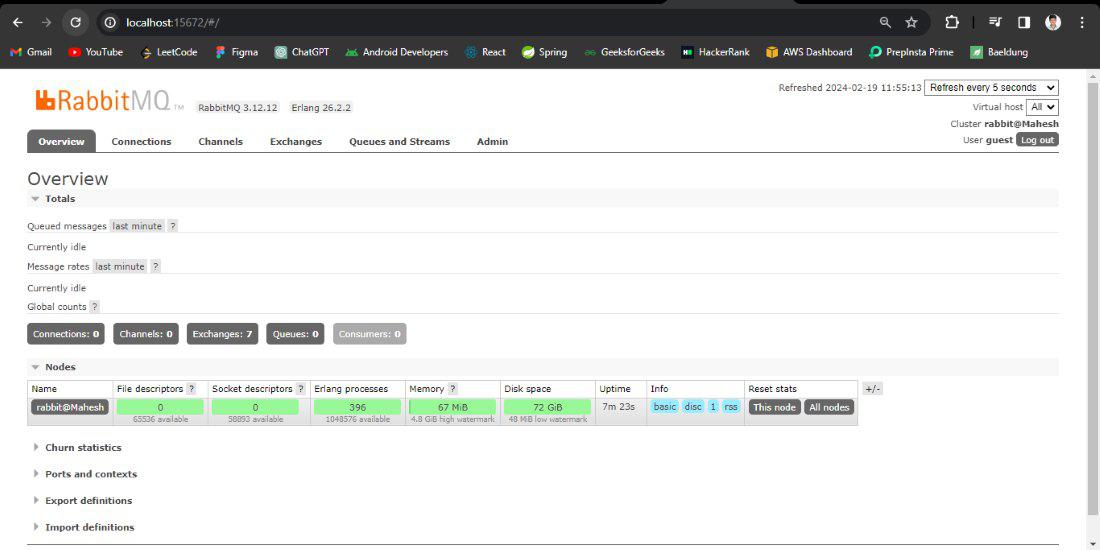
Once start the server and its dashboard open in the port number 15672 and if ask the username and password both are gives as guest.
RabbitMQ Dashboard:
Step 5: Create the new package and it named as model and in that package create the class named as Course
Go to src > java > com.gfg.eventdrivendemo > model > Course and put the below code:
Step 6: create the class in the same package and it named as Student.
Go to src > java > com.gfg.eventdrivendemo > model > Student and put the below code:
Step 7: Create the new package and it named as repository and in that package create the interface named as CourseRepository
Go to src > java > com.gfg.eventdrivendemo > repository > CourseRepository and put the below code:
Step 8: create the one more interface in the same package and it named as StudentRepository
Go to src > java > com.gfg.eventdrivendemo > repository > StudentRepository and put the below code:
Step 9: Create the new package and it named as dto and in that package create the class named as CourseDTO
Go to src > java > com.gfg.eventdrivendemo > dto > CourseDTO and put the below code:
Step 10: In the same package create the one more class named as StudentDTO
Go to src > java > com.gfg.eventdrivendemo > dto > StudentDTO and put the below code:
Step 11: Create the new package and it named as service and in that package create the class named as CourseService
Go to src > java > com.gfg.eventdrivendemo > service > CourseService and put the below code:
Step 12: In the same package create the more class named as StudentService
Go to src > java > com.gfg.eventdrivendemo > service > StudentService and put the below code:
Step 13: Create the main package create the class named as MessageConfiguration
Go to src > java > com.gfg.eventdrivendemo > MessageConfiguration and put the below code:
Step 14: Create the main package create the class named as RabbitMQConfig
Go to src > java > com.gfg.eventdrivendemo > RabbitMQConfig and put the below code:
Step 15: Create the new package and it named as MessageConvertor and create the class named as CustomMessageConvertor
Go to src > java > com.gfg.eventdrivendemo > MessageConvertor > CustomMessageConvertor and put the below code:
Step 16: Create the new package and it named as MessageConvertor and create the class named as StudentMessageConvertor
Go to src > java > com.gfg.eventdrivendemo > MessageConvertor > StudentMessageConvertor and put the below code:
Step 17: Create the new package and it named as publisher and create the class named as CoursePublisher
Go to src > java > com.gfg.eventdrivendemo > publisher > CoursePublisher and put the below code:
Step 18: Create the new package and it named as publisher and create the class named as StudentPublisher
Go to src > java > com.gfg.eventdrivendemo > publisher > StudentPublisher and put the below code:
Step 19: Open the main class and put the below code:
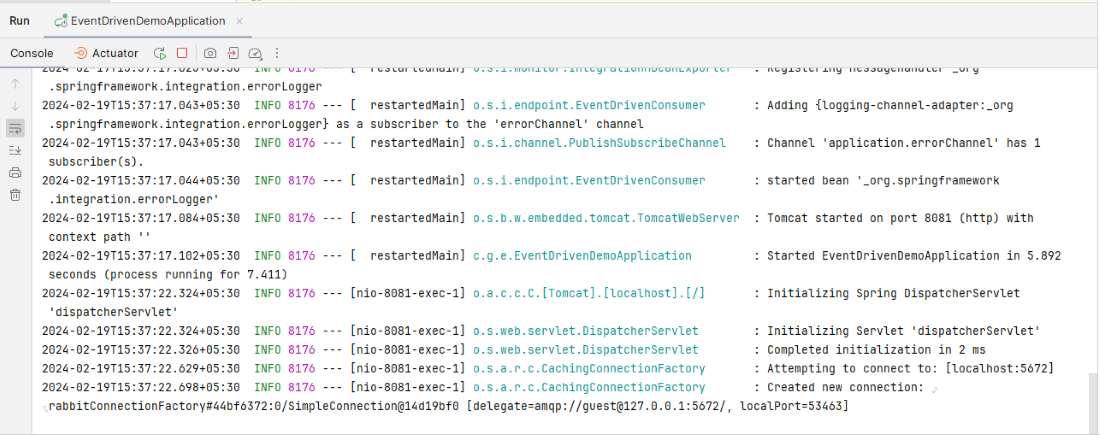
Step 20: Once created the project successfully run the application as spring project it can be start at 8081. Refer the below image for better understanding.
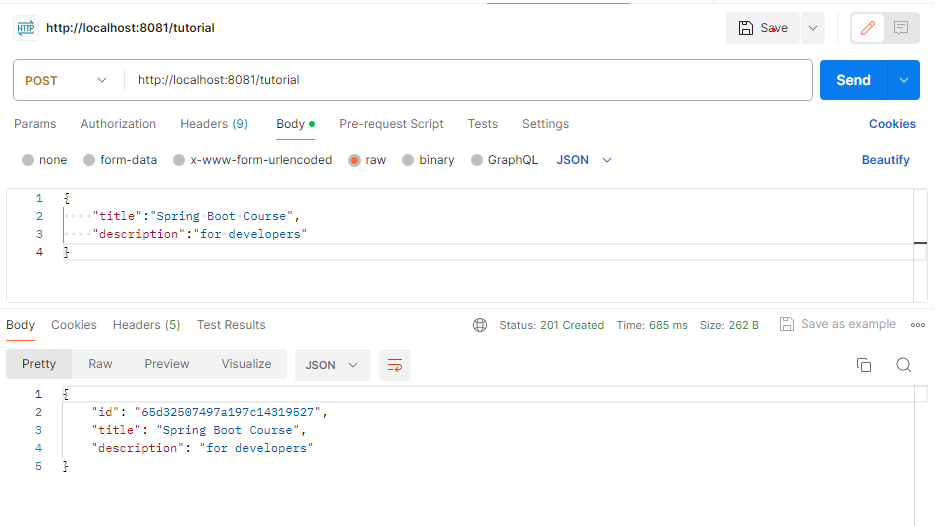
Course publisher:
Student Publisher:
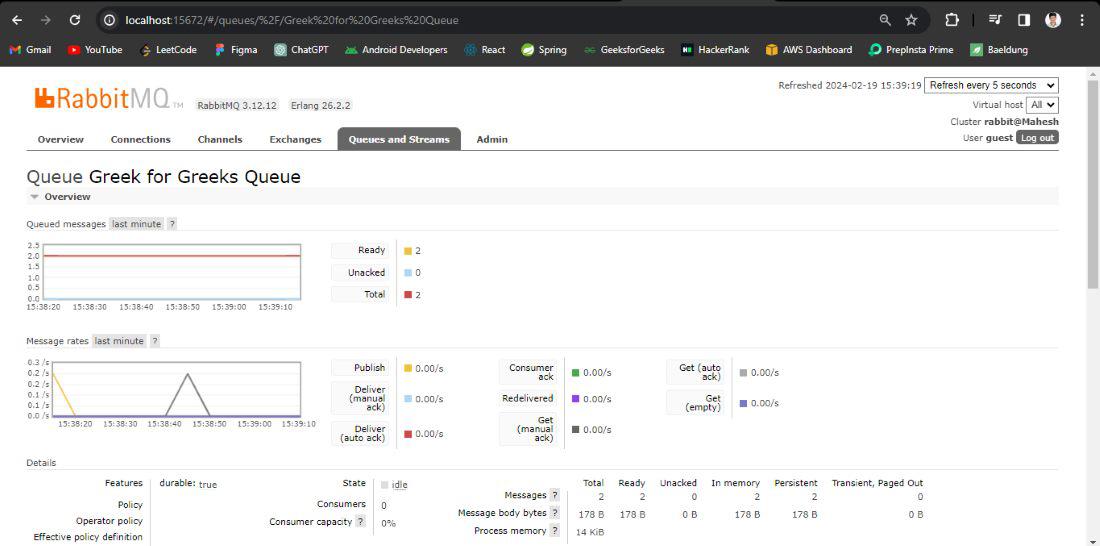
Message Queue at RabbitMQ Output:
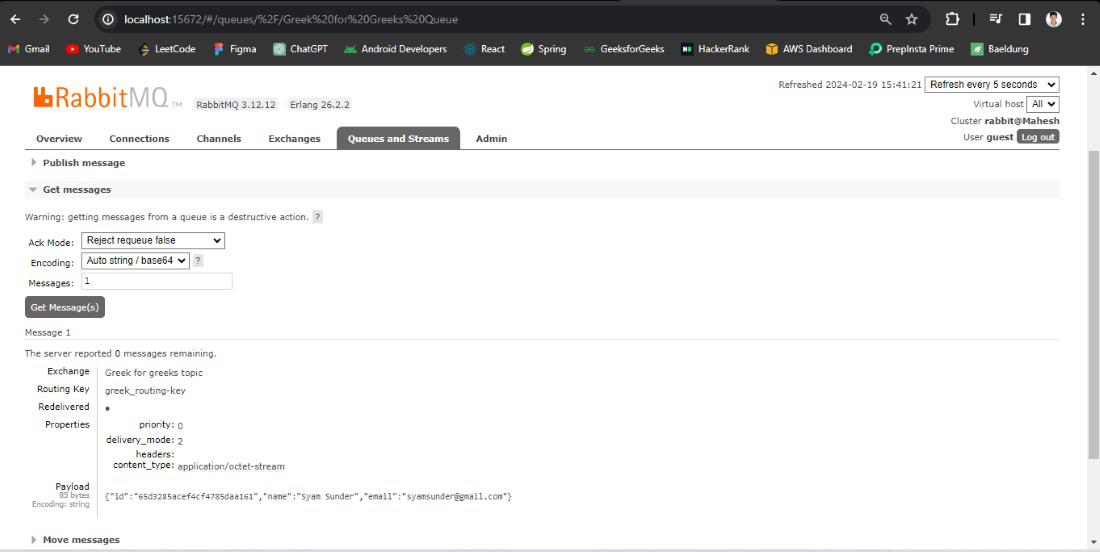
Queue Message Output:
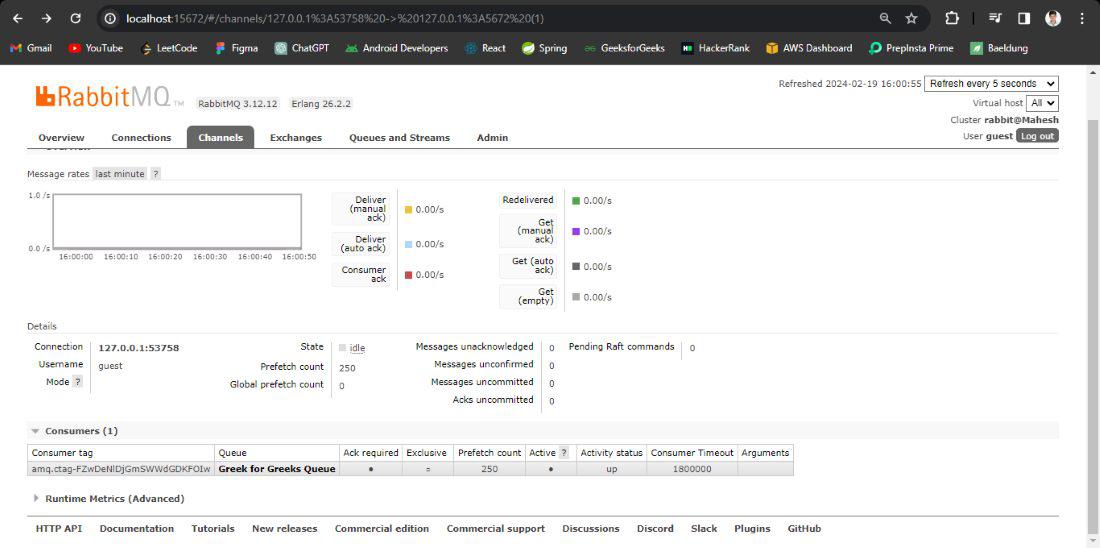
RabbitMQ Channel Output: