 |
VOOZH | about |
|
VOOZH | about |
GraphQL is a more flexible query language and runtime for APIs that lets clients request exactly the data they need by making data fetching more efficient. Compared to REST, GraphQL allows clients to define the exact structure of the response, making data retrieval smoother and more efficient. Integrating GraphQL with Java applications, especially in microservices, can boost data fetching speed and overall performance.
In this article, we will learn how to make a call to a GraphQL service from a Java application using Spring Boot and graphql-java.
To call a GraphQL service, it is necessary to understand the following concepts:
WebClient for GraphQL API interactionGraphQL is an API query language that allows clients to specify exactly which data they need. Compared to REST, it is more efficient, as it supports:
To call a GraphQL service from Java, the main steps are defining the query, sending it to the GraphQL endpoint, and processing the response.
GraphQL queries are JSON objects with a "query" key. For example:
{
 "query": "query { users { id name email } }"
}
In this query, we request each user's id, name, and email.
WebClient to Send the QueryWebClient is a non-blocking HTTP client from Spring WebFlux. It is an alternative to RestTemplate, providing better performance and flexibility for modern web applications.
Why Use WebClient?
Constructing the WebClient: Configure WebClient with the GraphQL server’s base URL:
WebClient webClient = WebClient.builder()
 .baseUrl("http://localhost:8080/graphql")
 .build();
Sending the Query: Send the query as a POST request using WebClient:
String query = "{ \"query\": \"query { users { id name email } }\" }";

String response = webClient.post()
 .bodyValue(query)
 .retrieve()
 .bodyToMono(String.class)
 .block();
This POST request sends the GraphQL query to the server, which returns the JSON response with the requested data.
The GraphQL response is a JSON object containing the data key with the results. For instance:
{
 "data": {
 "users": [
 {
 "id": "1",
 "name": "John Doe",
 "email": "john.doe@example.com"
 },
 {
 "id": "2",
 "name": "Jane Smith",
 "email": "jane.smith@example.com"
 }
 ]
 }
}
This response includes the data object which contains the array of users.
By understanding these steps and the role of the each component, we can effectively integrate the GraphQL service with a Java application.
This section provides a sample setup for a GraphQL server with Spring Boot.
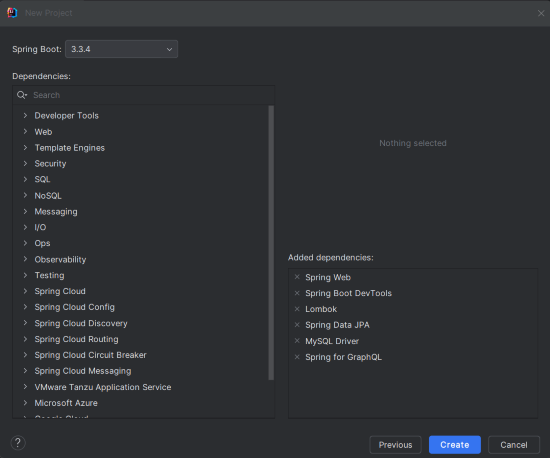
Create a new Spring Boot project with the following settings:
graphql-server-demoClick on the Next button.
Add the following dependencies into the Spring Boot Project:
Click on the Create button.
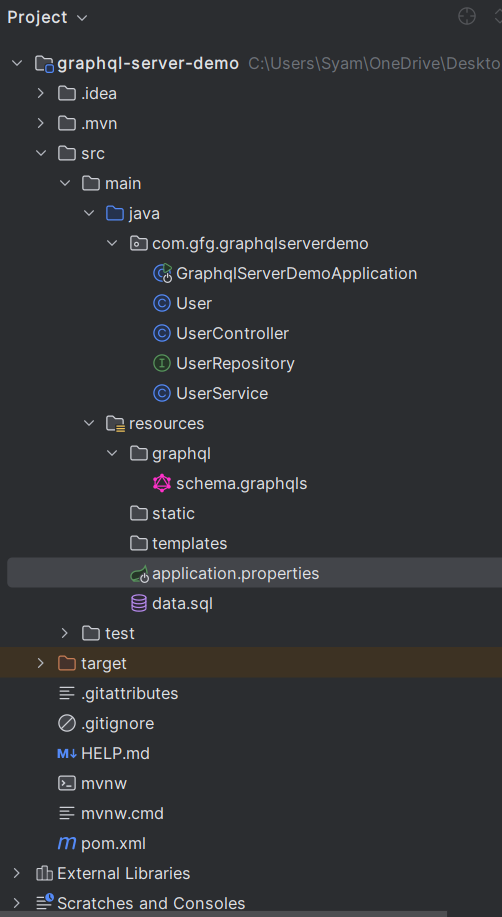
After the project creation done, set up the project structure as shown in the below image:
Open the application.properties file and add the following MySQL, Hibernate and GraphQL configuration.
spring.application.name=graphql-server-demo
# MySQL Database configuration
spring.datasource.url=jdbc:mysql://localhost:3306/demo?useSSL=false&serverTimezone=UTC
spring.datasource.username=root
spring.datasource.password=mypassword
spring.datasource.driverClassName=com.mysql.cj.jdbc.Driver
spring.jpa.hibernate.ddl-auto=update

# Show SQL queries in the console (Optional)
spring.jpa.show-sql=true

# GraphQL Configuration
graphql.servlet.mapping=/graphql
graphql.graphiql.enabled=true
Define a GraphQL schema for queries in schema.graphqls:
type Query {
 users: [User]
 userById(id: ID!): User
}

type User {
 id: ID!
 name: String!
 email: String!
}
We will now create the data.sql file to insert the default data into the database.
INSERT INTO user (name, email) VALUES ('John Doe', 'john.doe@example.com');
INSERT INTO user (name, email) VALUES ('Jane Smith', 'jane.smith@example.com');
INSERT INTO user (name, email) VALUES ('Alice Johnson', 'alice.johnson@example.com');
INSERT INTO user (name, email) VALUES ('Bob Brown', 'bob.brown@example.com');
INSERT INTO user (name, email) VALUES ('Charlie Davis', 'charlie.davis@example.com');
Create a User class to represent user data:
No changes are required in the main class.
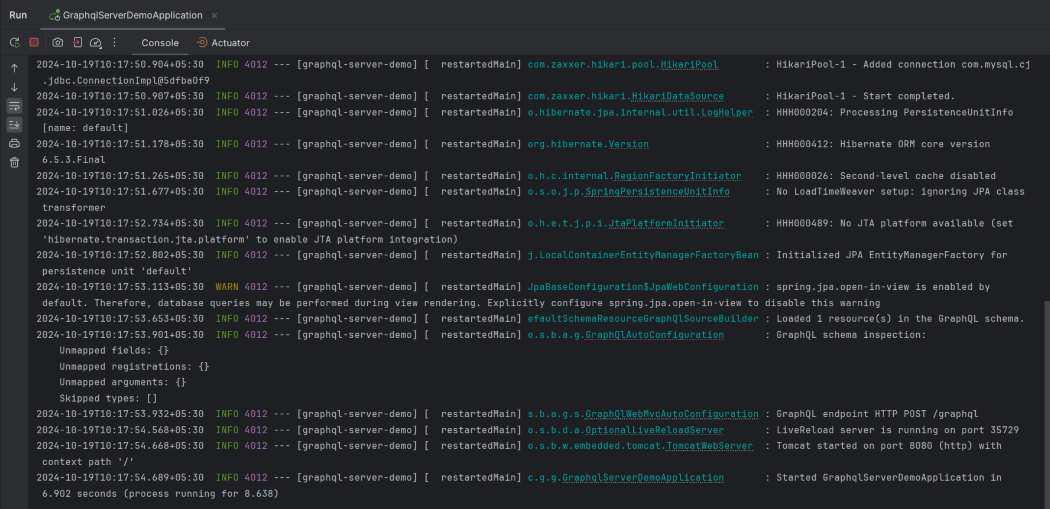
Once the project is completed, we will run the application and it will start at port 8080.
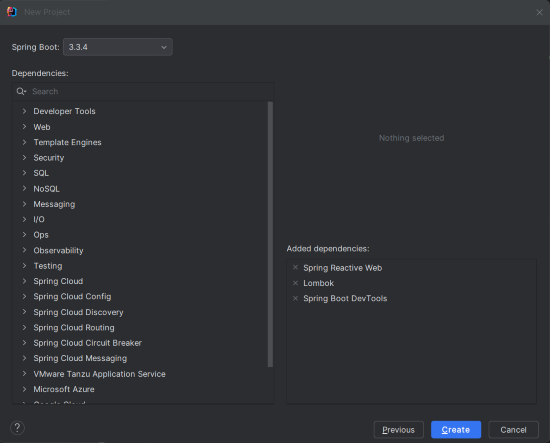
Create a new Spring Boot project using IntelliJ IDEA, then choose the following options:
Click on the Next button.
Add the following dependencies into the Spring Boot project:
Click on the Create button.
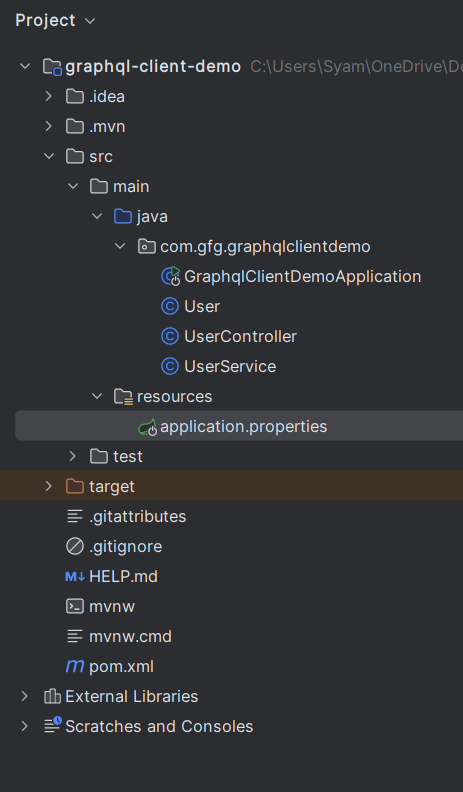
Once the project is created, set the file structure as shown in the below image:
Now, we will configure the properties in application.properties.
spring.application.name=graphql-client-demo
server.port=8081
graphql.service.url=http://localhost:8080/graphql
No changes are required in the main class.
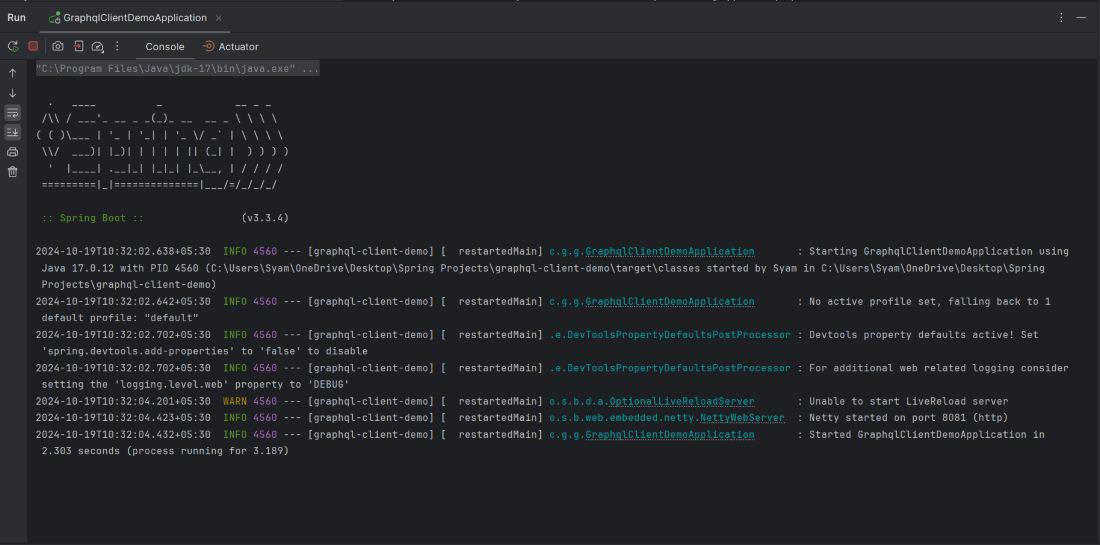
Once the project is completed, we will run the project and it will start at port 8081.
Integrating GraphQL with a Java application allows for the efficient data fetching and flexibility in the API communication. By using the WebClient in the Spring Boot Project, we can easily send the queries to the GraphQL service and parse the results into Java objects. This method is particularly useful for the microservices and applications that need to fetch nested or complex data structures.