 |
VOOZH | about |
|
VOOZH | about |
In JUnit 5, the ParameterResolutionException occurs when JUnit fails to inject a dependency on a test method or constructor. JUnit 5 introduces the concept of dependency injection in test methods that allow services or mock objects to be injected directly into test classes. If the required settings do not exist, this can cause a ParameterResolutionException. In this article, we will explore how to resolve ParameterResolutionException in JUnit 5 using a hands-on example.
In JUnit 5, testing with dependency injection allows you to provide the necessary dependencies directly into test methods or constructors. This feature makes it easier to mock dependencies using tools like Mockito without having to write boilerplate code for setting up mocks. However, to fully utilize this feature and avoid common errors like the ParameterResolutionException, it is important to understand how JUnit 5 handles parameter resolution internally.
JUnit 5 introduces the Jupiter platform, which allows you to extend its functionality using extensions. One such extension is the Parameter Resolver, which handles the process of injecting dependencies into test methods. When a test method declares a parameter, JUnit attempts to find a registered ParameterResolver that can provide the required parameter.
ParameterResolver does the following:If JUnit fails to find a suitable ParameterResolver for the parameter type, it throws a ParameterResolutionException. This often happens when using mock objects in JUnit tests without registering the required Mockito extension.
The MockitoExtension is a powerful JUnit 5 extension that:
@Mock.@InjectMocks.MockitoExtension with JUnit 5:@ExtendWith(MockitoExtension.class)
public class UserServiceTest {
@Mock
private UserRepository userRepository; // Creates a mock instance of UserRepository
@InjectMocks
private UserService userService; // Injects the mock into UserService
@Test
void testGetUserDetails() {
String userId = "user123";
when(userRepository.findUserById(userId)).thenReturn("John Doe");
String result = userService.getUserDetails(userId);
assertEquals("John Doe", result);
}
}
In the above example:
@ExtendWith(MockitoExtension.class) registers the MockitoExtension, enabling JUnit to recognize and inject mock objects.@Mock tells Mockito to create a mock instance of UserRepository.@InjectMocks instructs Mockito to inject the UserRepository mock into the UserService instance.The MockitoExtension takes care of the parameter resolution process, ensuring that UserRepository is properly mocked and injected into UserService before the test method runs. This eliminates the need for manual setup and prevents ParameterResolutionException.
Let's create a simple project demonstrating how to properly set up a test with dependency injection in JUnit 5.
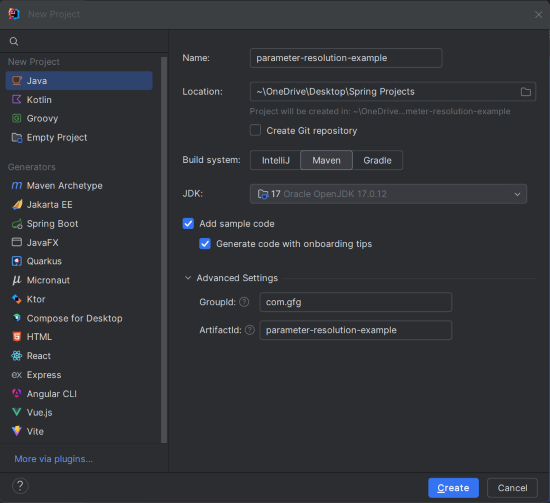
Create a new Maven project in IntelliJ IDEA. Choose the following options:
parameter-resolution-exampleClick on the Create button.
Once project creation done, set the folder structure as shown in the below image:
Open the pom.xml file and include the below JUnit 5 and Mockito dependencies in the project.
In this step, we will create a test class and will use the @ExtendWith annotation to enable dependency injection in JUnit 5.
UserServiceTest.java:
Explanation:
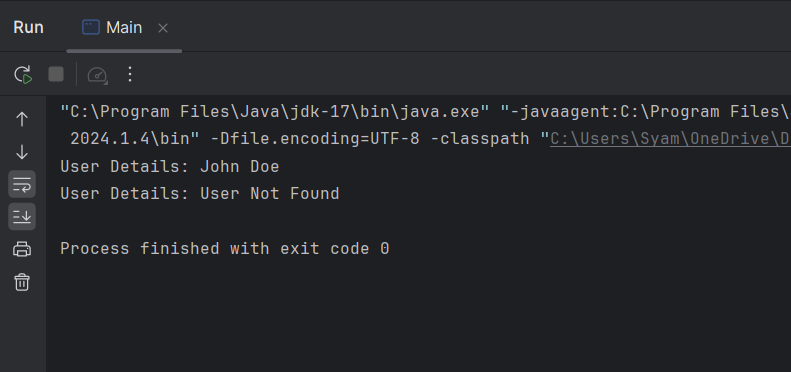
Once the project is completed, we will run the application and it will display the below output:
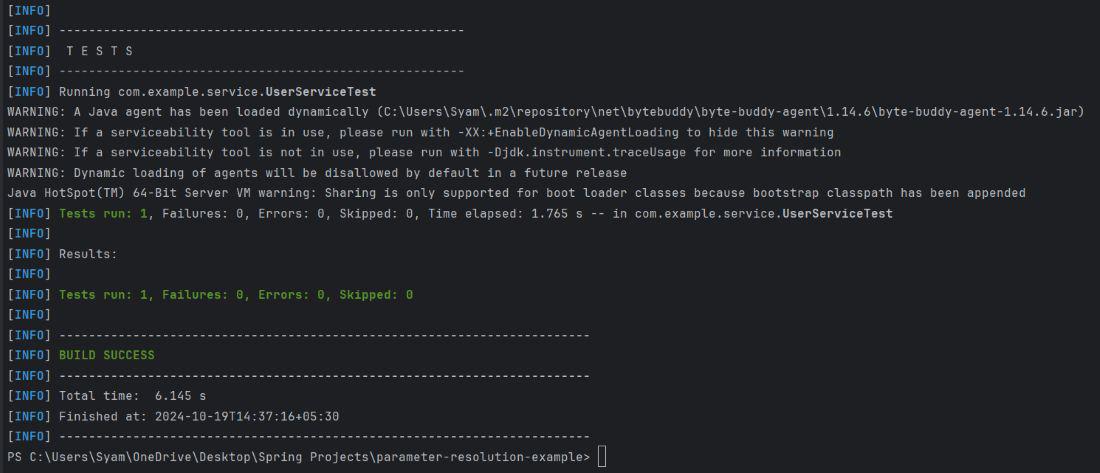
We will now test the test suites using the following maven command:
mvn testThe expected output in the terminal will indicate that the tests passed: