 |
VOOZH | about |
|
VOOZH | about |
In a web environment, securing an application is a crucial necessity. SSL, a Secure Socket Layer, provides a secure channel between the client and server by encrypting the transmitted data. In this article, we will go through the steps to secure a Spring Boot 3 application using SSL Bundles.
SSL stands for Secure Socket Layer. It is a standard security technology for establishing the encrypted link between server and client typically the web server and browser. It ensures that all the data passed between the web server and browsers remains private.
1. Handshake process:
2. SSL Certificates:
Create a new Spring Project using IntelliJ idea and add the below dependencies into the project.
Dependencies:
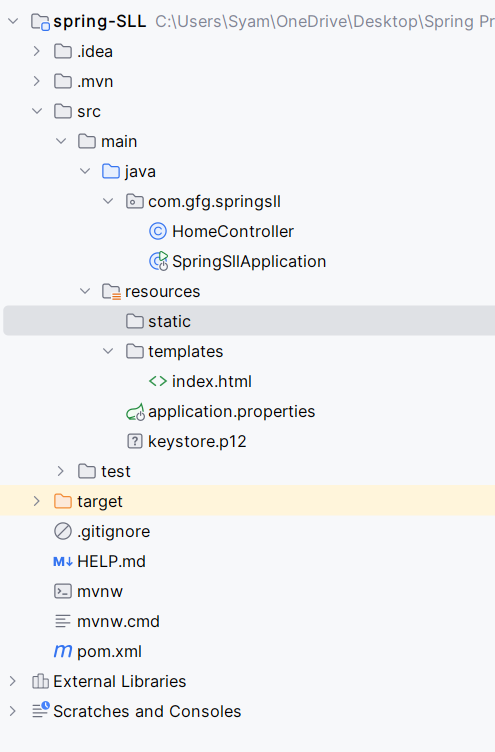
After project creation done, the folder structure will look like the below image:
Use the keytool to generate the SSL certificate. The generated keystore.p12 will be placed in the src/main/resources directory of the Spring Boot project.
keytool -genkeypair -alias mysslkey -keyalg RSA -keysize 2048 -storetype PKCS12 -keystore keystore.p12 -validity 3650Open the application.properties file and add the SSL configuration to the project.
spring.application.name=spring-SLL

server.port=8443
server.ssl.key-store=classpath:keystore.p12
server.ssl.key-store-password=mahesh
server.ssl.key-store-type=PKCS12
server.ssl.key-alias=mysslkey

spring.thymeleaf.prefix=classpath:/templates/
spring.thymeleaf.suffix=.html
SSL Configuration Options:
Create a simple controller to map the root URL to an HTML page.
Go to src > main > com.gfg.springsll > HomeController and put the below code.
No changes are required in the main class.
Create a simple HTML page to display a welcome message.
Go to src > main > resources > templates > index.html and put the HTML code.
Now, run the application. It will start at port 8443.
Open your browser and navigate to https://localhost:8443. You should see the application server running over HTTPS.
This example project demonstrates how to secure a Spring Boot 3 application with SSL by configuring the SSL certificate, updating application properties, and setting up a basic controller and HTML page.
Securing the Spring Boot application with SSL can be essential for protecting the data between the client and server. By the following these steps outlined in this article, we can easily secure the Spring Boot application using SSL certificate. It is not only enhances security but also builds the trust with users who can see that your application uses HTTPS.