 |
VOOZH | about |
|
VOOZH | about |
Spring Cloud Gateway is the library that allows you to build API gateways on top of Spring WebFlux. It provides a simple and effective way to route requests, apply filters, and manage cross-cutting concerns reactively. This article will guide you through demonstrating how to set up Spring Cloud Gateway with a simple microservice and route requests through the gateway to the microservice.
Spring Cloud Gateway routes incoming requests to downstream services based on various predicates and filters. It allows you to apply custom logic to the request and response flows using filters. This setup can be particularly useful in microservices architecture, where it acts as the entry point for external requests and forwards them to the appropriate microservices.
We will create two main components:
We will create the new spring reactive project for the gateway service and add the below dependencies into the project.
Dependencies
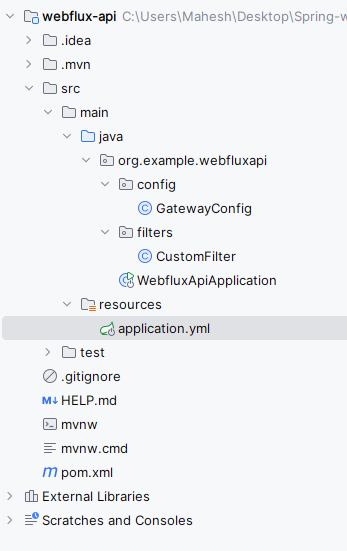
After creating the project, structure will be like below.
Open the application.properties file and rename into application.yml to add the gateway configuration.
server:
 port: 8088

spring:
 application:
 name: gateway-service
 cloud:
 gateway:
 default-filters:
 - DedupeResponseHeader=Access-Control-Allow-Credentials Access-Control-Allow-Origin
 routes:
 - id: example_route
 uri: http://localhost:8081
 predicates:
 - Path=/example/**
 filters:
 - AddRequestHeader=X-Request-Example, Gateway-Request
 - AddResponseHeader=X-Response-Example, Gateway-Response
We will now create the CustomFilter class to demonstrate how to send request and responses in the application.
Go to src > main > java > org.example.webfluxapi > filters > CustomFilter and put the below code.
We will create the GatewayConfig class to define the routes and filters of the application.
Go to src > main > java > org.example.webfluxapi > config > GatewayConfig and put the below code.
No changes are required in the main class of the project.
pom.xml:
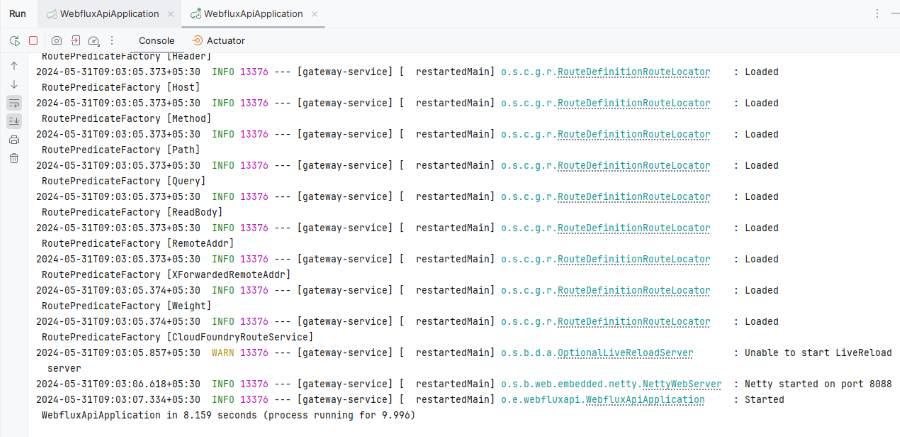
Once complete the project, we will now run the application and then it will start at port 8088.
Now, we will create one new spring reactive project for the example-microservice service by adding the below dependencies into the project.
Dependencies:
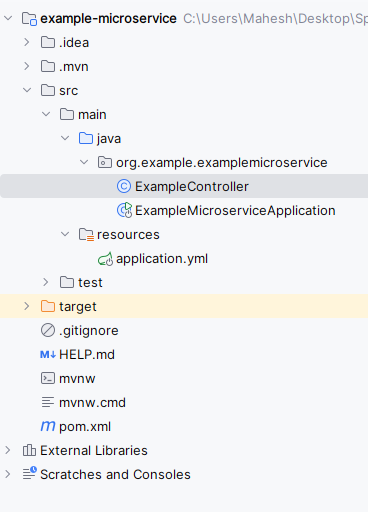
Folder Structure:
Open the application.properties file and rename into application.yml to add the server port configuration.
server:
 port: 8081

spring:
 application:
 name: example-microservice
We will create the ExampleController class to define the simple REST endpoint of the Spring application.
Go to src > main > src > org.example.examplemicroservice > ExampleController and put the below code.
No changes are required in the main class.
pom.xml:
Once complete the project, we will now run the application and then it will start at port 8081.
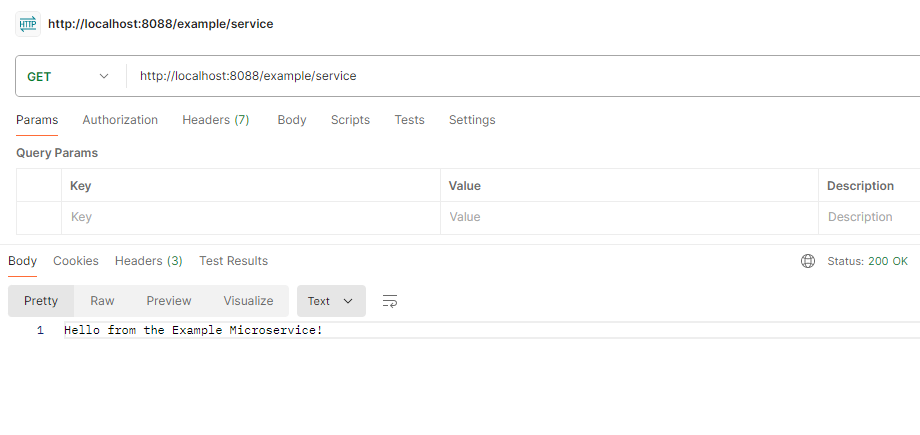
After successfully running both the gateway and microservices, we will now test the endpoints:
API Endpoint:
GET http://localhost:8080/example/service
.jpg)