VOOZH about

URL: https://www.geeksforgeeks.org/advance-java/spring-data-jpa-column-annotation/

⇱ Spring Data JPA - @Column Annotation - GeeksforGeeks


  • Courses
  • Tutorials
  • Interview Prep

Spring Data JPA - @Column Annotation

Last Updated : 3 Nov, 2025

@Column is part of the Jakarta Persistence API (JPA) and is used within entity classes to specify details about the column that stores a particular field. If no @Column annotation is specified, JPA automatically maps the field name to a column with the same name.

Syntax:

@Column(name = "description", nullable = false, length = 512)
private String description;

Commonly Used Attributes of @Column

  • name: Specifies the exact column name in the database
  • length: Defines the maximum size of a string column (default is 255)
  • nullable: Indicates whether the column can contain NULL values (default is true)
  • unique: Ensures that all values in this column are unique
  • precision: Defines the total number of digits for numeric columns
  • scale: Defines the number of digits to the right of the decimal point
  • insertable: Determines whether the column is included in SQL INSERT statements
  • updatable: Determines whether the column is included in SQL UPDATE statements
  • columnDefinition: Allows custom SQL column definition (e.g., VARCHAR(100) or TEXT)

Step-by-Step Implementation

Step 1: Create a Spring Boot Project

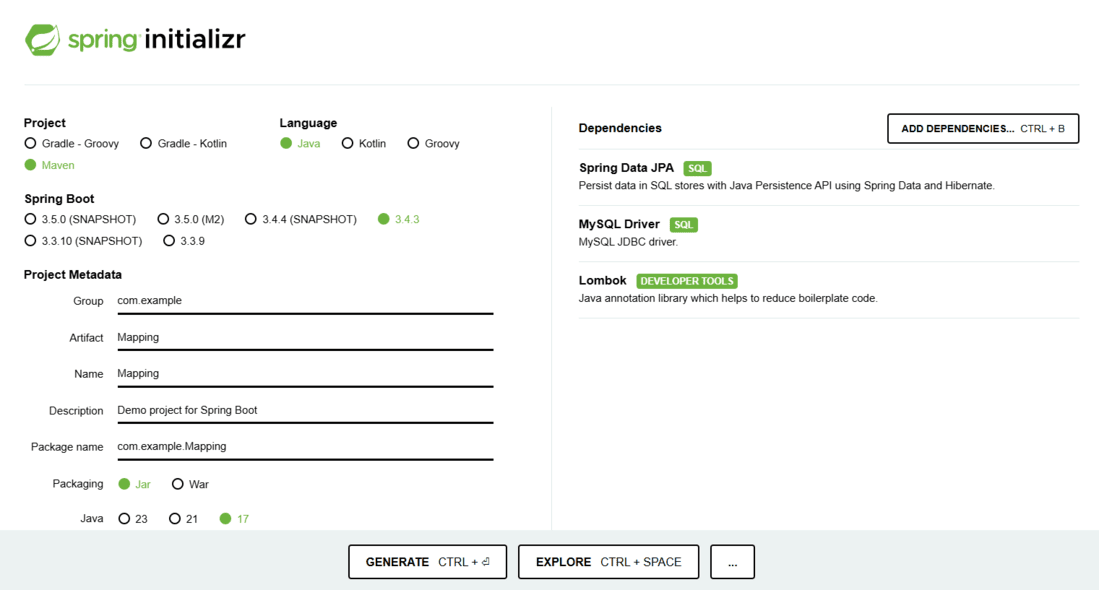
Go to Spring Initializr and generate a new project with the following configuration:

Project: Maven

Language: Java

Spring Boot Version: 3.x (Latest LTS)

Dependencies:

  • Spring Data JPA
  • MySQL Driver
  • Lombok
👁 Spring-Initializr
Spring Initialir

Download and extract the project, then open it in your preferred IDE (such as IntelliJ IDEA or Eclipse).

👁 Image

Step 2: Configure Database in application.properties

Open the application.properties file and add the following configuration:

spring.datasource.url=jdbc:mysql://localhost:3306/mapping
spring.datasource.username=root
spring.datasource.password=yourpassword
spring.datasource.driver-class-name=com.mysql.cj.jdbc.Driver

spring.jpa.hibernate.ddl-auto=update
spring.jpa.show-sql=true

Explanation:

  • ddl-auto=update automatically updates the database schema when the entity changes.
  • show-sql=true enables SQL query logging.

Step 3: Create the Entity Class

Create a new package com.example.model and add the entity class

StudentInformation.java:

  • @Entity marks the class as a JPA entity.
  • @Table(name = "student") defines the table name.
  • @Column customizes column properties like name, length, nullability, and uniqueness.
  • The rollno field is the primary key using @Id and auto-incremented via GenerationType.IDENTITY.

Step 4: Run the Application

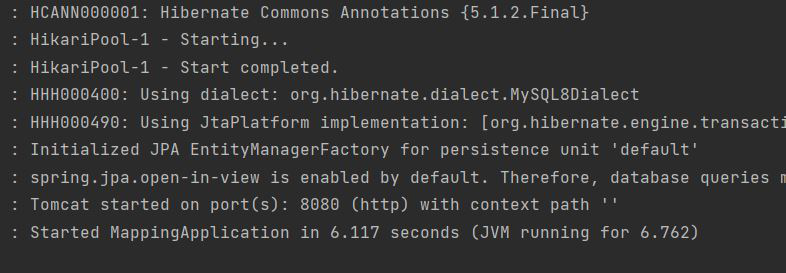
Run the Spring Boot main class (the one annotated with @SpringBootApplication).

👁 Image

Spring Boot will automatically connect to the database and generate a table named student with the specified column properties.

Step 5: Verify the Database Table

Use the following SQL command in MySQL to inspect the created table structure:

DESC student;

Expected Output:

👁 Image
Comment

Explore