 |
VOOZH | about |
|
VOOZH | about |
Spring Security is a powerful framework that provides authentication and authorization for Java applications. In a RESTful registration API, users send their details (username, email, password) as JSON, which are validated and stored securely in the database.
Below are the step-by-step implementation to make Registration API RESTful in spring security.
Step 1: Create a Spring project using Spring Initializr, add the following dependencies when generating the project:
Dependencies:
Once the Spring project is created, the file structure typically resembles the following:
Step 2: Open the application.properties file and add the following code to configure the server port and MySQL database:
spring.application.name=spring-security-registration
# DataSource configuration
spring.datasource.url=jdbc:mysql://localhost:3306/example
spring.datasource.username=root
spring.datasource.password=
spring.datasource.driver-class-name=com.mysql.cj.jdbc.Driver# Hibernate configuration
spring.jpa.hibernate.ddl-auto=update
spring.jpa.show-sql=true
Step 3: Create a new package named "model". Inside this package, create a new Java class named "User".
Go to src > org.example.springsecurityregistration > model > User and put the below code.
Step 4: Create a new package named "repository". Inside this package, create a new Java interface named "UserRepository".
Go to src > org.example.springsecurityregistration > repository > UserRepository and put the below code.
Step 5: Create a new package named "dto". Inside this package, create a new Java class named "RegistrationRequest".
Go to src > org.example.springsecurityregistration > dto > RegistrationRequest and put the below code.
Step 6: Create a new package named "config". Inside this package, create a new Java class named "SecurityConfig".
Go to src > org.example.springsecurityregistration > config > SecurityConfig and put the below code.
Step 7: Create a new package named "service". Inside this package, create a new Java class named "UserService".
Go to src > org.example.springsecurityregistration > service > UserService and put the below code.
Step 8: Create a new package controller
Step 8: Create a new package named "service". Inside this package, create a new Java class named "UserDetailsServiceImpl".
Go to src > org.example.springsecurityregistration > service > UserDetailsServiceImpl and put the below code.
Step 9: Open the main class and insert the following code.
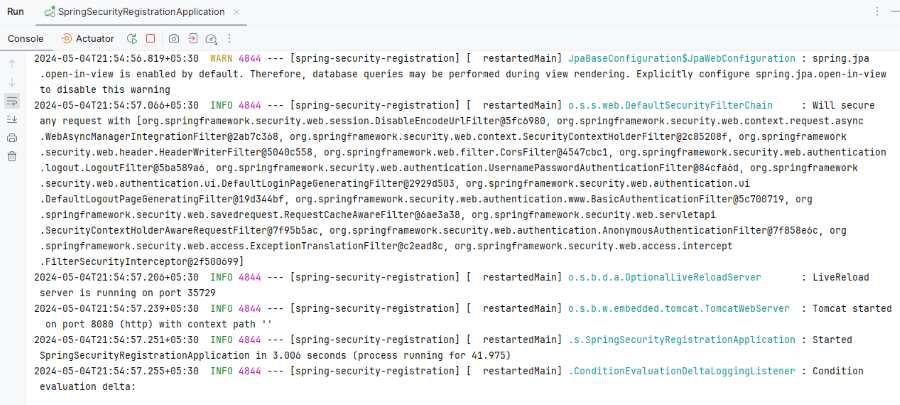
Step 10: Once the Spring project is completed and runs as a Spring application successfully, it will start at port 8080.
👁 Application Runs
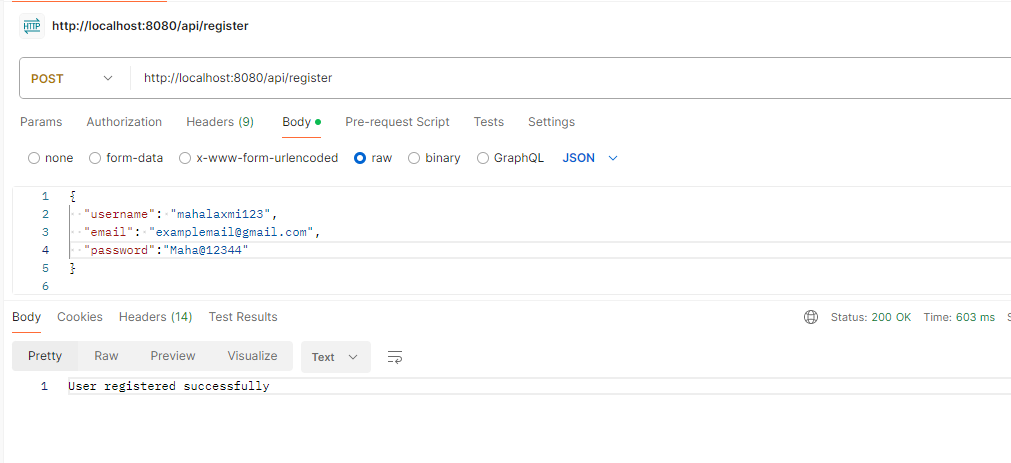
Registration Restful API:
POST http://localhost:8080/api/registerThis example demonstrates how to integrate Spring Security into a Spring Boot application to secure the registration endpoint. Users need to access other endpoints while the registration endpoint remains accessible without authentication.