 |
VOOZH | about |
|
VOOZH | about |
When building web applications, ensuring that users verify their email addresses is important to confirm their identity and secure access. In scenarios where the user does not receive the initial verification email or the verification link has expired. It becomes necessary to provide the option to resend the verification email. This feature can enhance the user experience by accommodating email delivery issues and user errors in accessing the email on time.
Resending the verification emails in the Spring Security application involves several key components and processes. Here is the detailed process:
Below are the implementation steps to resend verification email in Spring Security.
Step 1: Create a new Spring Boot project using Spring Initialize and include the required dependencies.
After doing this step, the project structure will be like below:
Step 2: Open the application.properties file and add the configuration for the MySQL database, mail and thymeleaf of the application.
# Database connection settings
spring.datasource.url=jdbc:mysql://localhost:3306/email_verification
spring.datasource.username=root
spring.datasource.password=
spring.datasource.driver-class-name=com.mysql.cj.jdbc.Driver

# Hibernate settings
spring.jpa.properties.hibernate.dialect=org.hibernate.dialect.MySQLDialect
spring.jpa.hibernate.ddl-auto=update

# Mail settings (replace with your mail server details)
spring.mail.host=smtp.gmail.com
spring.mail.port=587
spring.mail.username=mahi.looser123@gmail.com
spring.mail.password=rsgazwlsiokhazsl
spring.mail.properties.mail.smtp.auth=true
spring.mail.properties.mail.smtp.starttls.enable=true

spring.thymeleaf.prefix=classpath:/templates/
spring.thymeleaf.suffix=.html
spring.thymeleaf.mode=HTML
spring.main.allow-circular-references=true
Step 3: Create the new package and name it the model. In that package, create the new Java class and name it User.
Go to src > com.gfg.springsecurityaccountactivateemail > model > User and write the below code.
Step 4: Create a new package and name it the repository. In that package, create the new Java interface and name it UserRepository.
Go to src > com.gfg.springsecurityaccountactivateemail > repository > UserRepository and write the below code.
Step 5: Create a new package and name it the DTO. In that package, create the new Java class and name it RegistrationDto.
Go to src > com.gfg.springsecurityaccountactivateemail > dto > RegistrationDto and write the below code.
Step 6: Create a new package and name it the service. In that package, create the new Java class and name it UserService.
Go to src > com.gfg.springsecurityaccountactivateemail > service > UserService and write the below code.
Step 7: Create a new package and name it the service. In that package, create the new Java class and name it EmailService.
Go to src > com.gfg.springsecurityaccountactivateemail > service > EmailService and write the below code.
Step 8: Create a new package and name it the service. In that package, create the new Java class and name it VerificationTokenService.
Go to src > com.gfg.springsecurityaccountactivateemail > service > VerificationTokenService and write the below code.
Step 9: Create a new package and name it the service. In that package, create the new Java class and name it LoginService.
Go to src > com.gfg.springsecurityaccountactivateemail > service > LoginService and write the below code.
Step 10: Create a new package and name it the handler. In that package, create the new Java class and name it CustomAuthenticationFailure.
Go to src > com.gfg.springsecurityaccountactivateemail > handler > CustomAuthenticationFailure and write the below code.
Step 11: Create a new package and name it the handler. In that package, create the new Java class and name it CustomAuthenticationSuccess.
Go to src > com.gfg.springsecurityaccountactivateemail > handler > CustomAuthenticationSuccess and write the below code.
Step 12: Create a new package and name it config. In that package, create the new Java class and name it SecurityConfig.
Go to src > com.gfg.springsecurityaccountactivateemail > config > SecurityConfig and write the below code.
Step 13: Create a new package and name it util. In that package, create the new Java class and name it RandomStringGenerator.
Go to src > com.gfg.springsecurityaccountactivateemail > util > RandomStringGenerator and write the below code.
Step 14: Create a new package and name it the event. In that package, create the new Java class and name it OnRegistrationCompleteEvent.
Go to src > com.gfg.springsecurityaccountactivateemail > event > OnRegistrationCompleteEvent and write the below code.
Step 15: Create a new package and name it the event. In that package, create the new Java class and name it RegistrationListener.
Go to src > com.gfg.springsecurityaccountactivateemail > event > RegistrationListener and write the below code.
Step 16: Create a new package and name it the controller. In that package, create the new Java class and name it RegistrationController.
Go to src > com.gfg.springsecurityaccountactivateemail > controller > RegistrationController and write the below code.
Step 17: Create a new package and name it the controller. In that package, create the new Java class and name it LoginController.
Go to src > com.gfg.springsecurityaccountactivateemail > controller > LoginController and write the below code.
Step 18: Create a new package and name it the controller. In that package, create the new Java class and name it DashboardController.
Go to src > com.gfg.springsecurityaccountactivateemail > controller > DashboardController and write the below code.
Step 19: Create the index HTML file.
Go to src > main > resources > templates > index.html and put the below HTML code.
Step 20: Create the registration HTML file.
Go to src > main > resources > templates > registration.html and enter the below HTML code.
Step 21: Create the VerifyEmail HTML file.
Go to src > main > resources > templates > verify-email.html and enter the below HTML code.
Step 22: Create the login HTML file.
Go to src > main > resources > templates > login.html and enter the below HTML code.
Step 23: Create the verified email HTML file.
Go to src > main > resources > templates > verified-email.html and enter the below HTML code.
Step 24: Create the Dashboard HTML file.
Go to src > main > resources > templates > dashboard.html and enter the below HTML code.
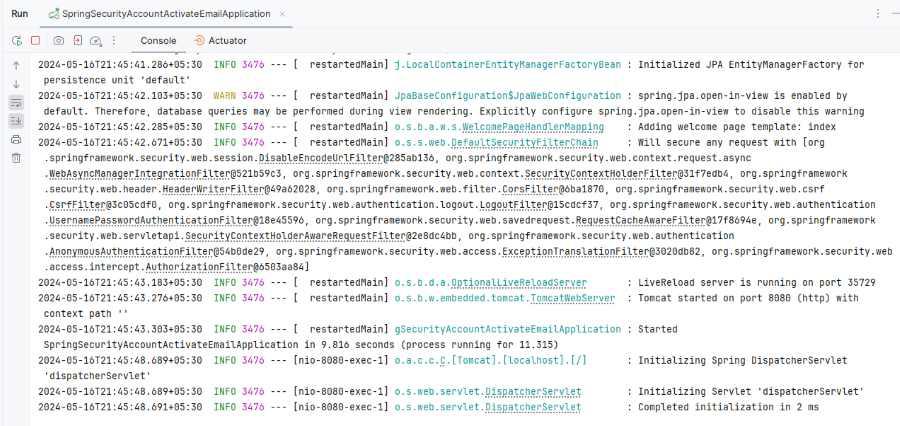
Step 25: Run the Application
Now, we will run the application, and it will start start port at 8080.
http://localhost:8080/Click on the register page button.
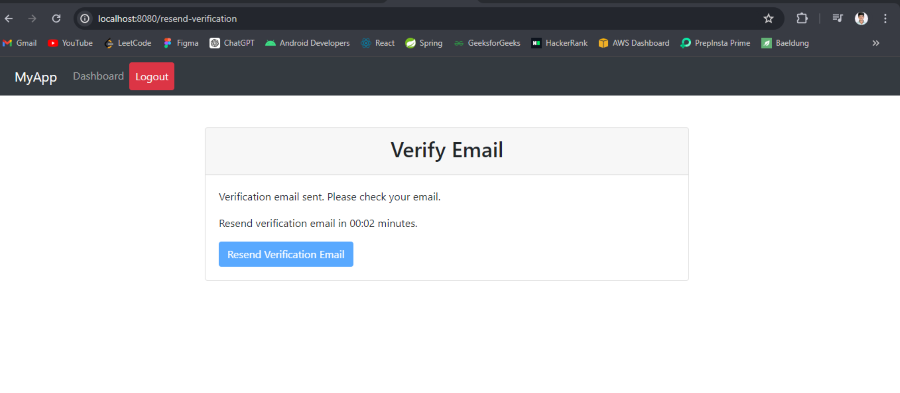
http://localhost:8080/registerThere is a 11 minute of time, then enable resend verification of the user account of the application.
Click on resend verification button:
Resend email messages:
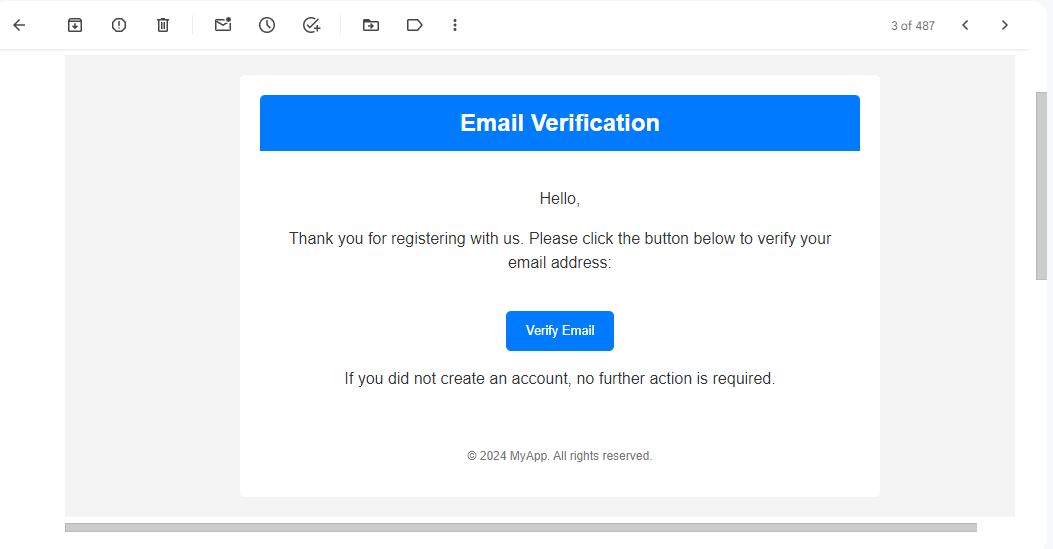
Verification message:
Once you click on the verify button, it will verify the account.
Now, click on the dashboard, and then we will redirect to the dashboard.
This project demonstrates how to resend the verification email in Spring Security in Spring Boot application.