 |
VOOZH | about |
|
VOOZH | about |
WebSockets enable two-way communication over a single, persistent connection, allowing for real-time, bidirectional data exchange between the client and server. Unlike traditional HTTP, which is request-response based, WebSocket communication allows for real-time, bi-directional communication between the client and the server. This makes WebSockets ideal for applications requiring immediate data updates, such as chat applications, gaming, collaborative editing, and real-time notifications. In this article, we'll explore how to use WebSocket with Spring Boot to build an interactive web application.
WebSocket communication in Spring Boot involves using @Controller annotated classes to handle WebSocket connections. The communication protocol is defined using mappings that match client-side connections to server-side message-handling methods. A message broker is often utilized to manage message routing between clients.
The WebSocket workflow typically looks like this:
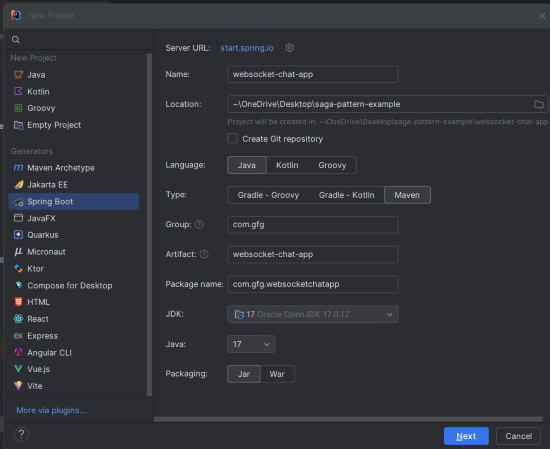
We'll build a simple chat application using WebSocket in a Spring Boot project.
websocket-chat-appClick on the Next button.
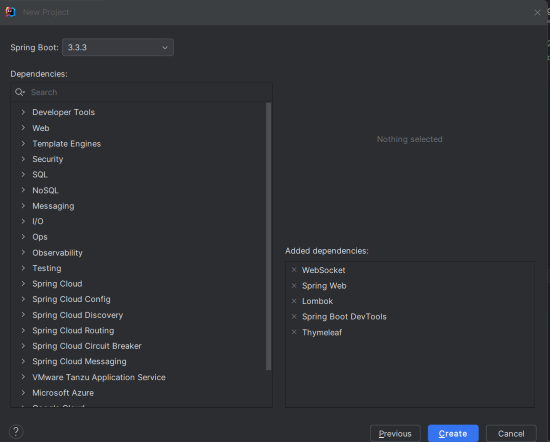
Add the following dependencies into the Spring Boot project.
Click on the Create button.
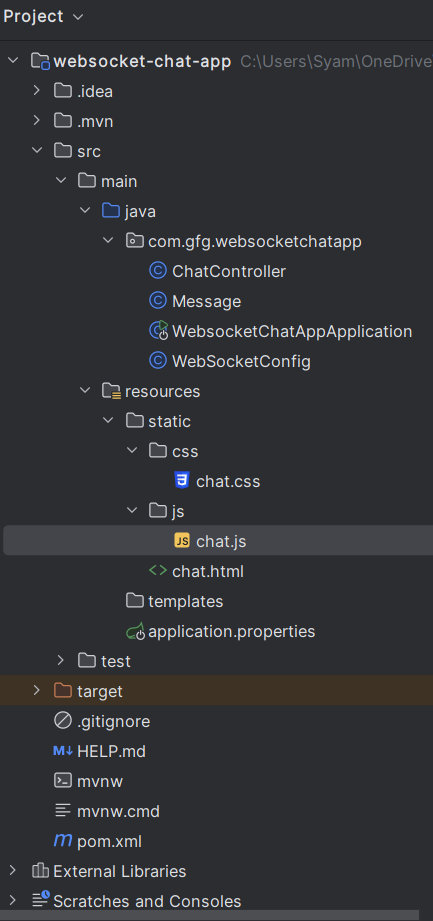
Once created the project, the file structure will look like the below image.
Add the following property to src/main/resources/application.properties:
spring.application.name=websocket-chat-appCreate the WebSocketConfig configuration class to register WebSocket endpoints:
WebSocketConfig.java
Explanation:
@EnableWebSocketMessageBroker: Enables WebSocket message handling with a message broker.registerStompEndpoints(): Registers the /chat endpoint for WebSocket connections and supports SockJS as a fallback option.configureMessageBroker(): Configures the message broker to route messages based on the destination prefixes /topic and /app."Create the Message class to define the structure of the messages:
Message.java
Create the ChatController class to handle incoming messages and broadcast them to connected clients:
ChatController.java
Explanation:
@MessageMapping("/chat.sendMessage"): Maps incoming messages to the /chat.sendMessage destination.@SendTo("/topic/public"): Sends the returned message to all subscribers of /topic/public.No changes are required in the main class.
Create the chat.html page to provide a simple chat interface:
src/main/resources/templates/chat.html
Create chat.css to style the chat application:
Create the chat JavaScript file and this script will manage the WebSocket connections and handling the sending/receiving messages.
src/main/resources/static/js/chat.js
Explanation:
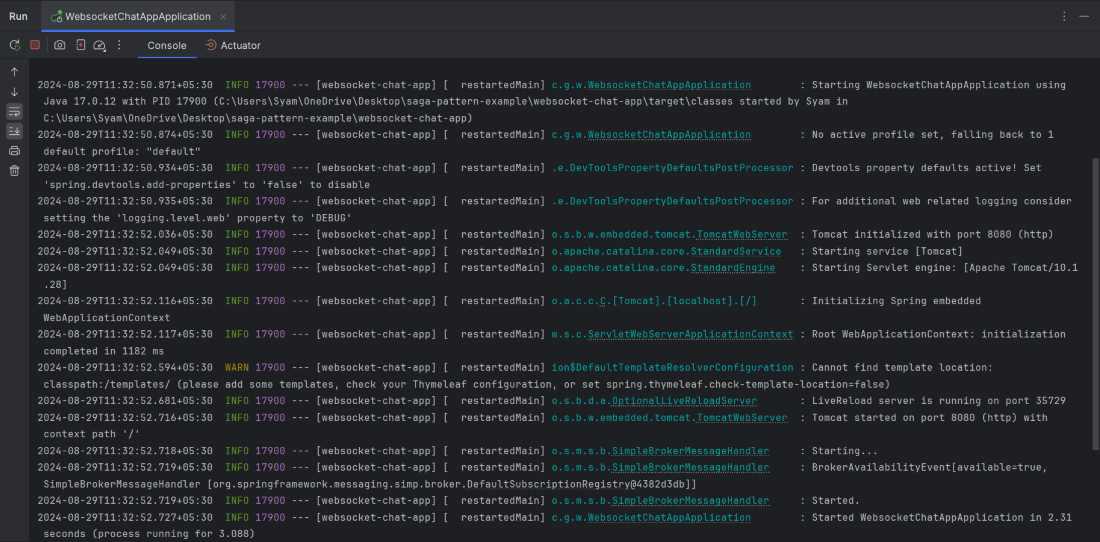
Once completed the project, it will start and run at port 8080. We can run the spring boot application using the IntelliJ IDEA or with the following Maven command.
mvn spring-boot:runOpen the web browser and navigate to the below URL.
http://localhost:8080/chat.htmlEnter the message in the input box and click the send button. We should see the message appear in the chat box and it will also broadcast to the any other open connections of the chat application.