 |
VOOZH | about |
|
VOOZH | about |
Detecting Emergency Vehicles Using CNNs
Motivation: Recently I participated in JanataHack: Computer Vision Hackathon hosted by Analytics Vidhya. The aim of the competition was to create a binary image classifier that could differentiate the Non?-?Emergency Vehicles eg. private owned vehicles. from the emergency vehicles (police vehicles, ambulances, etc).
Problem Statement:
We need to create a classifier which is able to differentiate between Emergency and Non- Emergency vehicles. The Emergency vehicles are labelled 1 and Non- Emergency vehicles are labeled 0. In this article I am going to show the approach I followed to create a models that got be in the 147 place out of 10000.
The models shows in this article are Convolution Neural Networks. I have tried to make the code as simple as I can. Readers are required to have some knowledge of neural networks.
Problem Solving Steps:
Code: Loading And Visualizing Data
We will be using:
Data Loading:
The above image shows the datasets provided to us all the images the train and test set are present in the images folder, the train and test CVS files contains the name of images.
Code:
Code: Loading the images into numpy arrays
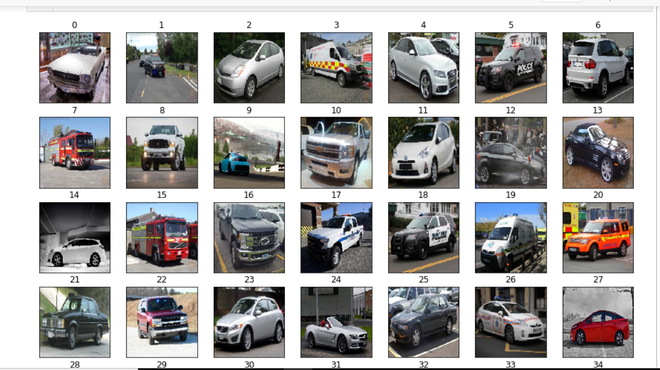
Code: opening and displaying Images.
Output:
Now that we have the images stored in the train and output classes stored in labels we can move on to the next step.
Data Cleaning
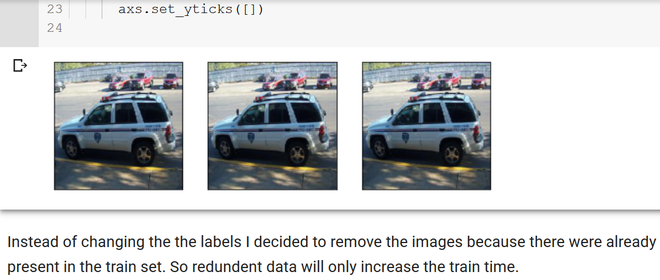
In this section, we will look at miss classified labels and improper image samples by removing these images my accuracy increased the val_score by 2%. It went from 94% to 96% and sometimes 97%.
Miss labelledImages: the code used to visualize the data is same as above
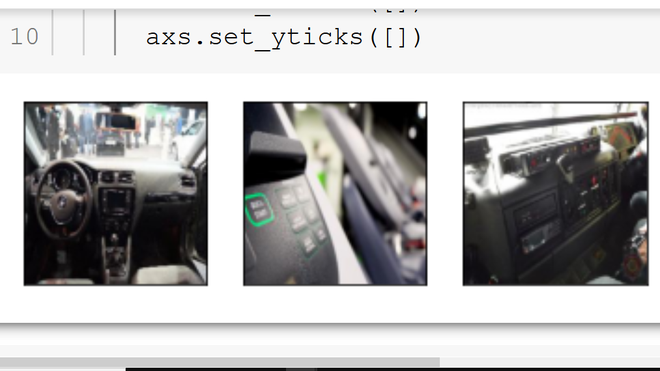
Improper Data: Images of dashboards.
By removing these images the accuracy become more stable (less oscillations). One think to note here I was able to remove these dashboard images because I didn't find any similar images in the test data.
Defining the DatasetClass: For the model to load the dataset from the disk pytorch provides a DatasetClass using this we don't need to fit the entire model into memory.
Code:
Now that we have our data pipeline ready we need to create the deep learning model.
CNN Model:
This post assumes that you have some knowledge of Neural Nets as explaining that is out of scope of this article. I am going to use a CNN (Convolution neural network). The model has 3 main layers naming the conv2d layer, batch Norm, and max pooling 2d the activation function used over here is relu:
Code:
One can find the entire model definition in this notebook in my github repo
Training function:
Code: the following function is used to train all the models in the post.
Before starting training we need to split our data into train and validation set. This is done so that the model generalizes well on unseen data. We will do a 80 - 20 split 80% train and 20%test. After splitting the data we need to pass the datasets to a Data Loader this is provided by pytorch.
Code: Splitting and creating dataloaders.
Now we are ready to start training by calling the fit() method.
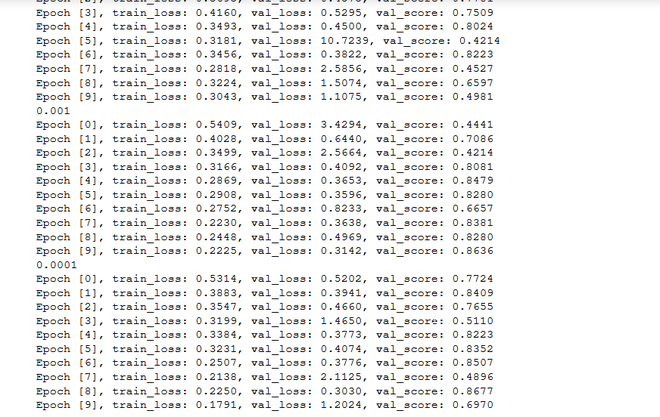
Output of above code:
The entire code is available in github repo link is provide below.
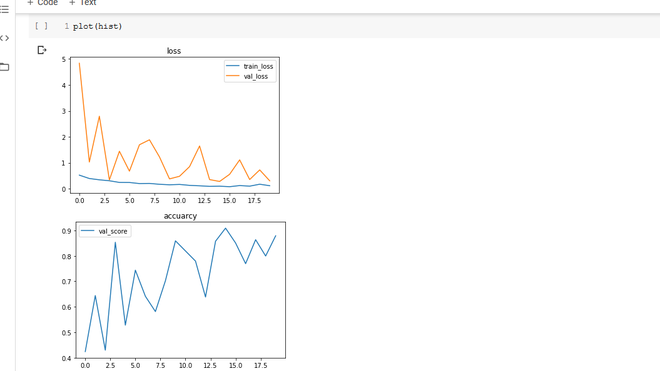
Code: The plot function is used for producing the loss and accuracy graphs shown below
Output: Plotting the loss and accuracy plots.
There is very less over-fitting and the val_accuracy reaches its peak value at 90%. here again, I would like to add when I had created a custom model in keras the height val_score I was able to achieve was 83% changing the framework got we can increase of 7%. One more thing the size of the mode, using pytorch I am able to use a model having more than 3 Conv2d layers without over-fitting. But in keras I could only use 2 layers not more than that anything higher or lower would just add to the training cost without improving the accuracy.
Transfer Learning:
Using The Pre-trained Models: I made use of two model architectures resnet and densenet. One thing to not the densenet models produce almost similar results to resnet models with lower epochs and most important the saved model takes half the memory space.
Code:
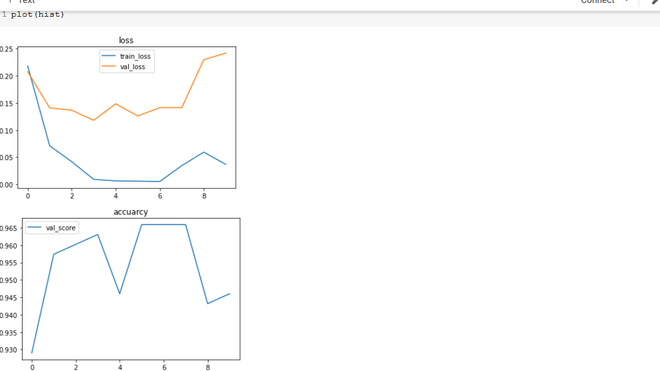
Output: Plotting the loss and accuracy plots.
here one can see a lot of over-fitting and now improvement in val_score. I decided to try using the cyclic scheduler training strategy here's the result. I still need to do more experiment with this method but as one can see. I have reduced the overfitting to some extend but the val_accuracy is still low.
Using Densenet169: The dense net is similar to Resnet to instead to adding the skip connection it concatenates it hence the blocks are called as dense blocks.
Code:
If you look at the loss and accuracy plots. The over-fitting has decreased. the val accuracy is better but this was done without the cyclic scheduler.
Code: Plotting the loss and accuracy plots.
Using early stopping the training can be stopped at 5 epochs.
Web APP:
Note: the web app only accepts jpg images.
Conclusion: I was able to get a 200 rank out of 10000 so I made it in the top 2% using the above model. all the code will be available in my github repo: https://github.com/evilc3/EmergencyVehicleDetector
Entire notebook: https://colab.research.google.com/drive/13En-V2A-w2o4uXuDZk0ypktxzX9joXIY?usp=sharing
Web app link: https://emervehicledetector.herokuapp.com/