 |
VOOZH | about |
|
VOOZH | about |
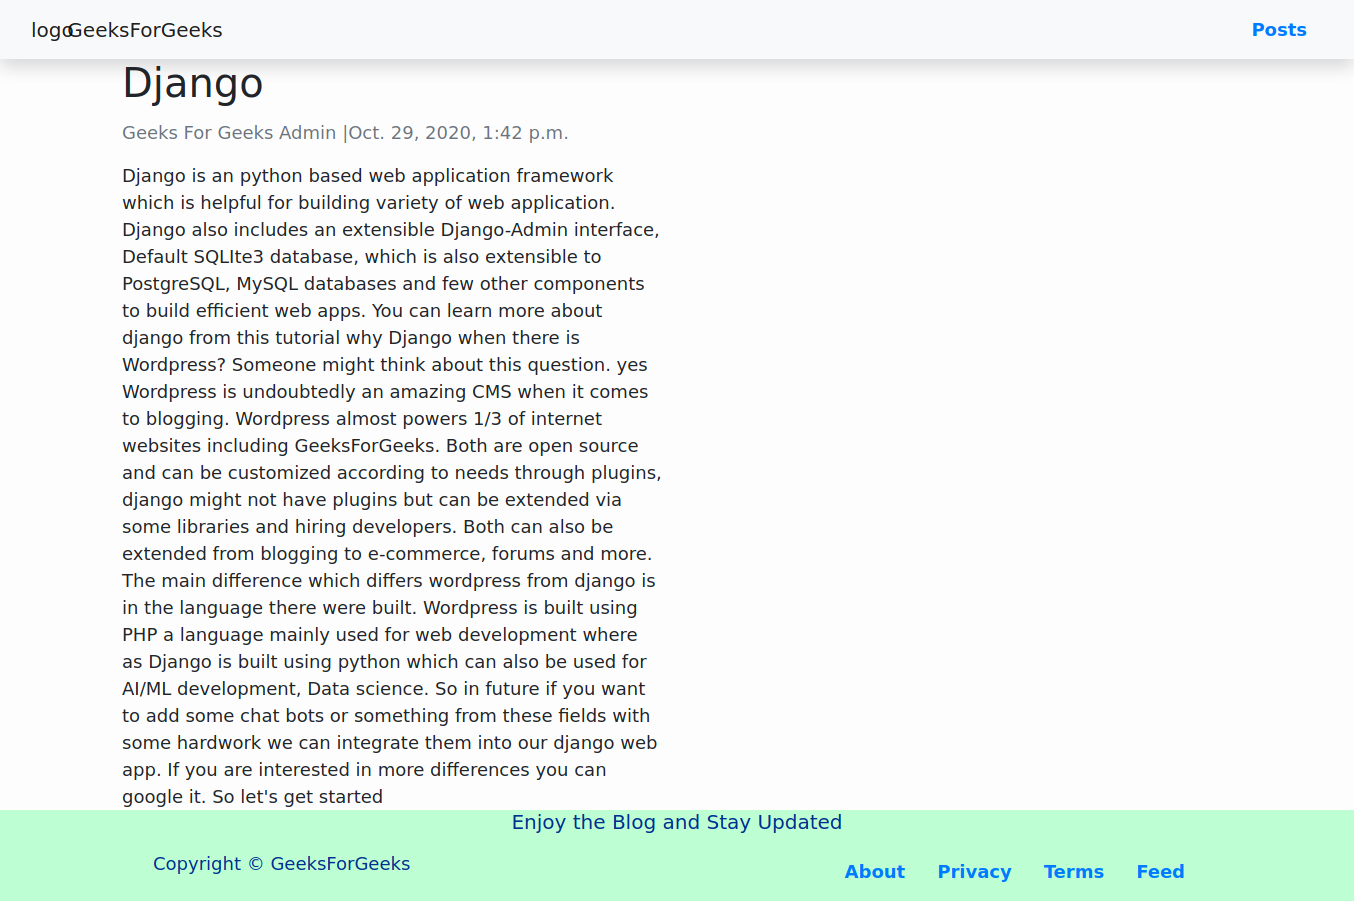
Django is a python based web application framework that is helpful for building a variety of web applications. Django also includes an extensible Django-Admin interface, Default SQLIte3 database, which is also extensible to PostgreSQL, MySQL databases, and a few other components to build efficient web apps.
Create a directory for our blog, install and activate the virtual environment. Then install Django using the below commands
# creating directory for our project
mkdir gfgblog && cd gfgblog

# installing virtual environment
pip install virtualenv
python3 -m venv env

# activating virtual environment
source env/bin/activate

# installing django
pip install django
As now we have installed Django we will now create a Django project which will set up a basic Django app
django-admin startproject gfgblog
cd gfgblog
In our gfgblog Django app, we will have these files
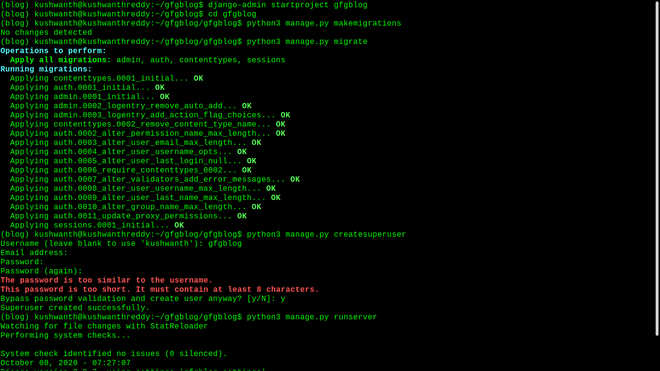
We are in the Django web app directory. Now we will make some migrations for our database which will be SQLite3 which will set up some default tables to run our app in our database. Then we will create a superuser for our app.
# migrating tables
python3 manage.py makemigrations
python3 manage.py migrate

# create and enter the details for superuser
python3 manage.py createsuperuser
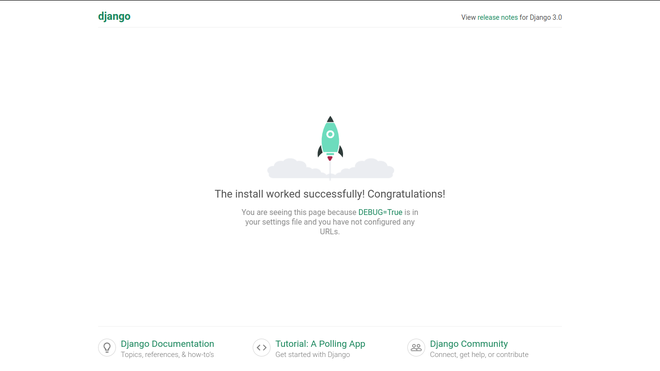
Now run the Django development server and open port 8000 in your localhost
# running python development server
python3 manage.py runserver
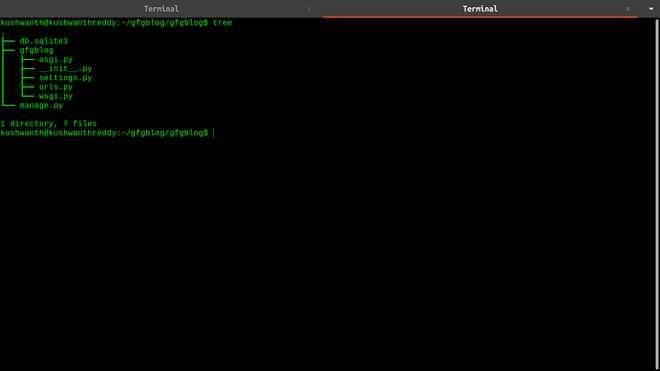
Now stop the server and go into gfgblog directory in our gfgblog Django app directory and open urls.py file using your code editor. You can look at the tree of our gfgblog directory from the below picture
Now we will create our actual blog app and database for it. Go to the gfgblog project directory. You can see our SQLite3 database, gfgblog Django app. now in this directory create a new app named blog. The below command will create a new app for us.
# creating an app named blog
python3 manage.py startapp blog
The new app directory has 5 default files
As we have created the app now we have to tell the django app that there is a new app in our project. For that go to settings.py in gfgblog directory and open settings.py file. Go to installed apps section of the settings file and add the name of the app we created; in our case its blog
Now we will create Django models for the app. You can learn more about Django Models from this tutorial - Django Models
To create Django Models open in your editor and add the below code
Save the file and make migration so that the fields will be created in our database using the below commands
# creates migrations for the blog app
python3 manage.py makemigrations blog

# migrates the blog app
python3 manage.py migrate blog
So far we are good with creating models and setting our database for storing our posts, but we should present them to users. Luckily Django comes with its own templating language with which we can build dynamic HTML pages to serve our users. We can also add styling using CSS and JavaScript. You can learn more about Django templates in this tutorial - Django Templates
To create templates first create a template directory in the blog app (You can also create it outside the blog app but in this way, it would be easy to manage). To manage templates in an easy way for each app in the project we have to do some changes in the settings. Go to the project settings file and replace template settings with the code below
Now we will create templates for our blog. As Django can build pages dynamically we will build our templates according to it. Now we will create a base template that serves as a base for all the pages in our blog.
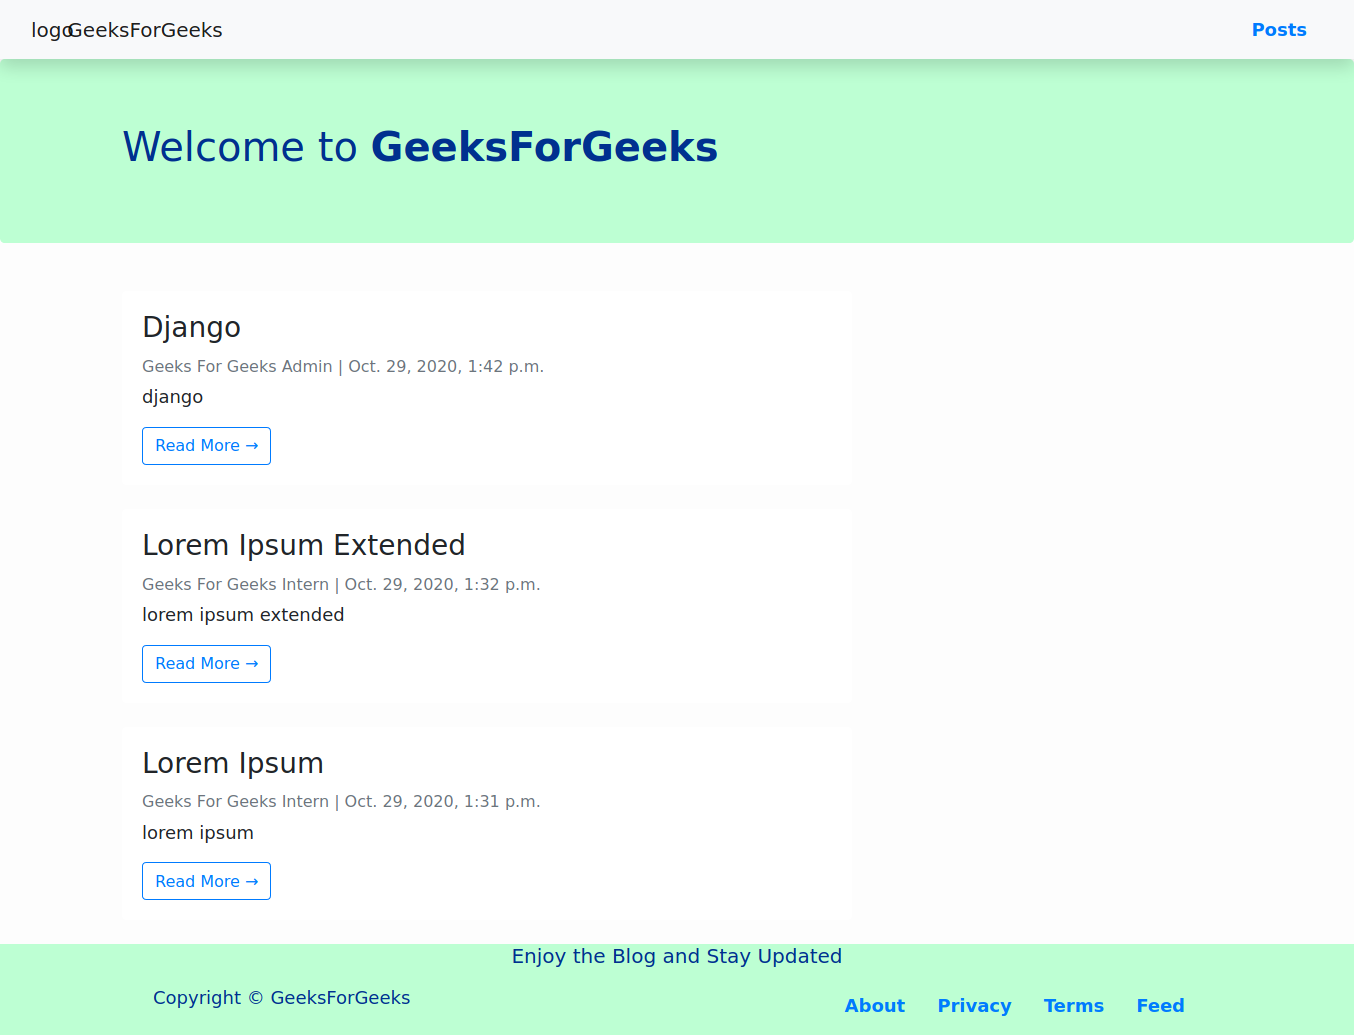
This will be our base template, You can block like {% block name %}{% endblock %} which will be replaced with the content assigned to them, Now we will create a home template that would be the homepage for our blog which will have the latest posts.
We have created our homepage with pagination. Posts will be displayed using the for a loop. Now we will add our last template to display posts individually.
Both homepage and post page will be built by extending the base template and replacing blocks with the data stored in our database. Both also have a Facebook open graphs for better sharing and social network and the post page has a structured schema for better SEO additionally. We will build AMP template incoming tutorial.
Now open views.py file in the blog directory. This file has the logic to run the blog app. We will be using class-based views for the blog app. Class Based Generic Views are an advanced set of Built-in views which are used for the implementation of selective view strategies such as Create, Retrieve, Update, Delete.
For Routing our blog app just go into the blog app directory and create a file urls.py to route our app. see the code below
Go to urls.py file in gfgblog directory and route our blog app. See the code below for reference