 |
VOOZH | about |
|
VOOZH | about |
Web applications often require dynamic content, where data from Python needs to be displayed inside HTML pages. Flask supports this using a templating engine called Jinja2, which allows to embed Python-like expressions, variables and control structures directly within HTML files.
Using Jinja2 templates one can display dynamic data, apply conditions, loop through data and reuse layouts across multiple pages.
Jinja2 is already included when installing Flask, so there is no need to install it separately. Installing Flask will automatically install the Jinja2 templating engine. Run the following command:
pip install flask
Before writing the code, the project should follow this structure:
The app.py file defines the routes of the application and renders the HTML templates.
Explanation:
Jinja2 allows displaying Python variables inside HTML templates.
Syntax:
{{ variable_name }}
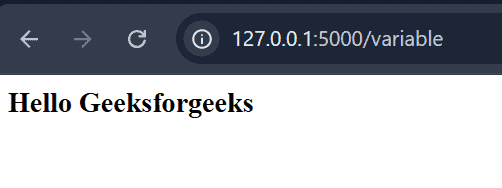
variable_example.html
Output
Explanation: {{name}} displays the value of the variable name passed from the Flask application.
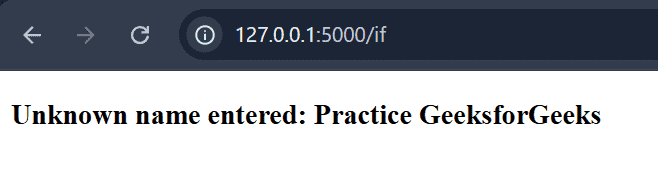
Jinja2 supports conditional statements similar to Python. These are used to display content based on certain conditions.
Syntax:
{% if condition %}
...
{% else %}
...
{% endif %}
if_example.html
Output
Explanation:
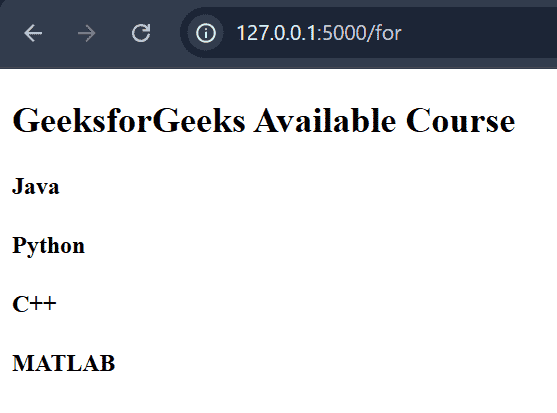
Jinja2 also supports loops, which allow iterating through lists or sequences.
Syntax:
{% for item in sequence %}
...
{% endfor %}
for_example.html
Output
Explanation:
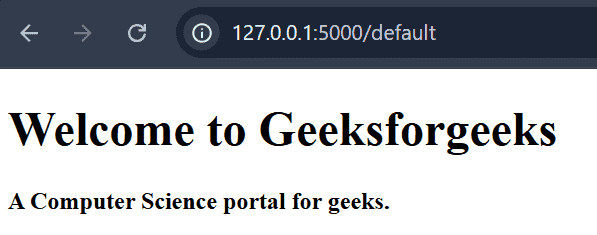
Template inheritance allows multiple HTML pages to share a common layout, such as headers and footers. A parent template defines the structure, and child templates extend it.
Syntax:
layout.html
{% block content %}
{% endblock %}
index.html
{% extends "layout.html" %}
{% block content %}
....
{% endblock %}
layout.html (Parent Template)
index.html (Child Template)
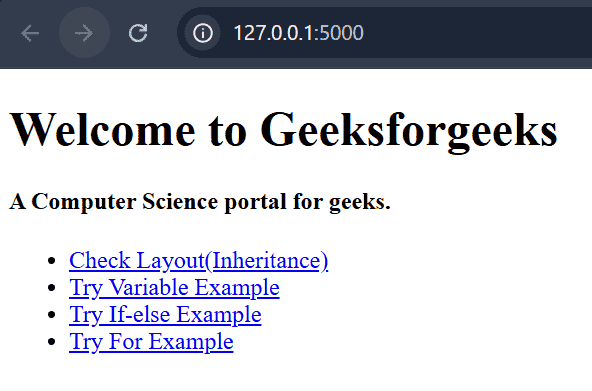
Output
layout.html
index.html
Explanation:
The url_for() function is used to generate URLs dynamically and manage redirection between routes.
Syntax:
url_for(function_name)
Example 1: In this example, the url_for() function is used inside the Flask application file (app.py) to redirect users to different routes based on their input.
Output
Explanation:
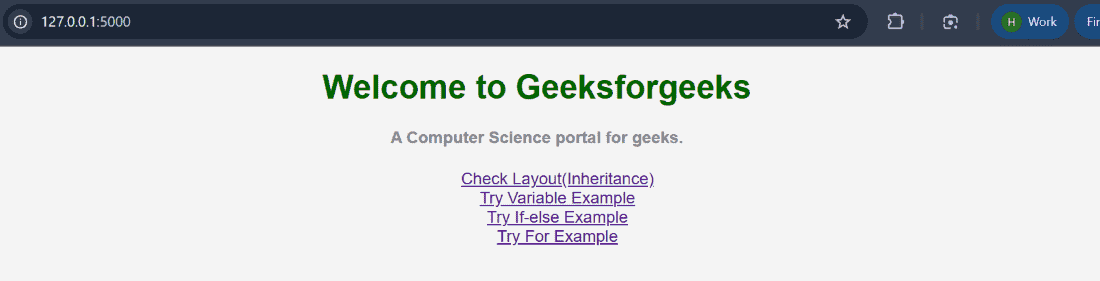
Example 2: The url_for() function can also be used inside HTML templates to link static files such as CSS or JavaScript. When used in HTML templates, it must be written inside {{ }} because it is treated as a Jinja2 expression.
Now, inside the static folder, create a file named style.css.
Output
Explanation: