 |
VOOZH | about |
|
VOOZH | about |
Blueprints in Flask help you organize your application into modular, reusable components. They let you group related routes, templates, and static files together, which is especially useful for large projects. With blueprints, you can develop, test, and maintain different parts of your app separately, and then register them with your main application.
The main idea behind Blueprints is to organize a Flask application into separate modules, each handling a specific feature with its own routes, templates, and static files. This helps keep the application structured and reduces complexity. Additionally, these modules can not only be integrated into the main Flask app but also reused in other applications if needed.
A typical Flask project using blueprints looks like this:
/flask_app
│── /app
│ │── /routes
│ │ │── __init__.py
│ │ │── user_routes.py
│ │── __init__.py
│── run.py
Let's create a simple User Blueprint to handle user-related routes.
Create a new file user_routes.py inside the routes folder. For example:
This creates a Blueprint called 'auth' for handling user authentication.
Now, modify __init__.py inside the /app folder:
app.register_blueprint(user_bp, url_prefix='/api') - Registers the user_bp blueprint with a URL prefix /api.
Now, create an app.py file to start the Flask app.
Now, the routes in the auth Blueprint will work when werun your app and visit the URL- http://127.0.0.1:5000/api/users, we will get:
{"message": "List of users"}Now, let's build a complete Flask app using blueprints, templates, and static files.
We’ll build a structured Flask application using Blueprints, templates, and static files. Instead of keeping all routes in a single file, we will organize different features into separate modules, making the application easier to manage and scale.
This app will have:
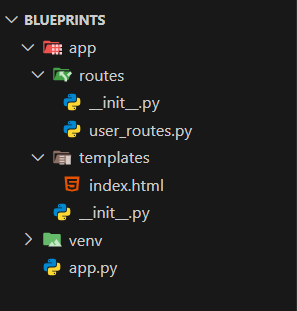
The file structure of our application is should be like this:
Modify user_routes.py to return an HTML template.
Inside the templates folder, create index.html.
Modify __init__.py in the /app folder.
Add this code to __init__.py in the /app/routes folder.
Modify app.py.
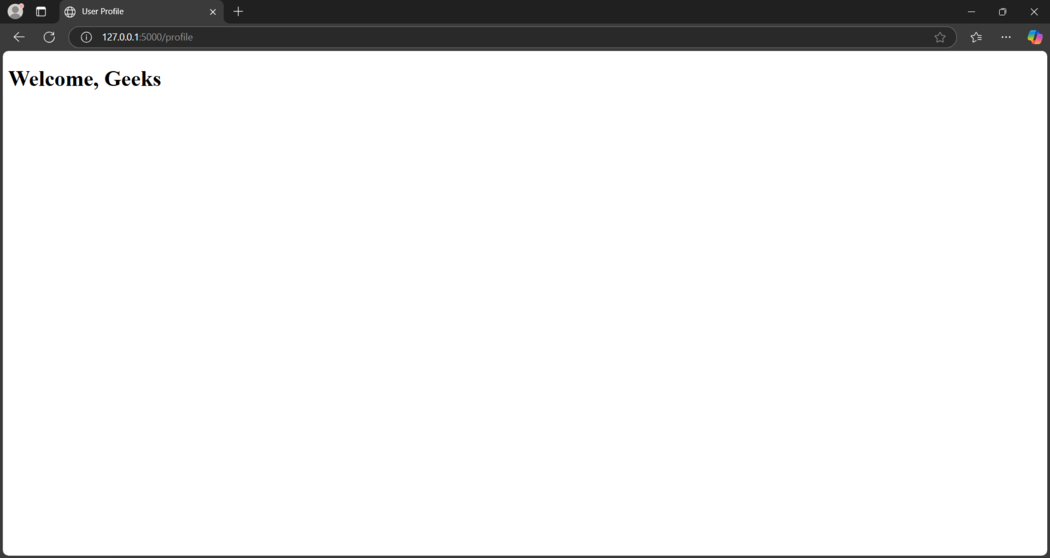
Run python run.py and visit http://127.0.0.1:5000/profile. We can see that we have accessed the '/profile' route from the routes flderin the Below is the snapshot of the live app: