 |
VOOZH | about |
|
VOOZH | about |
PyVista is a powerful and versatile library for 3D visualization in Python. It is built on top of the Visualization Toolkit (VTK) and provides an intuitive and user-friendly API for creating, manipulating, and visualizing 3D data. One of the common tasks when working with 3D visualizations is saving images of the rendered scenes. This article will guide you through the process of saving images from PyVista.
Table of Content
Firstly, we need to make sure that PyVista is installed on our system. We can install it using PIP Package Manager. Open the VSCode terminal and execute the below installation command.
pip install pyvistaWe also need to install some other additional dependencies like numpy and vtk. So execute the below command to install all the required dependencies.
pip install numpy vtkIn this section, we will explore various examples to save plots as images using PyVista in Python.
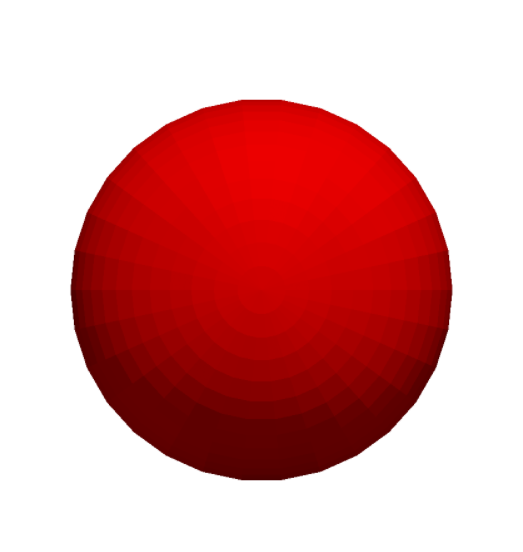
In this example, we are using PyVista to create and save an image of a 3D sphere. We start by creating a sphere mesh and setting up a plotter for off-screen rendering. The sphere mesh is added to the plotter with a blue color, and the camera is positioned to view the sphere from the 'xy' plane. Finally, the plot is saved as an image file named 'sphere.png'.
Output:
In this example, we are using PyVista to create and save an image of a plot containing multiple 3D meshes: a sphere, a cube, and a cone. Each mesh is added to the plotter with distinct colors and labels, and a legend is included for reference. The camera is positioned to an isometric view, and the plot is saved as an image file named 'multiple_meshes.png'.
Output:
In this section, we will customize the Image Output using various properties provided by PyVista library.
We are customizing the resolution and background color of a PyVista plot of a red sphere. The plot's resolution is set to 1920x1080, and the background color is changed to white before saving the image as 'custom_sphere.png'.
Output:
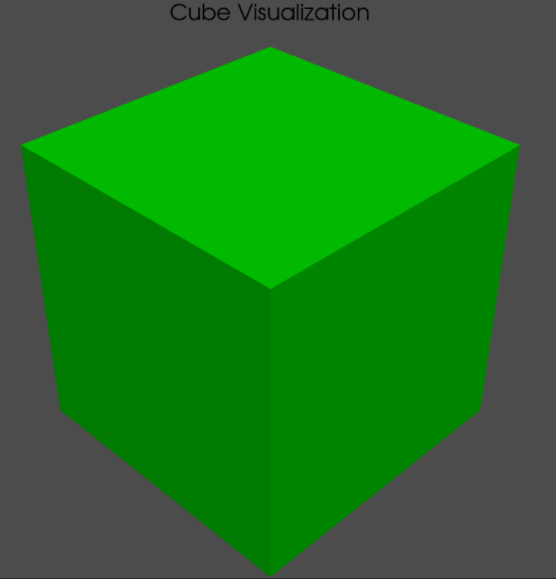
In this example, we are customizing the lighting and adding annotations to a PyVista plot of a green cube. A light source is added for enhanced lighting, and text is annotated on the plot. The camera is set to an isometric view before saving the image as 'custom_cube.png'.
Output:
In conclusion, saving images from PyVista involves creating and customizing 3D visualizations, setting up a plotter for off-screen rendering, and utilizing various PyVista features such as mesh addition, camera positioning, and image customization. This allows for efficient capturing and sharing of complex 3D models.