 |
VOOZH | about |
|
VOOZH | about |
Learn how to store usernames and passwords in a Flask web application using MySQL, implement user registration and login functionality, and display a welcome message after successful authentication.
First create a virtual environment. After creating and activating virtual environment install Flask and Flask-MySQLdb using the following command:
pip install Flask Flask-MySQLdb
To learn how to create and activate a virtual environment, refer to: Python virtual environment.
Create a "Templates" folder and in the templates folder create three files in it:
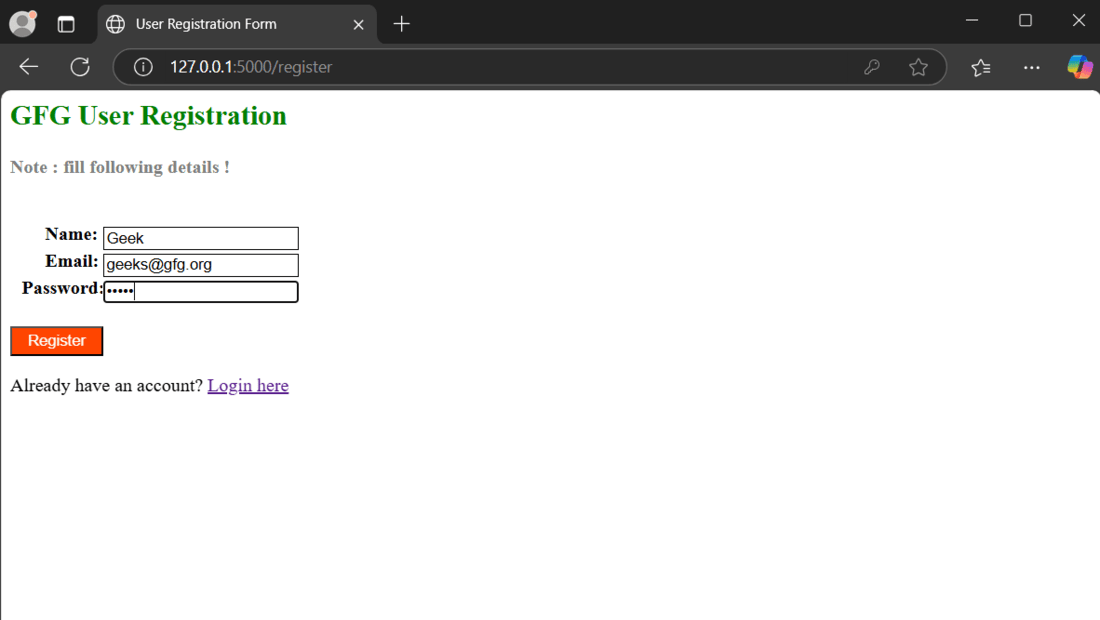
This HTML file contains a straightforward registration form that asks for three inputs: username, email address and password.
Output:
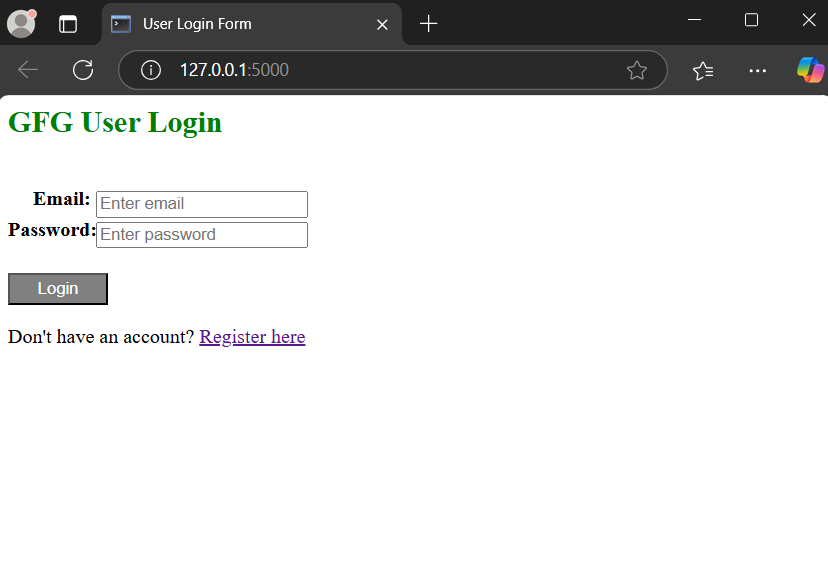
In login.html, we have two input fields for username and password. If the correct credentials are entered, the user is redirected to the profile page after successful login.
Output:
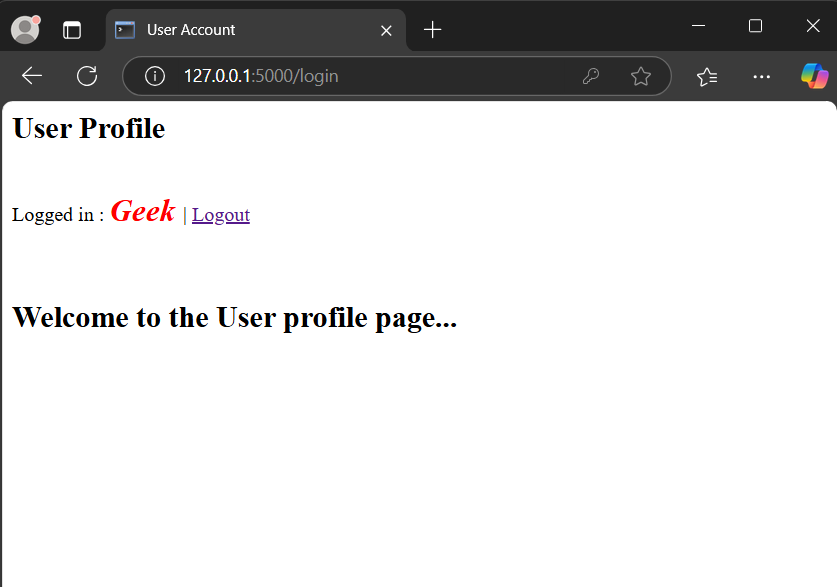
This pages displays a welcome message after a successful login.
Output:
The complete Flask app for user registration, login and database setup is shown below. For a detailed explanation of creating routes and configuring the database, refer to Login and Registration in Flask.
Explanation:
Run the flask application using command mentioned below in the terminal and visit the development server URL to launch it.
python app.py
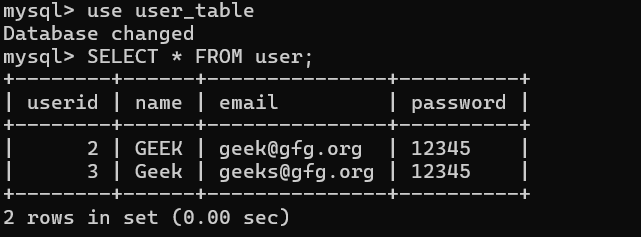
After launching the app, register two users:
Now, login to my sql server in the terminal using command:
mysql -u root -p
enter MySQL password when prompted to check if these two users have been added to the table or not.
The contents of the current user_table can be displayed by executing the following SQL query:
USE user_table;
SELECT * FROM user;
Here is the snapshot of the live demonstration: