 |
VOOZH | about |
|
VOOZH | about |
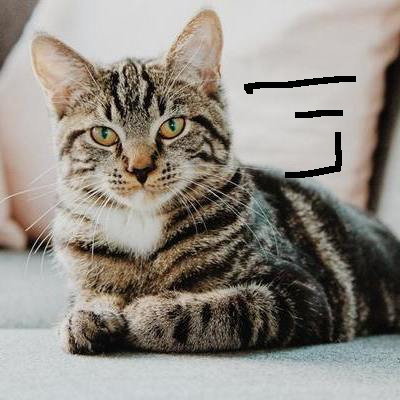
Image inpainting is the process of removing damage, such as noises, strokes or text, on images. It is particularly useful in the restoration of old photographs which might have scratched edges or ink spots on them. These can be digitally removed through this method. Image inpainting works by replacing the damaged pixels with pixels similar to the neighboring ones, therefore, making them inconspicuous and helping them blend well with the background. Consider the image below. 👁 Image
The image has some marks to the right. To inpaint this image, we require a mask, which is essentially a black image with white marks on it to indicate the regions which need to be corrected. In this case, the mask is created manually on GIMP.
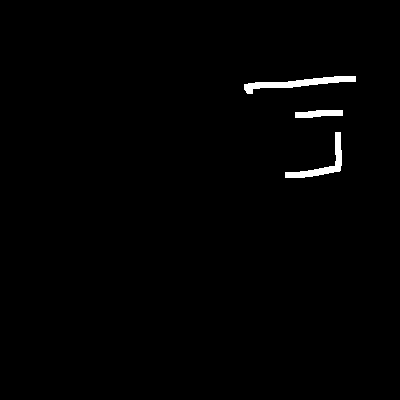
But don't worry. You don't need to learn how to use GIMP tool. Even if you know how to use OpenCV, you can easily create the following mask.👁 Image
Creating the mask manually in OpenCV
We will follow the following steps to create the mask using OpenCV python:
If you run the above code block, you can see the following result (mask created using the above cat_damaged image using OpenCV):
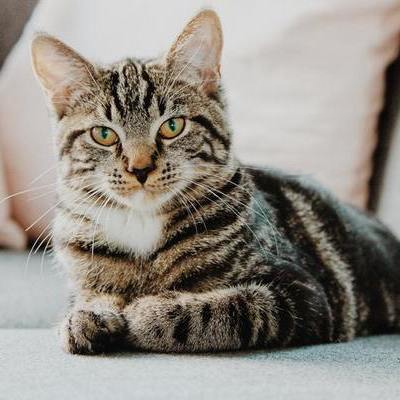
Now if you use the above mask and apply the following inpainting algorithm then you would get same results.
Inpainting Algorithms - OpenCV implements two inpainting algorithms:
FMM can be invoked by using cv2.INPAINT_TELEA, while Navier-Stokes can be invoked using cv2.INPAINT_NS. The Python code below inpaints the image of the cat using Navier-Stokes.
Output: 👁 Image