 |
VOOZH | about |
|
VOOZH | about |
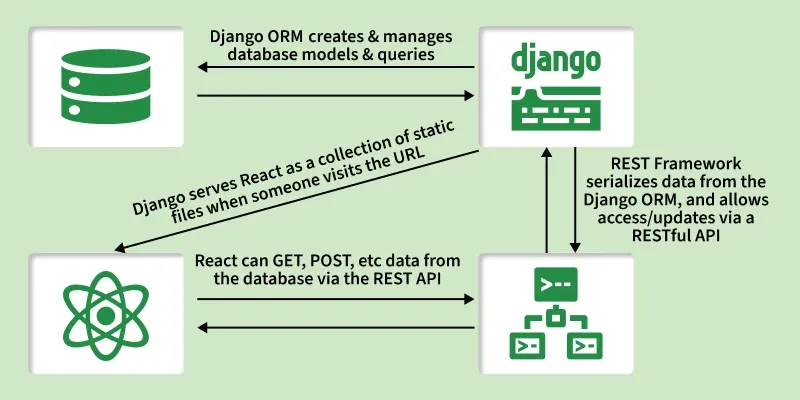
Connecting Django with React is a common way to build full-stack applications. Django handles the backend, database, and APIs, while React manages the frontend interface.
While learning web development, work often begins with either the front-end (HTML, CSS, React, etc.) or the back-end (Django, Node.js, etc.). Connecting Django with React combines a strong backend with a dynamic frontend to build powerful applications.
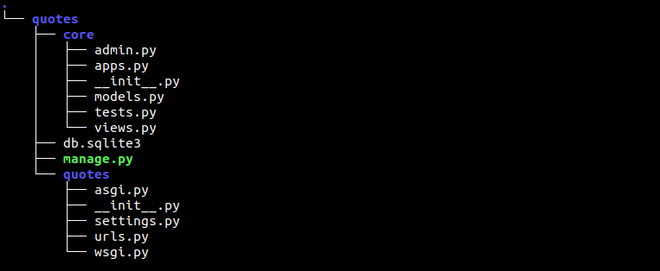
Consider a project named 'quotes' having an app named 'core'. We will create a simple application in which you can write a quote and the name of the author. Basically based on CRUD(Create Read Update and Delete) operations.
pip install djangorestframework
pip install django-cors-headers
Let's create a database model. Name and detail are two fields that are used to store the name of the author and the quote submitted by the author respectively.
In core/models.py:
Create serializer.py inside the core folder. Here is the serializer for model React. Serializers are basically used to convert complex data to native Python datatypes that can then be easily rendered into JSON(Which we are going to use in React i.e. Client side).
In views.py, methods such as GET, PUT, POST, and DELETE can be defined. GET and POST are implemented using Django class-based views. In the GET method, data is returned from the model by calling React.objects.all() and using list comprehension to convert authors and their quotes into Python dictionaries. In the POST method, data is stored by passing the incoming data to ReactSerializer().
Here is the main urls.py from the project quote. The localhost:8000/wel/ is the end-point of our ReactView.
There are few changes in settings.py file which are listed below:
INSTALLED_APPS = [
...
'rest_framework',
'corsheaders',
'core',
]MIDDLEWARE = [
...
'corsheaders.middleware.CorsMiddleware',
...
]REST_FRAMEWORK = {
'DEFAULT_PERMISSION_CLASSES': [
'rest_framework.permissions.AllowAny',
]}
CORS_ORIGIN_ALLOW_ALL = True
The corsheaders package is often associated with cross-origin access. This package informs the browser that a web application running at one origin is allowed to access selected resources from a different origin.
Run the following commands to create the required database tables:
python manage.py makemigrations
python manage.py migrate
Create a superuser for accessing the Django admin panel:
python manage.py createsuperuser --email admin@example.com --username admin
This command will run the server and the server should always be in running state:
python manage.py runserver
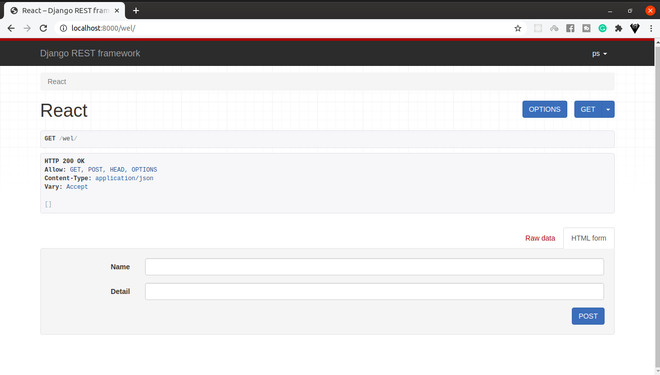
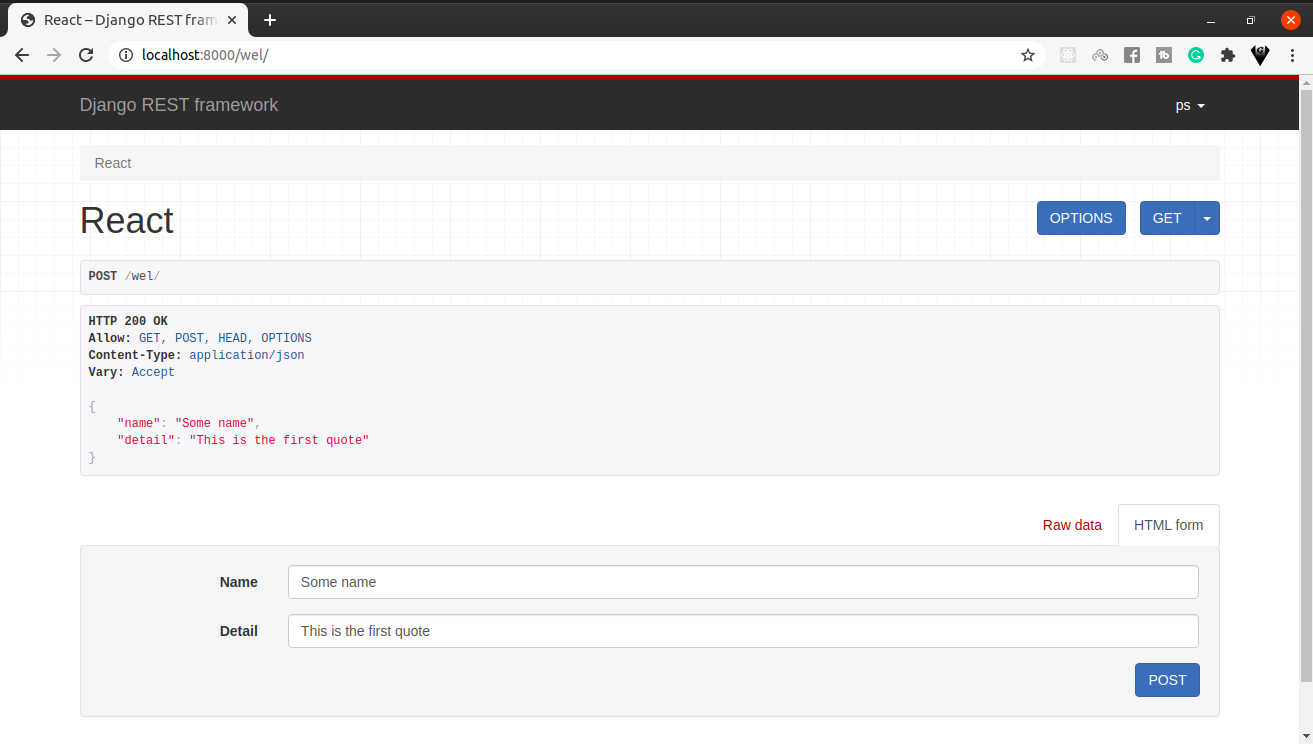
After the server starts, open the browser and access the endpoint: localhost:8000/wel/
👁 ImageThere is no requirement to place the front-end folder in the same directory as the back-end project. A React application also does not require a virtual environment. Use the following commands to set up the React application. Bootstrap is included for styling, and jQuery is added as a dependency for Bootstrap’s interactive components.
npx create-react-app our-quote
Go to the project folder using the below command
cd our-quote
npm install bootstrap jquery axios
Axios is the main tool for connecting back-end with front-end. All the requests will be sent to the server (back-end) with the help of Axios.
In our-quote/src/App.js:
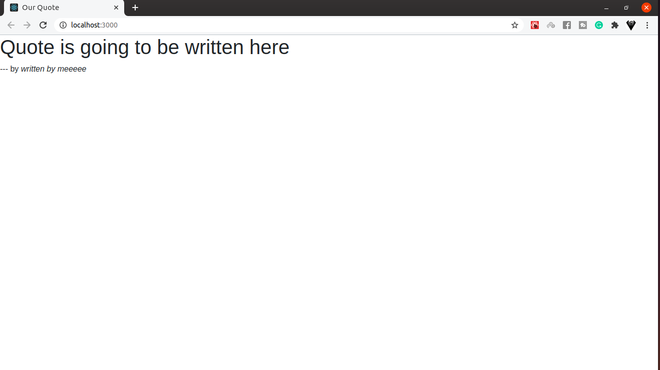
Output: After running npm start development server of React will start and by default can view at localhost:3000:
👁 ImageNow we have to fetch data from the server by using Axios. The componentDidMount method is called when the component is rendered. This is the right time to request a server for the data. We have used Axios in this method to store the data in a state obtained from the server and later on rendered by the help of a map in JavaScript.
In our-quote/src/App.js:
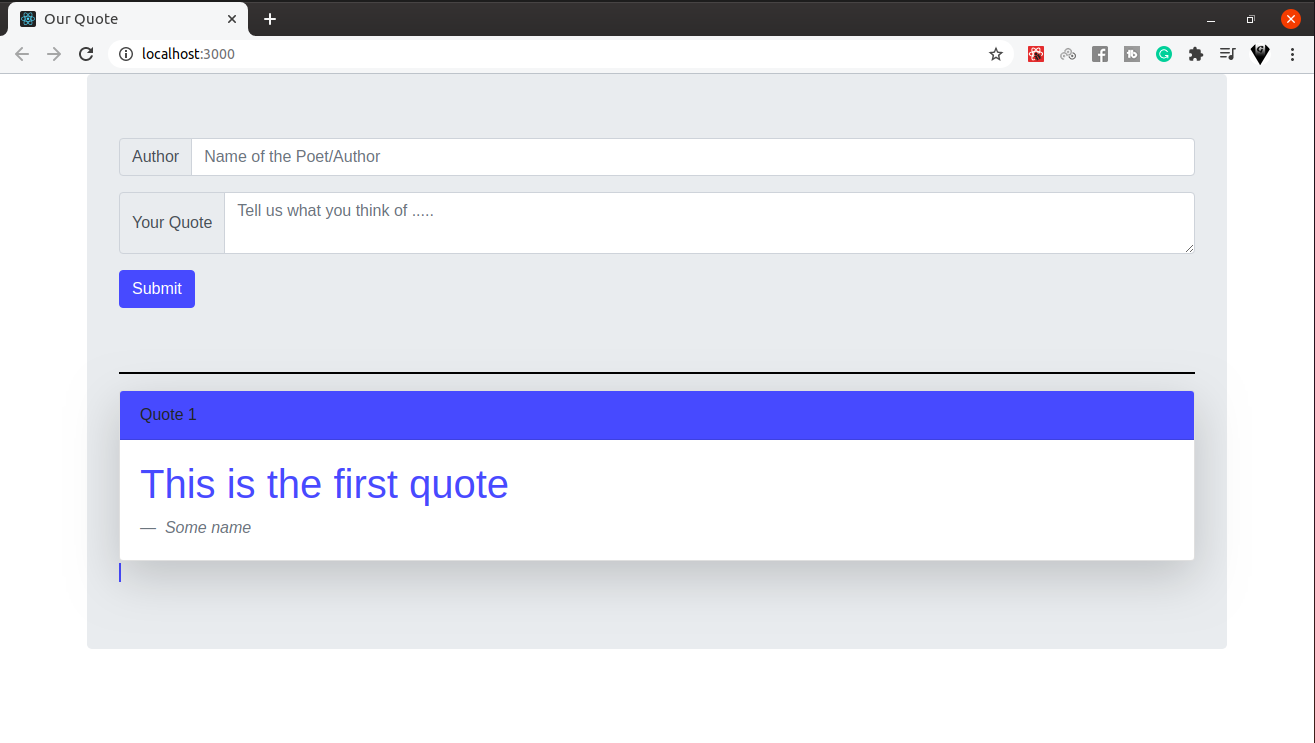
Output: As there is no data to display so fill some data in the database from the server-side.
👁 ImageNow the only part left with this project is to create a form so that the user can fill the data from Client-side which is the correct way to do so. Here is the form submitting a response from Client-side along with bootstrap.
In our-quote/src/App.js:
Output: The form will call handleSubmit which in return is using the POST method and submitting the response at end-point http://localhost:8000/wel/. The renderSwitch() is used for passing the index of the array which in return the color of bootstrap className.
👁 ImageReact and Django work independently, with one handling the frontend and the other handling the backend. Keeping them separate provides several advantages.