 |
VOOZH | about |
|
VOOZH | about |
If you’re looking to improve your internet speed, security, or reliability, changing your default DNS server can make a big difference. DNS (Domain Name System) is like the phonebook of the internet—it translates website names into IP addresses so your computer can load them. By switching to a faster or more secure DNS server, you can enjoy quicker browsing and added protection against online threats.
In this blog post, we’ll show you how to change the default DNS server on your router and Windows computer in simple steps. Whether you’re using Windows 10, managing a Wi-Fi connection, or tweaking your router settings, this guide has got you covered
Not all routers allow changing the DNS server, but if yours does, note the current settings before switching so you can switch back if you need to. Otherwise, you can try changing your DNS to either 1.1.1.1 and 1.0.0.1 (Cloudflare) or 8.8.8.8 and 8.8.4.4 (Google). Most routers support this feature, for example, a TP-Link router.
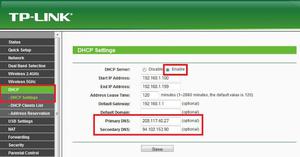
On TP-Link routers, click Network, WAN, select ‘Use these DNS servers, then enter the new DNS servers, such as those for Google Public DNS (8.8.8.8 and 8.8.4.4). See the image below for more details.
👁 ImageYou can also visit the official website of OpenDNS for a complete setup guide and more information. They provide detailed setup instructions for a wide of supported routers.
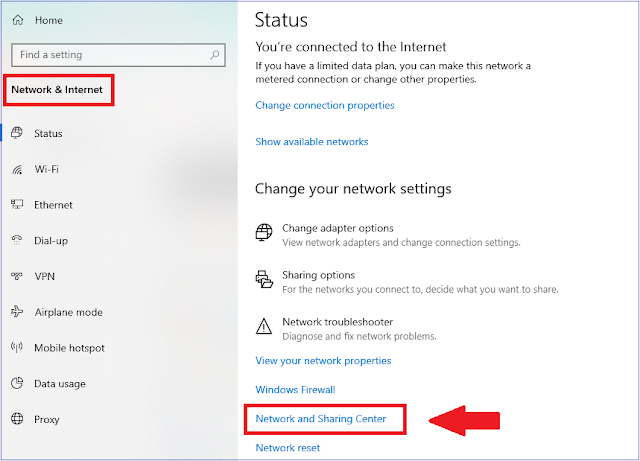
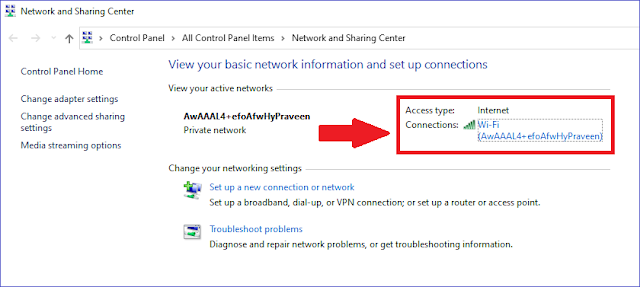
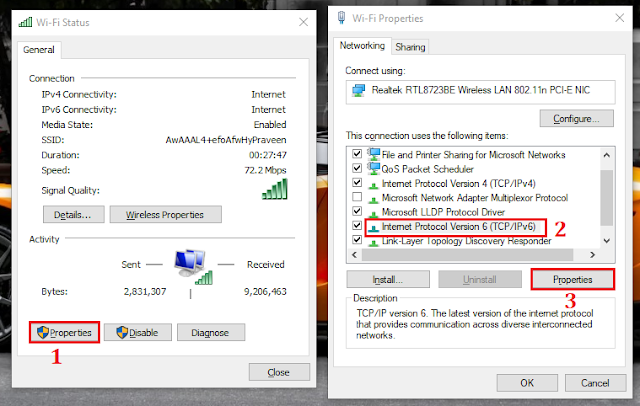
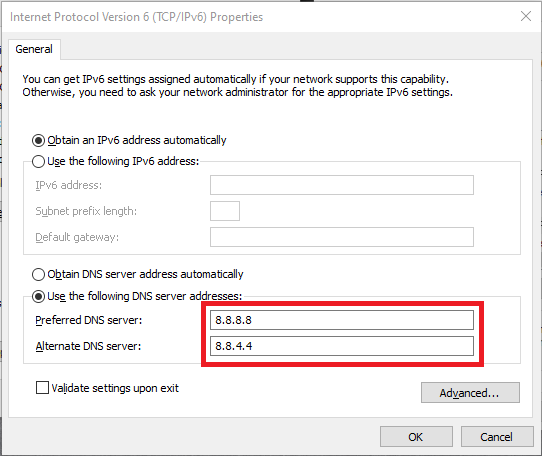
If your router doesn’t let you make this change, you can change your computer’s DNS setting in Windows so that it bypasses the router’s configuration and uses Cloudflare or Google instead. To do so, follow the below steps:
You are done. You have successfully changed the default DNS server of your PC.