 |
VOOZH | about |
|
VOOZH | about |
Enabling virtualization (VT-x) in Windows 10 BIOS is essential for running virtual machines and enhancing your system's performance for development, testing, and other tasks. VT-x is a technology that allows your CPU to efficiently manage multiple operating systems simultaneously. In this Article, we will walk you through the steps to enable VT-x in the BIOS settings of your Windows 10 computer, ensuring your system is ready for virtualization tasks.
Note: Accessing the BIOS might differ from manufacturer to manufacturer. Additionally, it is also possible that the same manufacturer may implement different BIOS versions depending on the age or model of the computer.
Follow the below steps to check if virtualization is disabled:
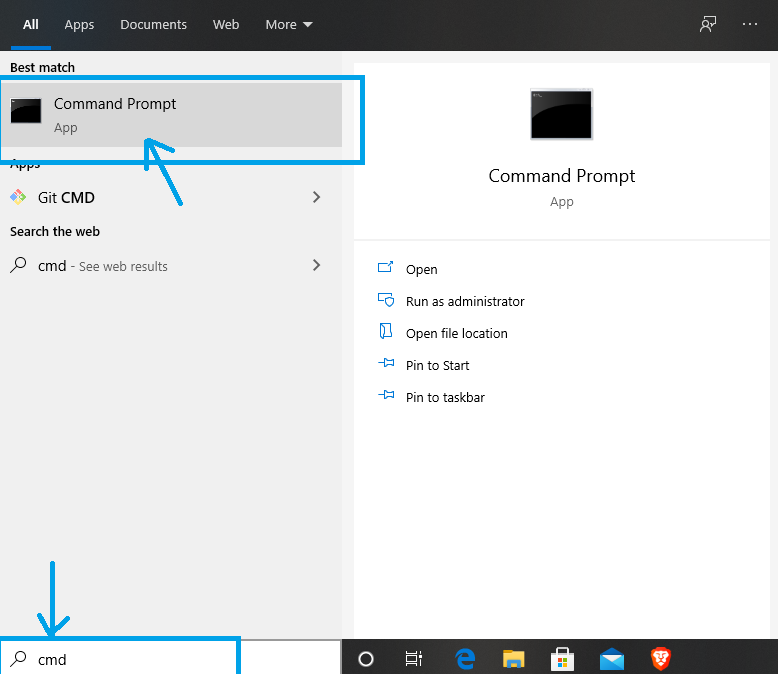
Step 1: Open up the command prompt.
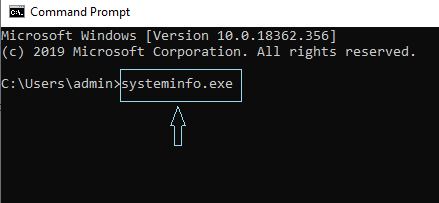
Step 2: Now run the below command:
systeminfo.exe Find hyper v requirements and to the right, you will find virtualization enabled in the firmware.
👁 ImageIf it is disabled that is if it is No we can move on.
Follow the below steps to enable virtualization on your windows 10 system:
Step 1: Navigate to the start menu and click on settings.
👁 ImageStep 2: Find update and security and click on it.
👁 ImageStep 3: A tab will open now find recovery and click on it.
👁 ImageStep 4: In recovery, you have to find advance startup, under advance startup you will see the restart now button, click on restart now.
👁 ImageStep 5: Once you see the blue screen with some icons, you have to select the Troubleshoot one.
👁 ImageStep 6: Select Advanced options.
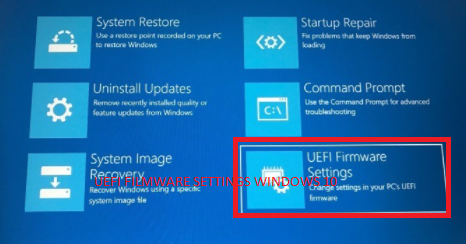
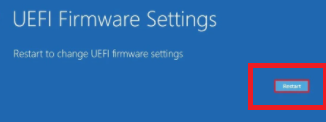
👁 ImageStep 7: Since our problem is with the firmware we have to find that setting. Once we find UEFI firmware settings select that and again restart button will appear so hit enter on restart.
Step 8: We have to find the BIOS setup and click on the respective function key. Here it is F10. So press F10 (for Lenovo system press Fn+F10).
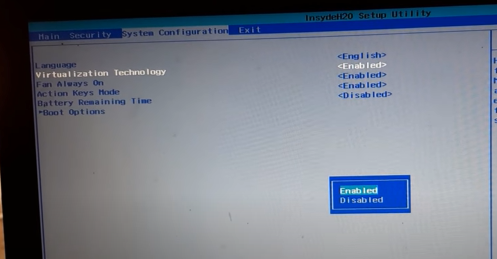
👁 ImageStep 9: New panel will open, here go to the System configuration (just by pressing up down left right key you can move here )and find Virtualization Technology. Once you go to virtualization technology hit the enter key.
Your virtualization technology is enabled at this point. You can press F10 to exit here.
Enabling virtualization (VT-x) in Windows 10 BIOS unlocks the full potential of your system, allowing you to run multiple operating systems and applications efficiently. By following the steps outlined in this guide, you can easily enable VT-x and take advantage of powerful virtualization features. Ensure your BIOS is properly configured to enhance your productivity and system performance.