 |
VOOZH | about |
|
VOOZH | about |
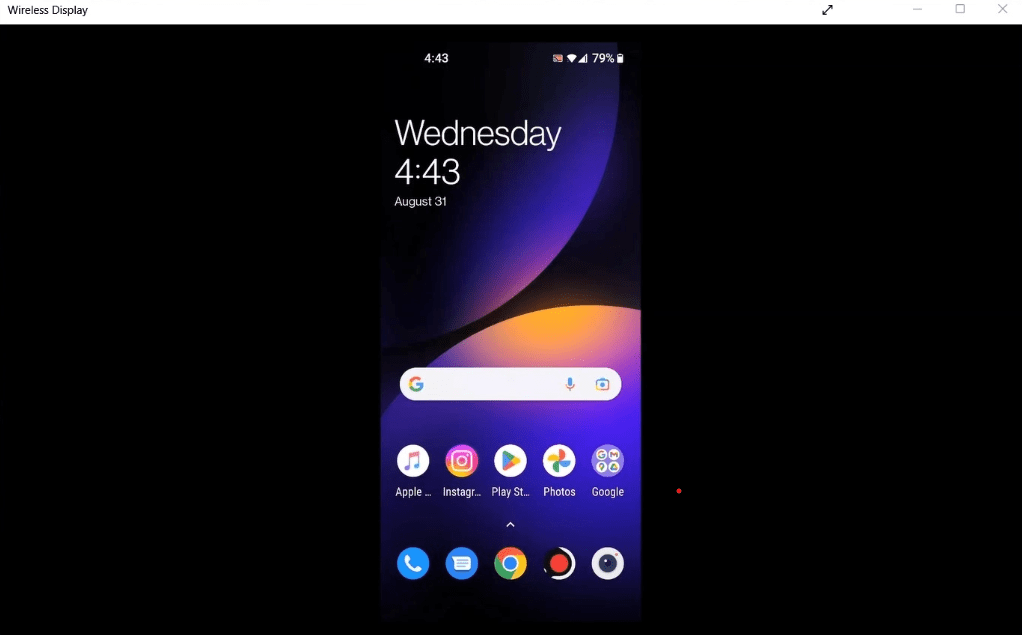
Screen mirroring lets you display your Android phone’s screen on your Windows 11 PC—ideal for presentations, gaming, media sharing, or controlling your phone on a bigger display. Windows 11 includes built-in features like Wireless Display, and Android offers native casting options, making the process simple and seamless.
What You Can Do With Screen Mirroring:
In this article, we will discuss how you can perform screen mirroring in Windows 11 using your mobile. But before you connect these two devices, you need to configure some things. They include:
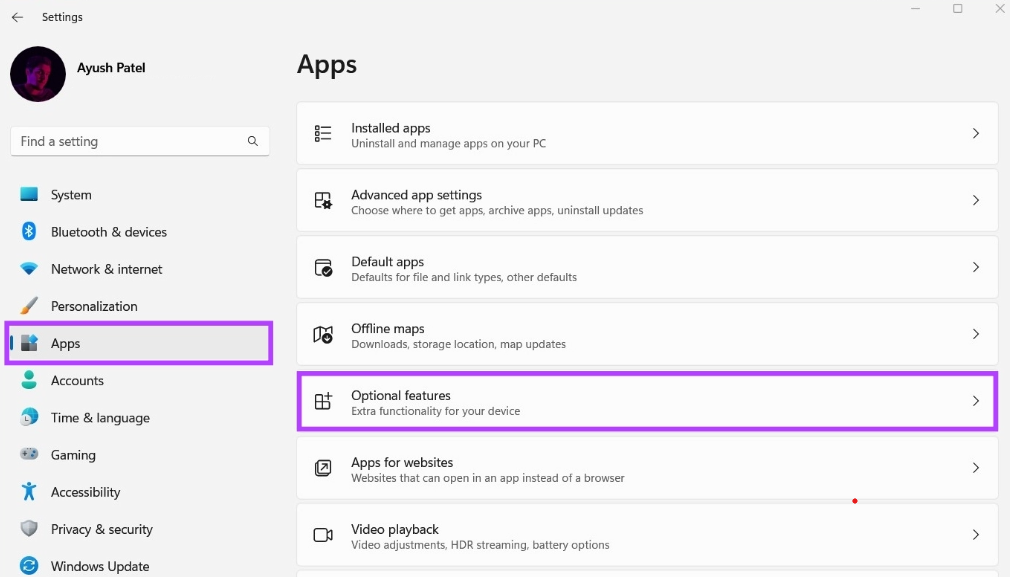
Step 1: Go to Settings > Apps > Optional features.
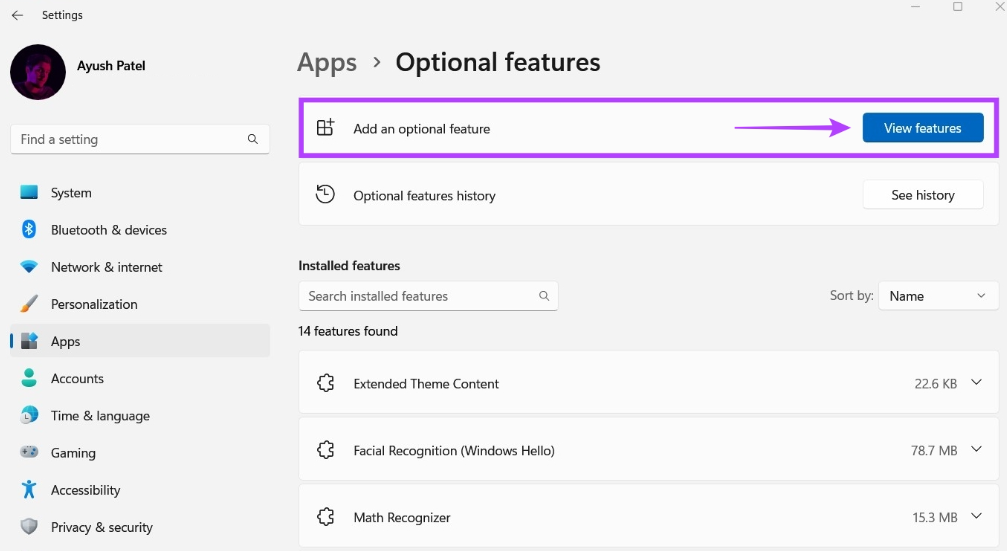
Step 2: Click View features in the Add an optional feature section.
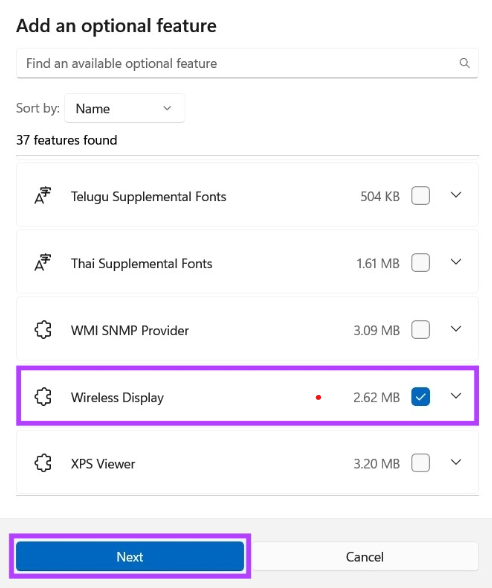
Step 3: Search for Wireless Display → check the box → click Next.
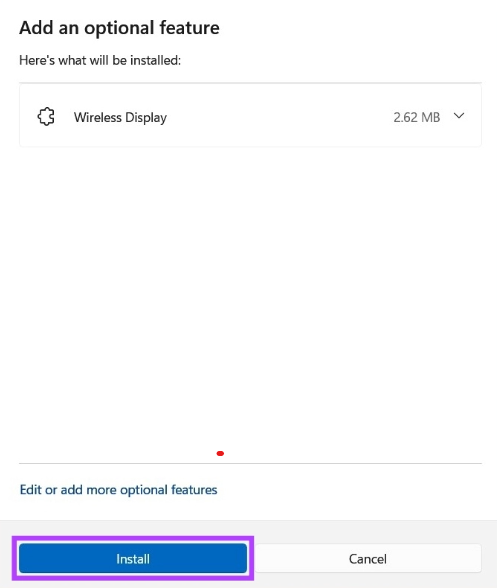
Step 4: Click on Install.
Once installed, Windows adds the Connect app, which enables screen mirroring.
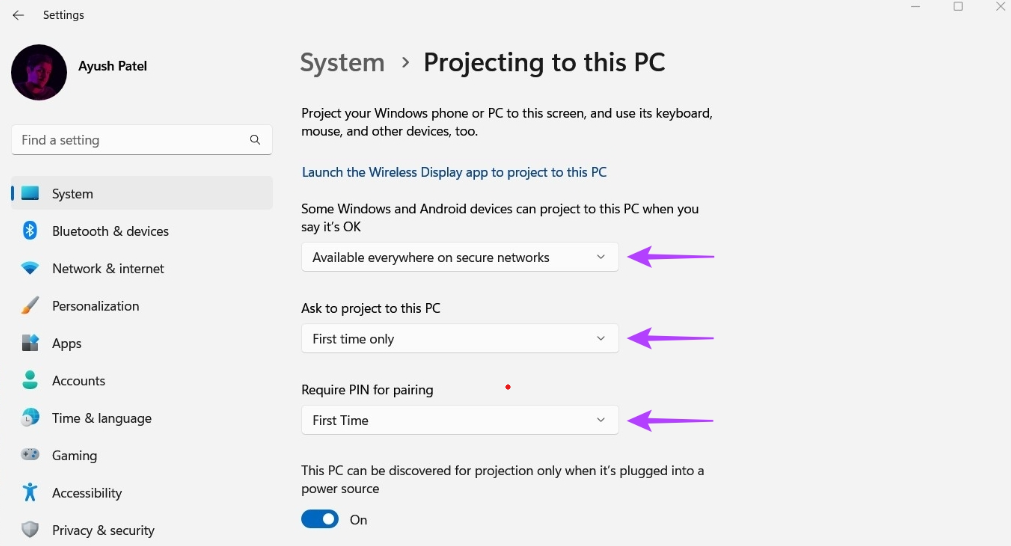
Step 1: Navigate to Settings > System. You will see a section named Projecting to this PC. Click on it to proceed.
Choose the options as follows:
Note: Steps may vary slightly depending on your phone model (Samsung, OnePlus, Xiaomi, etc.)
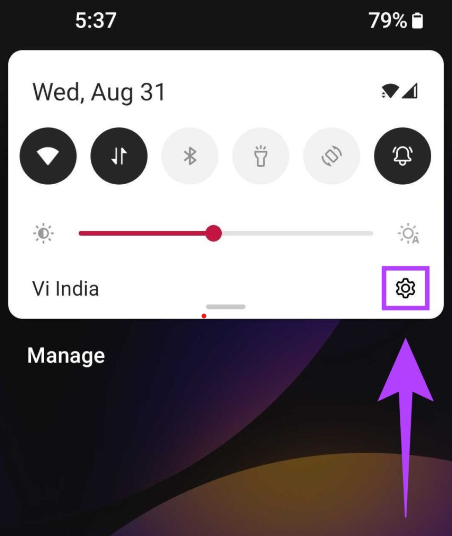
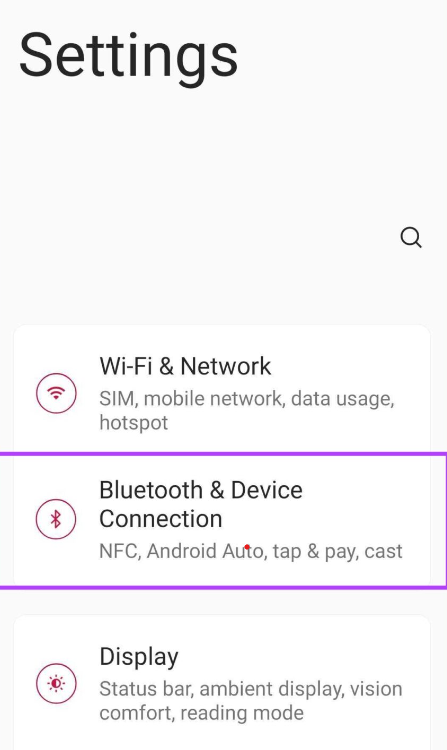
Step 1: Navigate to Settings.
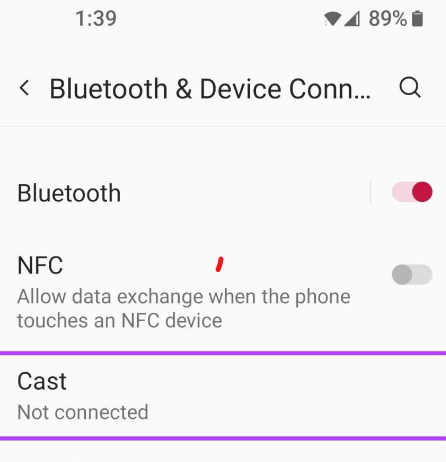
Step 2: Click on Bluetooth & Device Connection.
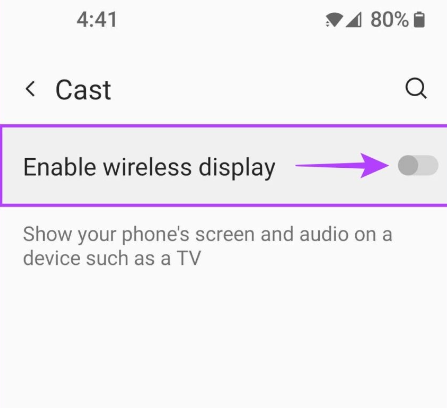
Step 3: Tap Cast / Screen Cast / Smart View.
Step 4: Turn on the toggle button that says Enable wireless display.
Your phone will now search for wireless display devices.
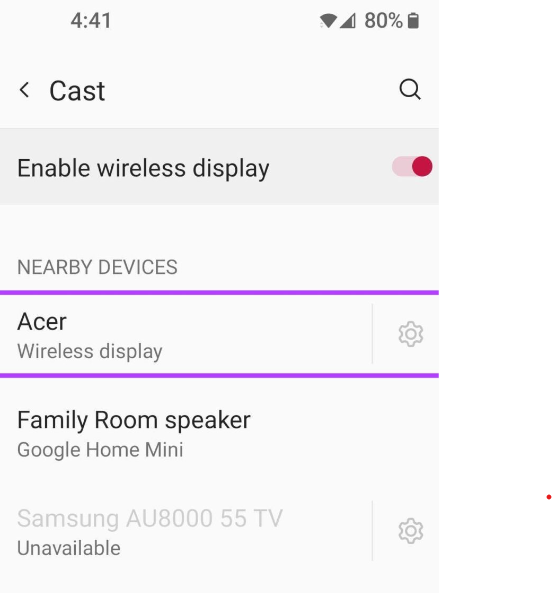
Step 1: On your Android device, you will notice that there is a new device added to the Nearby Devices list, which is essentially your Windows device. Click on it to proceed.
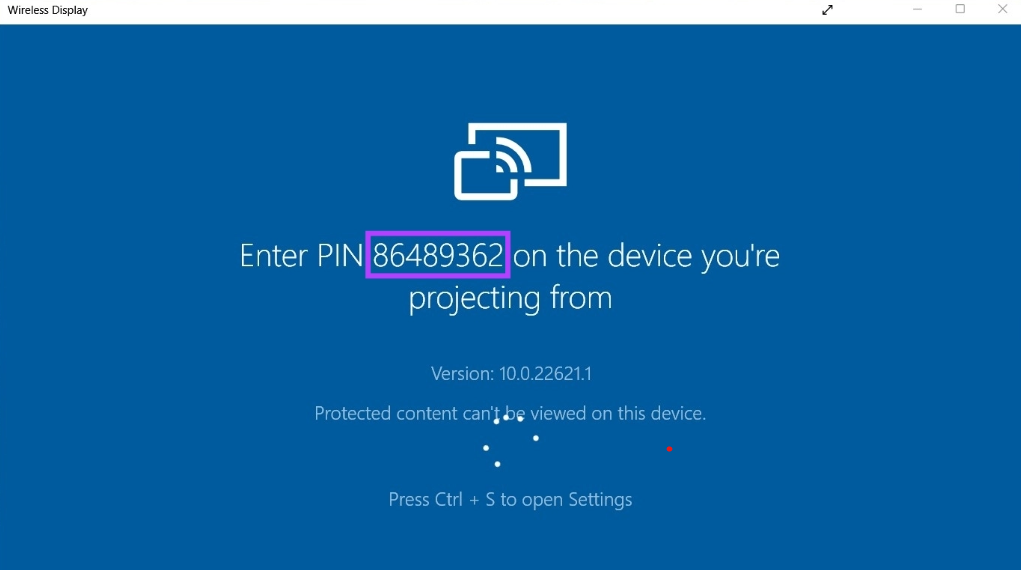
Step 2: Upon clicking, the Wireless Display application will open up on your Windows device. Notice that there is a PIN on your screen. In our case, the PIN is 86489362.
Step 3: Simultaneously, a box will pop up on your Android device. Type the PIN you got from your Windows device in the text field that says Type the required PIN. Then, click on Accept.