 |
VOOZH | about |
|
VOOZH | about |
Have you ever wished to record a video of your iPhone screen to highlight a fantastic app or a handy feature? So look no further! This step-by-step instruction will teach you how to record your iPhone screen. We have you covered whether you have the most recent iPhone model or an older model. Keep reading further to learn more about screen recording on iPhone. The procedures mentioned in the article are best suited for iPhone devices running iOS 11 and are more advanced.
Some steps may alter if you have an older iPhone or a different iOS version.
Before you begin, remember that screen recordings can quickly take up your iPhone storage, especially if they are extensive. Consider backing up your iPhone images or deleting the storage on your iPhone.
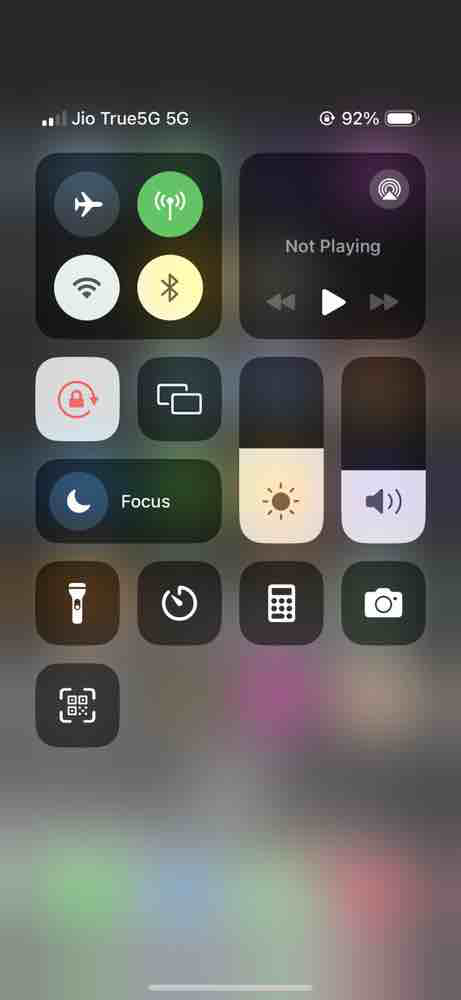
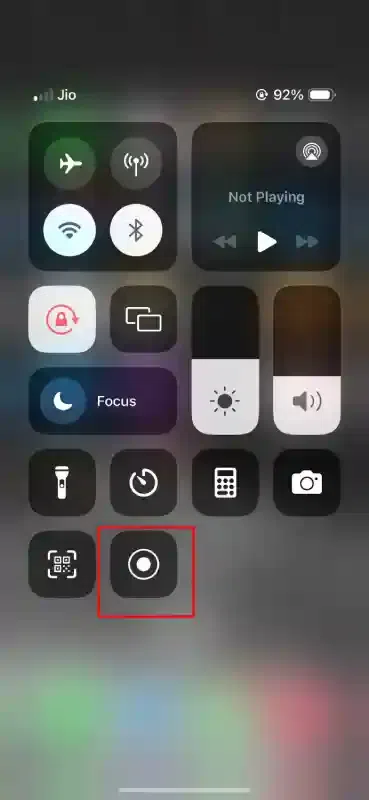
All iPhones with iOS 11 or later may record screens. Check the Control Center for the screen record button before learning to screen record on an iPhone. If not, add it. Starting recording will be simple and faster.
Swipe your phone screen either upwards or downwards to open the Control Center menu.
Look for the screen record button, which appears as a dot enclosed within a circle. If it's not visible, proceed to the next section.
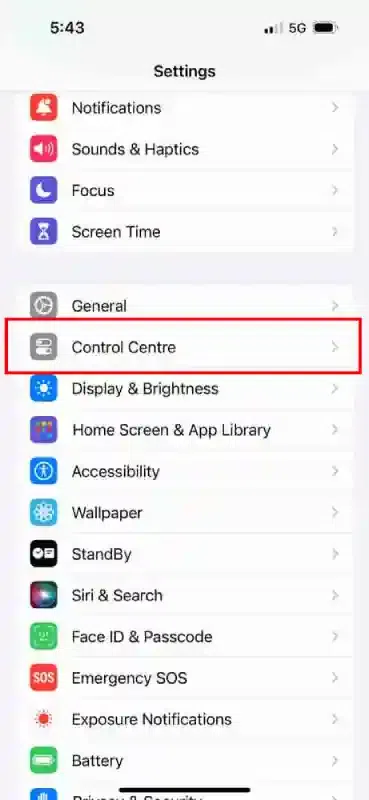
If you couldn't find the screen record button, you can find it in your device's settings. Access the Control Center, then navigate to "Control Centre"
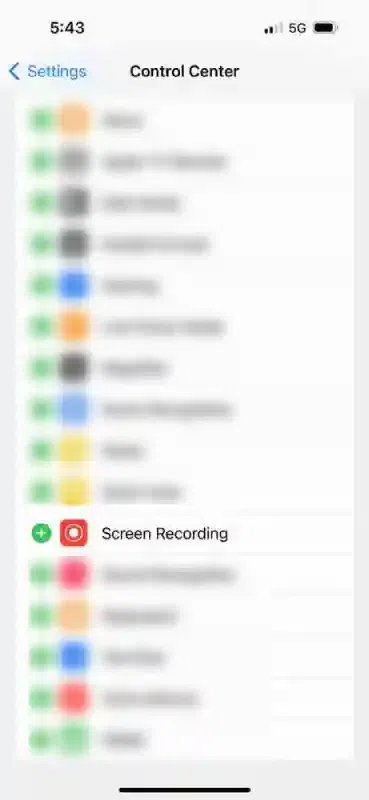
Scroll down to the "More Controls" section and search for the "Screen Recording" option.
Tap the green "+" symbol located to the left of the text. This action will move the feature to the "Included Controls" section above. Note that you can rearrange Control Center icons by holding and dragging the three-line symbol next to them.
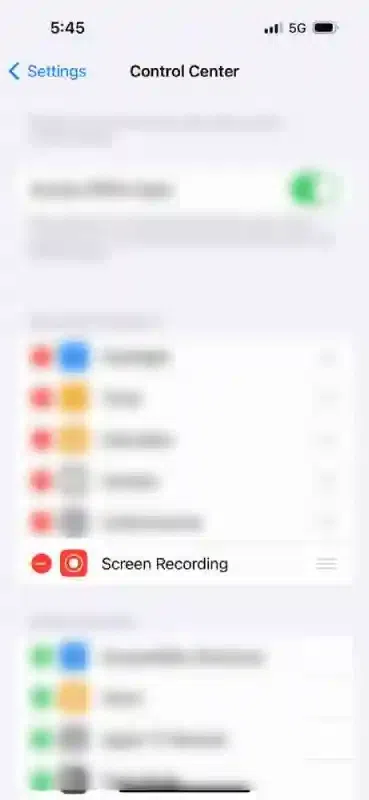
To remove the screen record button from the Control Center, return to the Control Center screen and tap the red "-" symbol anytime you wish to remove it.
Swipe down from the top right corner of your iPhone screen (or swipe up from the bottom on older iPhone models) to open Control Center.
You will come across various icons and control options. Amidst the same, the screen recording button looks like a solid circle inside a circle.
Note: Scroll down if you don't see this symbol in your Control Center. The screen recording option will be the final icon on your screen unless you manually adjusted the order of your Control Center icons in the previous stage.
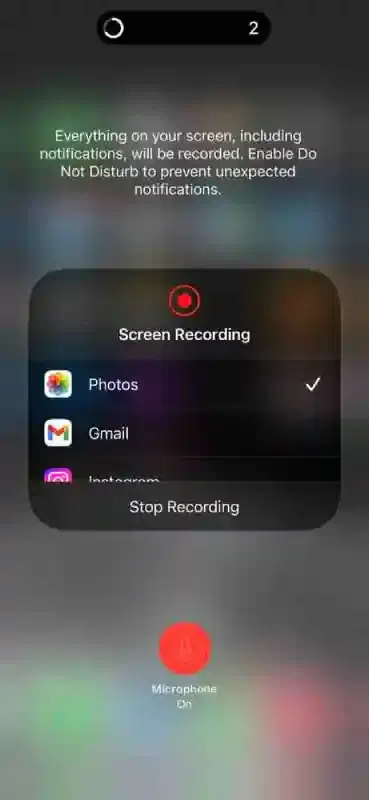
Tap the “Screen Recording” button in the Control Center.
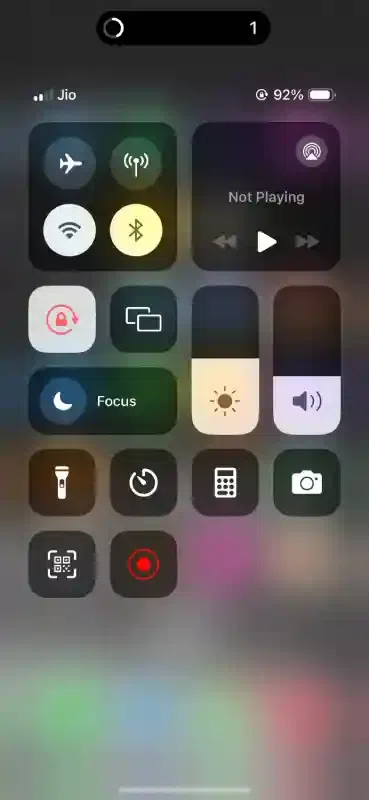
A countdown timer of three seconds will appear, giving you time to prepare.
Once the countdown ends, the screen recording on the iPhone begins. The appearance of the red status bar at the screen top indicates the initiation of screen recording.
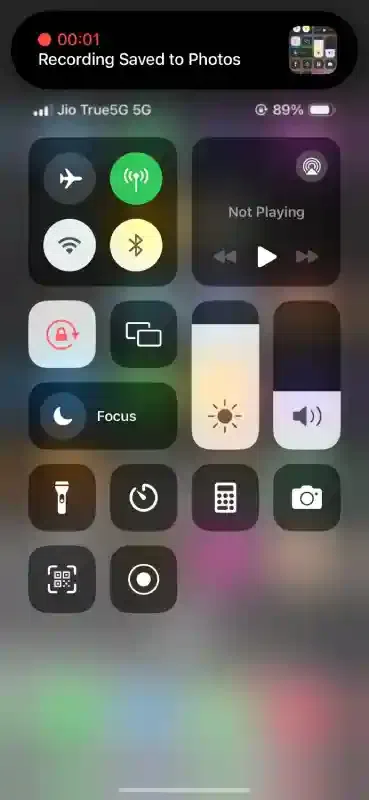
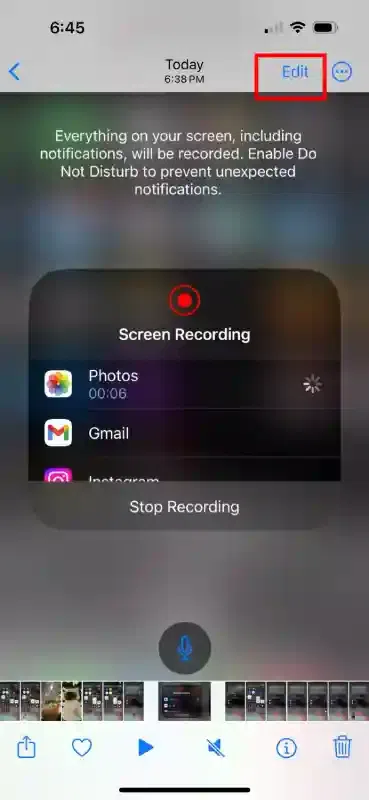
Your iPhone recorder will stop once the red status bar appears at the top.
You can also stop recording by reopening the Control Center and tapping the "Screen Recording" button.
Once you’ve stopped the recording, a notification will appear, indicating that your video has been saved to your Photos app.
Open the Photos app and navigate to the “Recents” album or the “Videos” folder to find your recorded video.
The iPhone's screen recording feature lets you simultaneously record your voice and screen.
Follow these steps before pressing the Record button to activate the microphone.
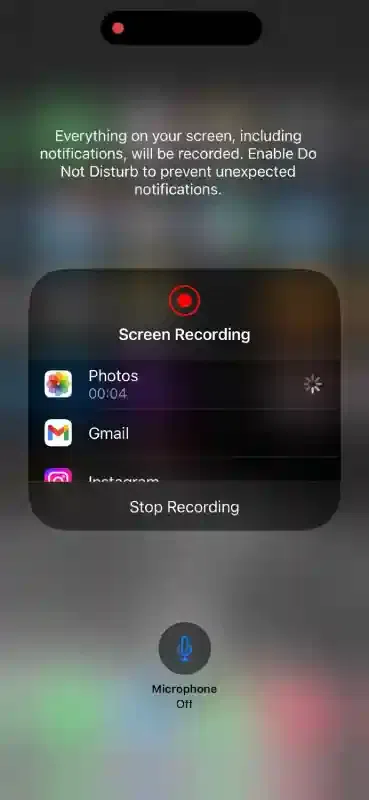
Start the process by clicking on the Record button.
On the pop-up screen, tap the microphone icon located at the bottom, and then press "Start Recording."
A countdown will begin, preparing you for the recording.
Tap twice to close the Control Center and exit the screen.
The microphone is active during recording. To deactivate it, tap and hold the microphone icon on the recording screen.
If needed, transfer the iPhone screen recording to a Mac or another device for further use.
Video can be transferred from a Mac to an iPhone in several ways, but some compress it more than others. iMessage allows you to share videos without compromising quality.
The iPhone's built-in screen recording feature was launched in 2017 when users started to mirror their iPhone's screen to their Mac devices and record it with Quick Time.
If you're on Mojave or earlier, you can still do this.
Here's what you need to do:
Link your iPhone to your Mac using a USB cable.
Open QuickTime Player on your Mac.
Click on "File" in the menu, then select "New Movie Recording."
Click the arrow next to the record button and pick your iPhone as the source.
Press the "Record" button to start capturing your iPhone screen.
This method is quicker and more convenient than transferring screen recordings to your Mac, although it does require having your Mac with you and connecting your iPhone to it.
You can edit your new video in the Photos app by adding filters, trimming the beginning or end, and saving it as a new clip on your iPhone.
Launch the Photos app and head to Camera Roll. Choose the video you want to edit.
Tap "Edit" located at the top right of the screen.
To change the playback direction, tap the arrow next to the play button on the right (turns yellow) or tap the hand on the left (changes to blue).
Play the video to preview your changes and adjust the arrows accordingly.
Use the same filters as you would in Photos to enhance your video.
Once you're satisfied with the edits, tap "Done" and choose "Save as New Clip" to save your edited video.
Screen recording on an iPhone is straightforward. With some tips and tricks, you can make the process more smooth.
During screen recording, your phone's processor and RAM can be taxed, so try closing apps that aren't in use to avoid performance issues.
Just tap the half-moon icon in the Control Center to enable Do Not Disturb mode. There is no blocking or silencing of calls or notifications; they are silenced.
You can rotate your iPhone's screen so the Control Center doesn't change orientation when you open it.
By adding captions to your videos, you can improve viewer comprehension.
IPhones are all right when recording audio, but if you want something more professional, you'll need to connect external microphones to iPhones.
.webp)