 |
VOOZH | about |
|
VOOZH | about |
Windows 11 comes with Bing integrated into the Start menu and taskbar search. While it can be helpful, many users prefer a cleaner, privacy focused, or alternative search experience. If you want to disable Bing search results in Windows 11, this guide walks you through multiple methods from Settings to Registry and Group Policy.
Why Remove Bing Search?
By following these steps, you can streamline your search functionality and use the search engine of your choice.
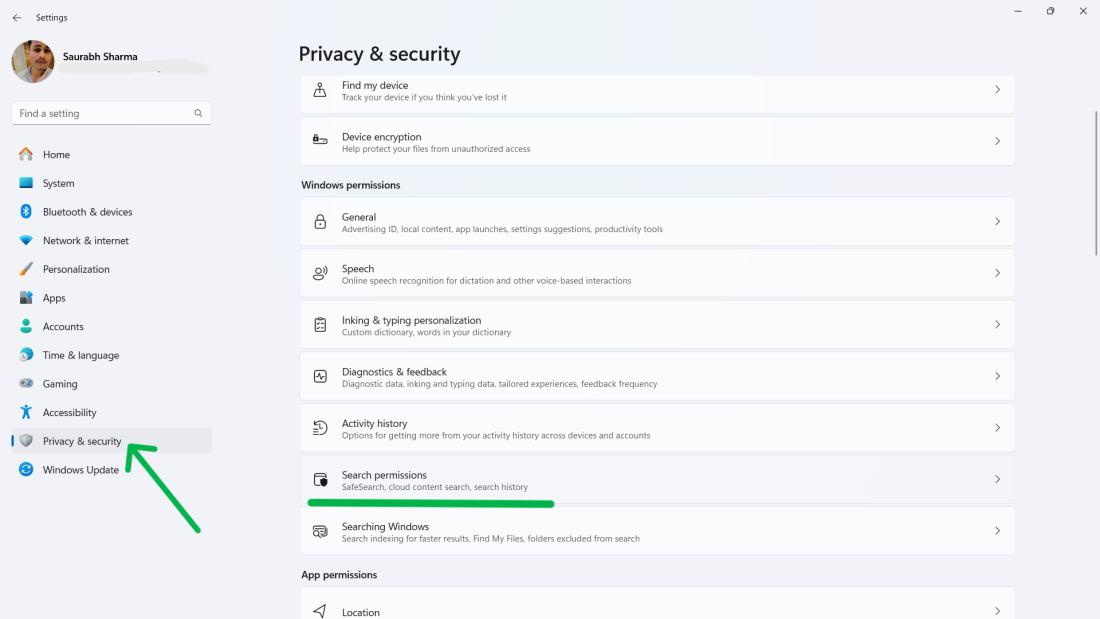
Step 1:
👁 How-to-Disable-Bing-Cloud-Search-in-Windows-11-From-Setting
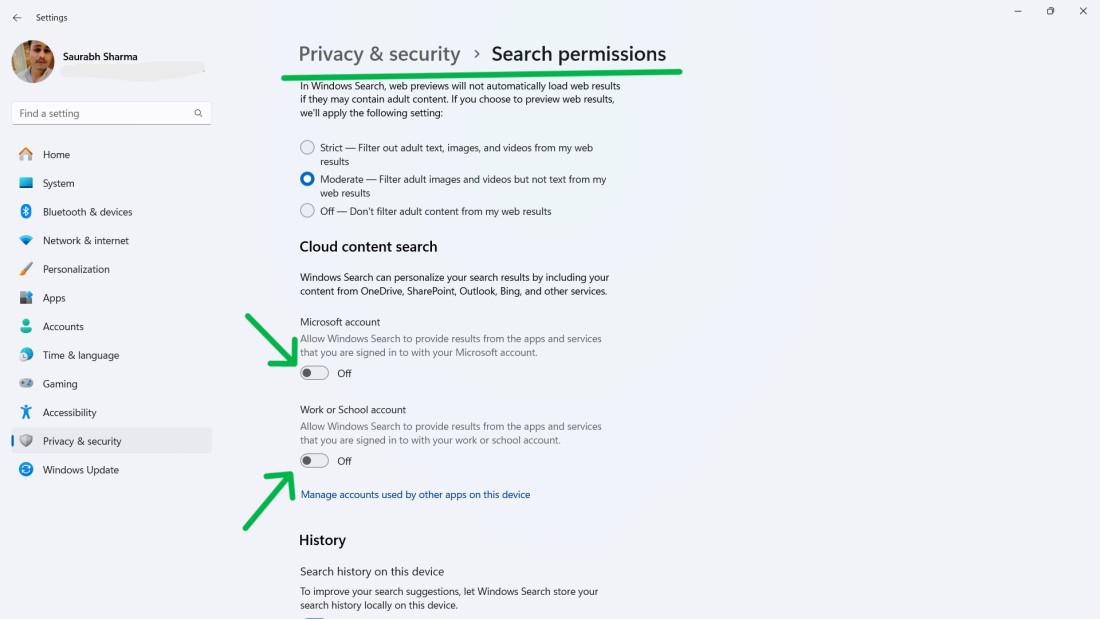
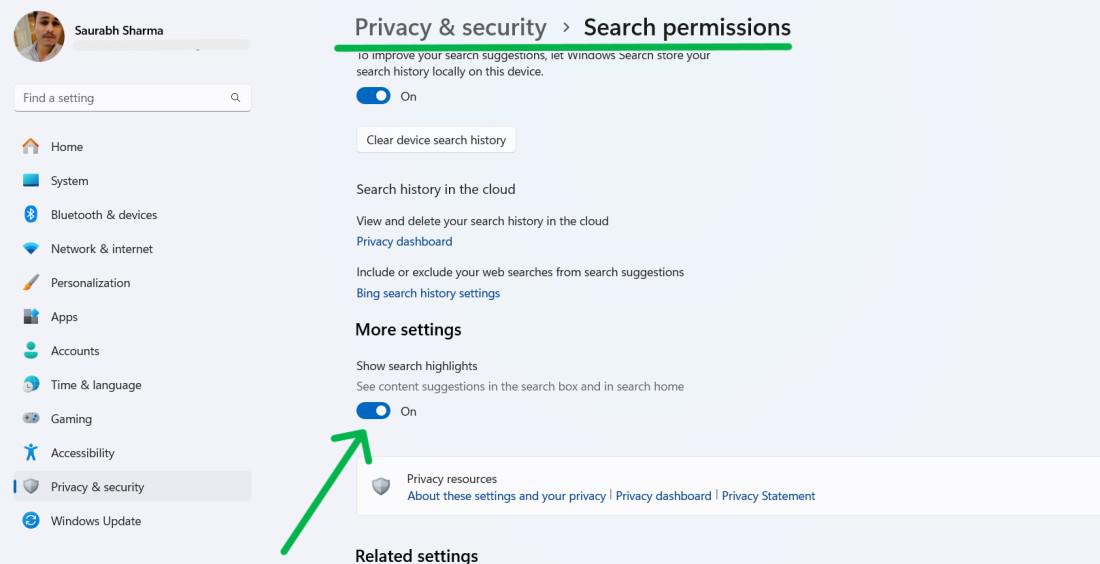
Step 2:
Turn off both toggles under Cloud content search:
👁 How-to-Disable-Bing-Cloud-Search-in-Windows-11-From-Setting--1
Step 3:
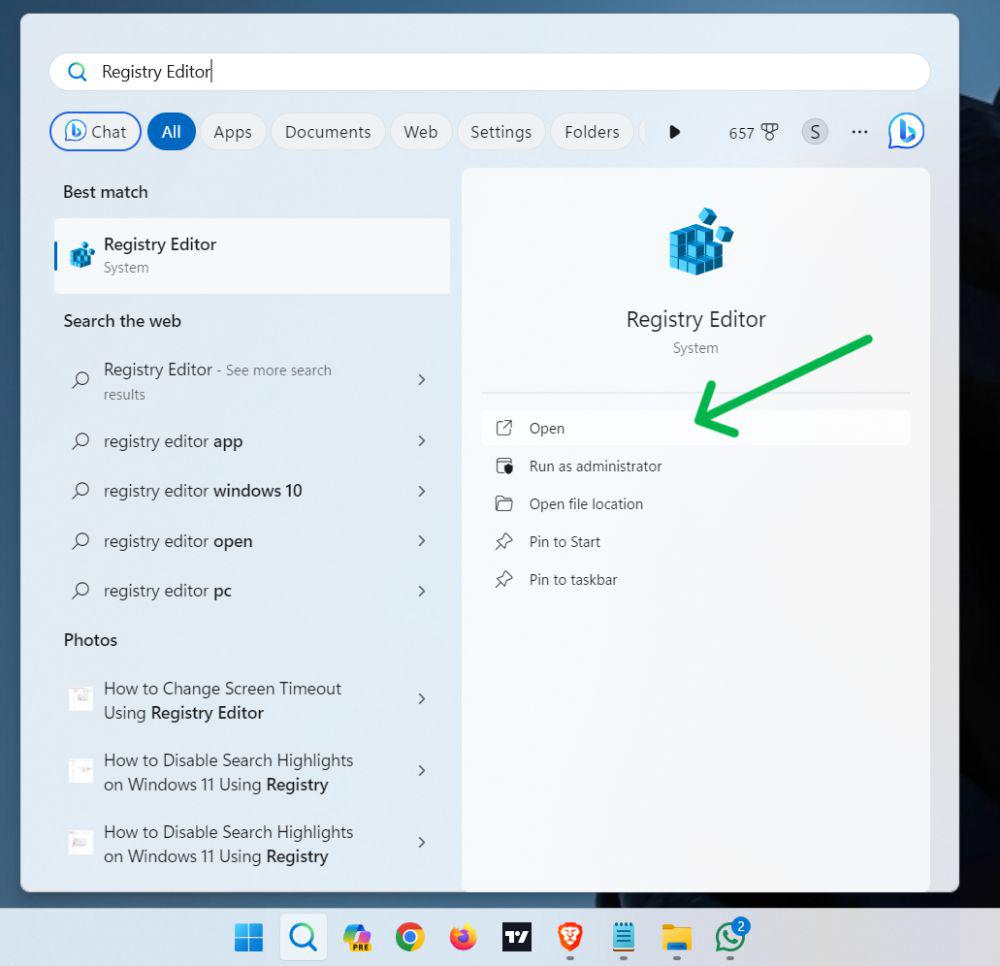
Step 1:
Step 2:
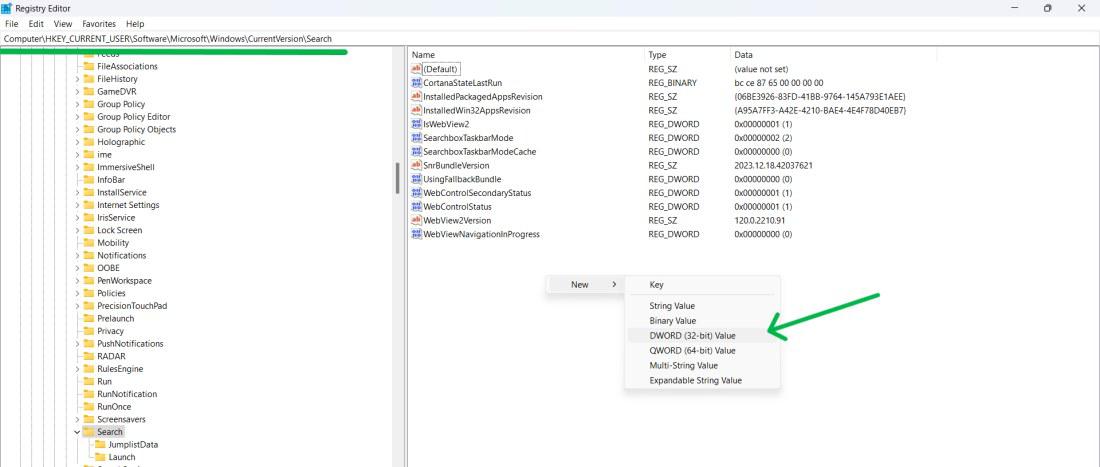
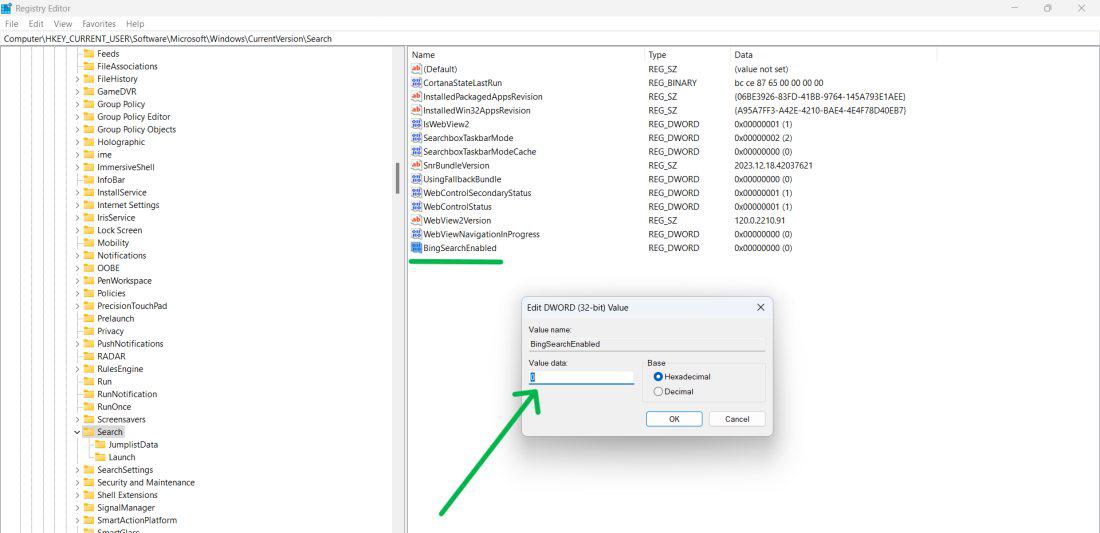
HKEY_CURRENT_USER\Software\Microsoft\Windows\CurrentVersion\Search
Step 3:
👁 How-To-Remove-Bing-Search-from-Windows-11-Using-Registry-Editor
Step 4:
👁 How-To-Remove-Bing-Search-from-Windows-11-Using-Registry-Editor-1
Step 5:
This method permanently disables Bing search functionality within Windows.
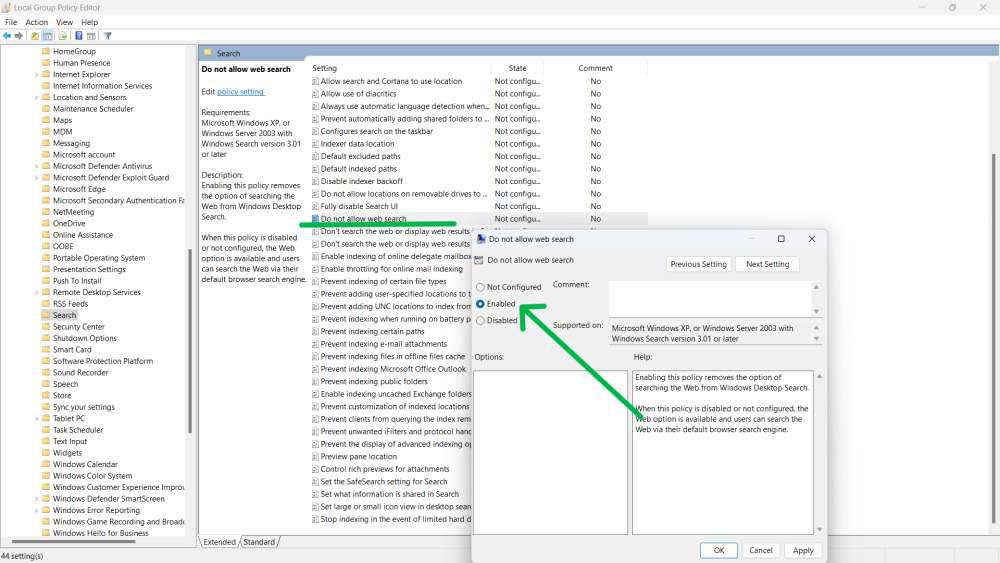
Step 1:
Step 2:
Step 3:
Enable the following:
👁 How-To-Remove-Bing-Search-from-Windows-11-Using-Group-Policy
Step 4: Click Apply and OK, then restart your computer.
Step 1:
Step 2:
👁 How-To-Hide-Or-Disable-The-Bing-Icon-On-The-Windows-Taskbar
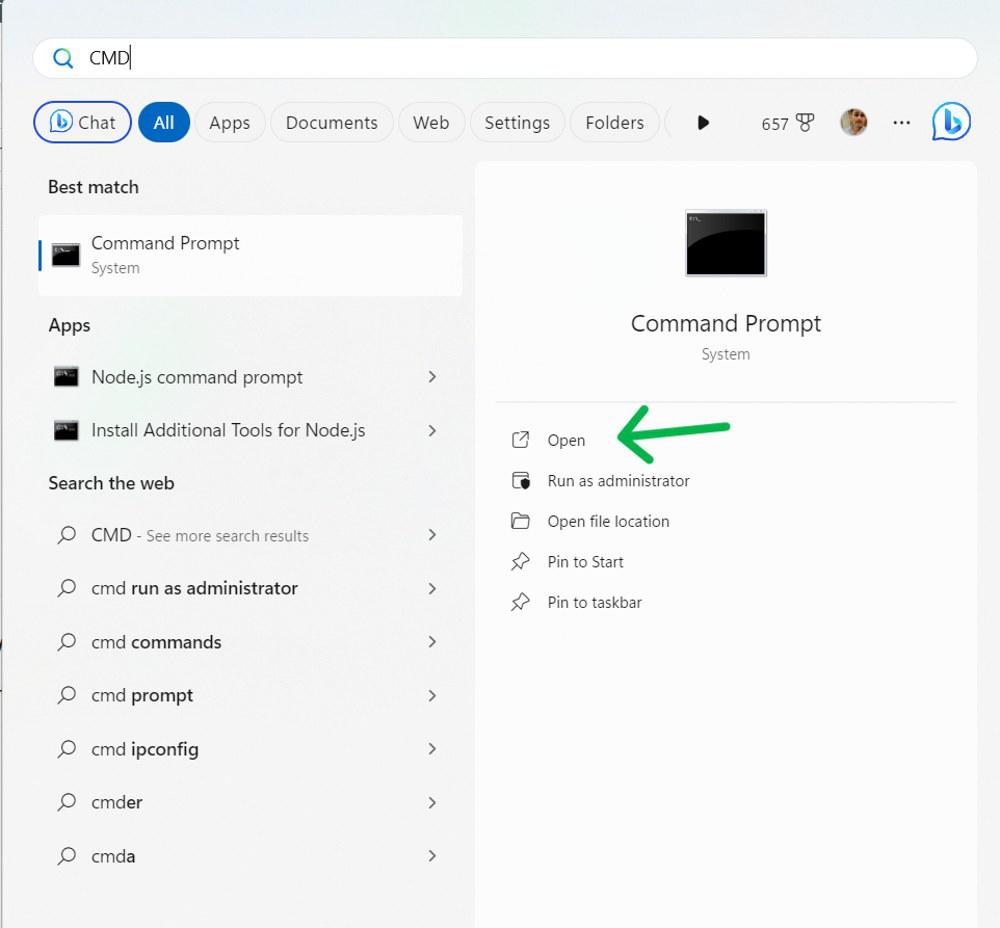
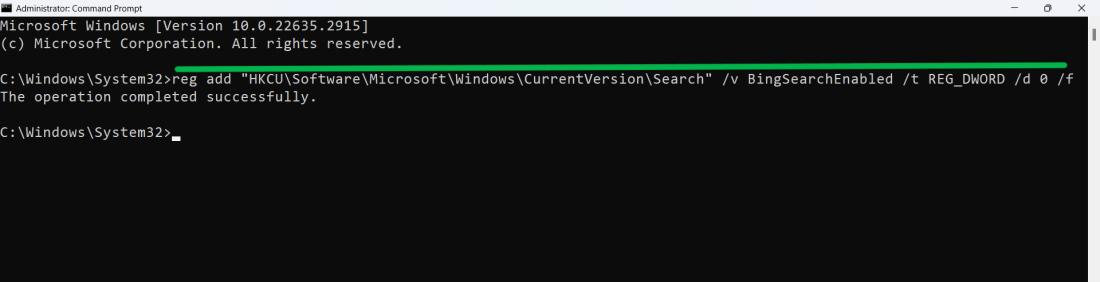
Step 1:
Step 2:
Enter the command below:
reg add "HKCU\Software\Microsoft\Windows\CurrentVersion\Search" /v BingSearchEnabled /t REG_DWORD /d 0 /f👁 How-To-Remove-Bing-Search-from-Windows-11-Using-Command-Prompt
This directly modifies the registry to disable Bing search.
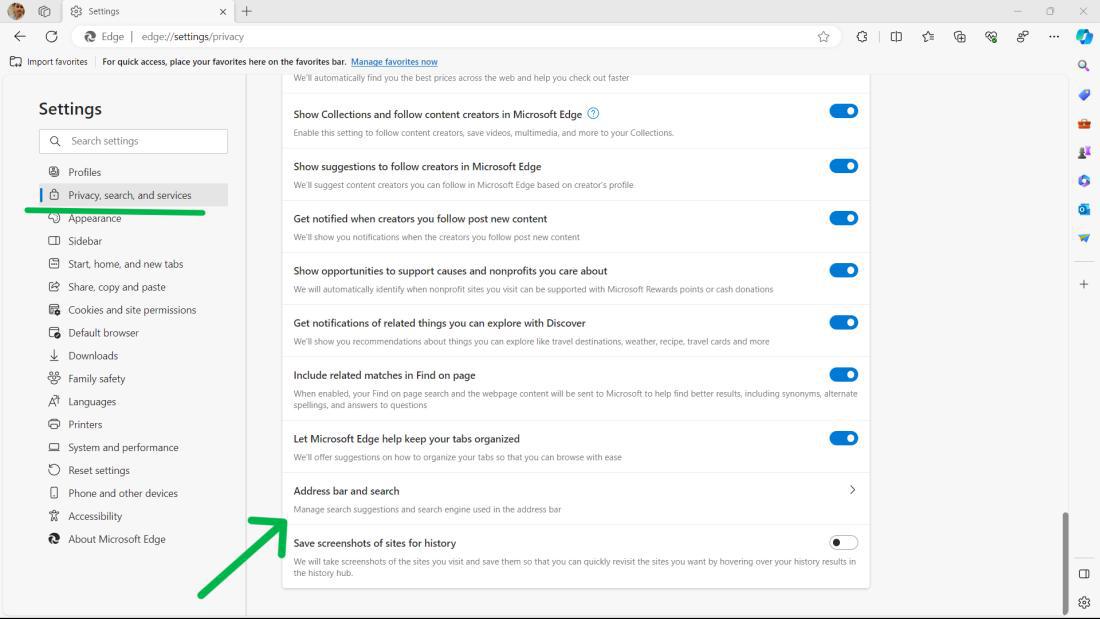
Step 1:
Step 2:
👁 How-To-Disable-Bing-As-Default-Search-Engine-On-Edge
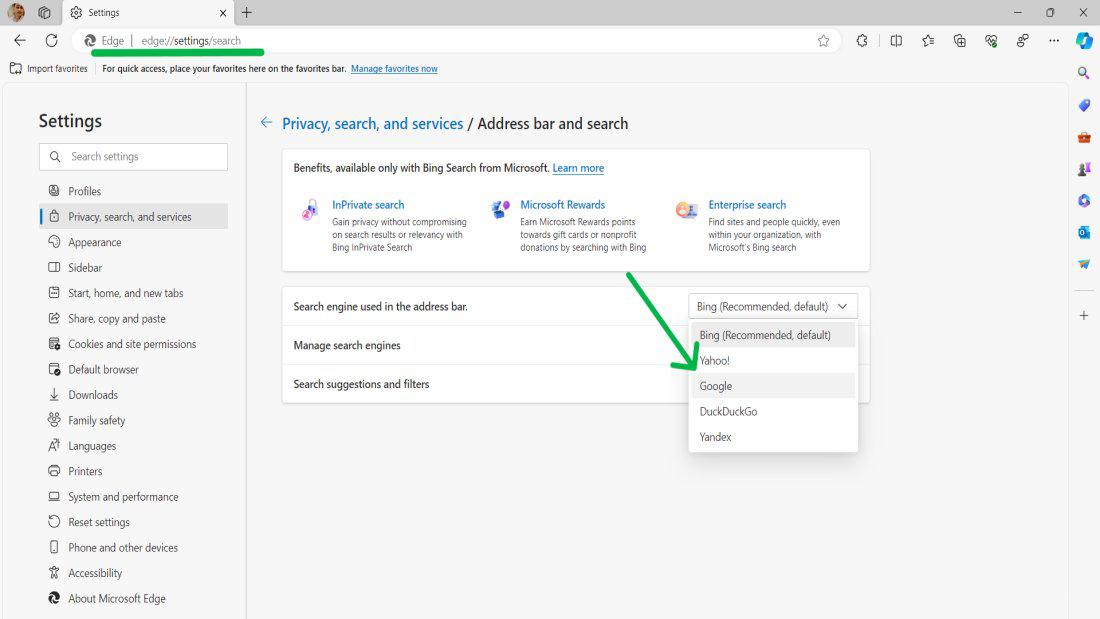
Step 3:
Step 4:
👁 How-To-Disable-Bing-As-Default-Search-Engine-On-Edge-1
Step 5:
Choose your preferred search engine:
👁 How-To-Disable-Bing-As-Default-Search-Engine-On-Edge-2