How to Use the Snipping Tool on Mac: Screenshot & Screen Recording Guide
Last Updated : 20 Jun, 2025
Looking for a snipping tool on your Mac? While macOS doesn't have a tool by that exact name, it includes advanced screenshot and screen recording features. This guide covers everything you need to know.
macOS doesn't have a tool named "Snipping Tool" like Windows, but it offers several built in features that serve the same purpose. Below are the different methods to capture screenshots and use snipping like tools on any mac, regardless of the macOs version.
Using Keyboard Shortcuts for Screenshots
macOS provides a variety of keyboard shortcuts for snipping parts of your screen:
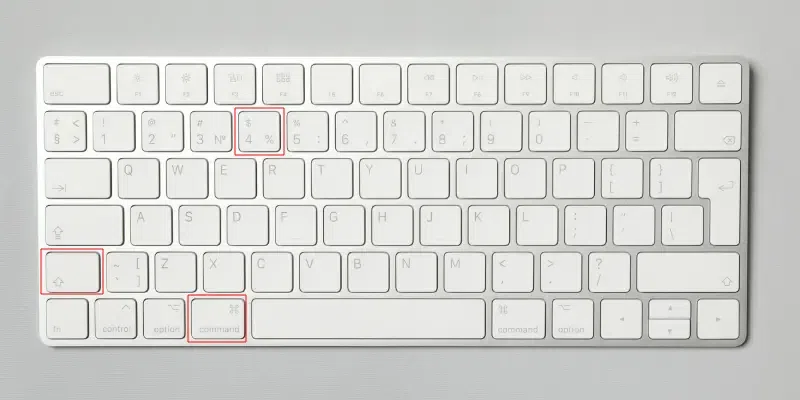
Capture Entire Screen
Press Command + Shift + 3 to capture the entire screen.
The screenshot will be saved on your desktop by default.
Use the menu to select Capture > Selection, Window, or Screen.
Using Third-Party Snipping Tools
If you need advanced features like scrolling screenshots, consider third-party apps:
Snagit: Offers annotation, editing, and video capture.
Lightshot: Lightweight tool for quick snips and uploads.
Greenshot: Free and simple tool for Mac users.
Explore other best snipping tool alternatives for MacBook if you're looking for features beyond what macOS provides such as scrolling capture, cloud integration, or advanced annotation capabilities.
Adding Snipping Tool to the Touch Bar
If you have a MacBook with a Touch Bar, you can add a shortcut for taking screenshots directly on the Touch Bar for quick access.
Step 1: Open System Preferences
Go to System Preferences and click on Keyboard.
Step 2: Customize the Touch Bar
In the Keyboard settings, click on Customize Control Strip.
Drag the Screenshot icon from the available items to the Touch Bar area.
Step 3: Use the Touch Bar
Now, anytime you want to take a screenshot, just tap the Screenshot icon on the Touch Bar for quick access to screen capture options.
Tips and Tricks for Snipping on Mac
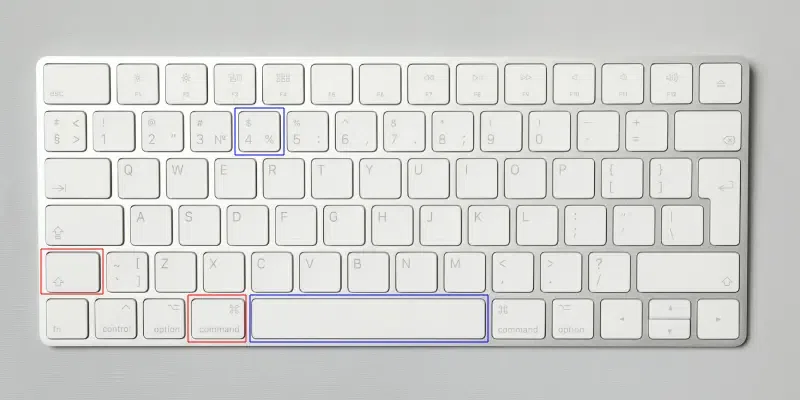
Change Save Location: Open Screenshot Toolbar (Command + Shift + 5), click Options, and choose a new location like a folder or clipboard.
Edit Screenshots: Click the floating thumbnail after taking a screenshot to annotate or crop it.
Timer Option: Use the toolbar to set a timer (5 or 10 seconds) for better preparation before capturing.
Snipping Tool Mac Help (Optional)
Screenshots Not Saving on Desktop
Check if the save location has been changed in the Screenshot Toolbar Options.
Reset the save location to Desktop by pressing Command + Shift + 5, clicking Options, and selecting Desktop.
Crosshairs or Toolbar Not Working
Restart your Mac, as it may resolve temporary issues.
Ensure that shortcuts are enabled:
Go to System Settings > Keyboard > Shortcuts > Screenshots and verify the settings.
How to Reset Screenshot Settings on Mac (Using Terminal)
If you encounter any persistent issues, reset screenshot settings using Terminal:
defaults delete com.apple.screencapture
killall SystemUIServer
Conclusion
Whether you’re using keyboard shortcuts, the Screenshot Toolbar, or third-party apps, macOS provides adaptable snipping tools for all your screenshot needs. With these tips, tricks, and troubleshooting steps, you can capture and customize your screenshots like a pro on any Mac device.
