 |
VOOZH | about |
|
VOOZH | about |
Spring Security 6 has made setting up security in Spring applications easier and more straightforward by moving away from the older WebSecurityConfigurerAdapter method. This new approach helps you configure security in a clearer and more flexible way. In this article, we will learn how to set up user login (authentication) and permissions (authorization) in a Spring Boot 3.0 app using this updated framework. We will focus on how to use a database to handle user information, which helps in managing security more effectively.
With this new method, managing user security becomes simpler and more scalable. It makes it easier to set up and adjust security features as your application grows, keeping your authentication and authorization processes secure and up-to-date.
This article will focus on database authentication for Spring Security 6.
This diagram shows the basic authentication flow.
This represents how a system verifies and grants access to users or services.
Use Spring Initializr to generate a new Spring Boot project with the following configurations:
Include the following dependencies:
For the complete configuration, you can refer to the Maven Repository to find the exact versions and additional details.
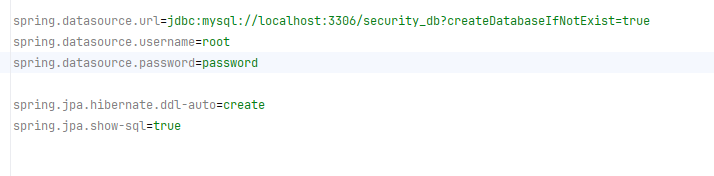
Configure your application.properties file with necessary settings for your database and Spring Security.
In this step, we will define the User model that represents the user entity in your database and implements the UserDetails interface from Spring Security. This model is crucial for integrating database-driven authentication with Spring Security.
The User class represents a user entity in a Spring Security context, implementing the UserDetails interface. It provides user information such as username, password, and authorities. The getAuthorities method converts a delimited string of authorities into a collection of GrantedAuthority objects for security roles.
The UserDetails interface is a core part of Spring Security. It provides a way to retrieve user information necessary for authentication and authorization. When you implement this interface, you tell Spring Security how to get details about a user from your data source (e.g., a database).
Importance:
In Spring Security 6, methods like isAccountNonExpired(), isAccountNonLocked(), and isCredentialsNonExpired() return true by default unless overridden.
Create a service to handle user details and authentication. This service implements the UserDetailsService interface, essential for fetching user information during authentication.
Why this Service is Implemented?
In essence, this service is crucial because it bridges the gap between your application's user data and Spring Security, ensuring secure and smooth authentication processes.
In this step, we create a repository interface for accessing user data in the database.
The UserRepo interface simplifies database interactions for user data and provides a way to retrieve user details by username, which is essential for authenticating users in your application
In this step, we define a controller to handle HTTP requests and interact with the UserService.
Controller Overview:
/home: Accessible by everyone./student: Restricted to users with the "STUDENT" authority./admin: Restricted to users with the "ADMIN" authority./create: Allows creation of new users by accepting username and password.In this step, we set up the security configuration for our Spring Boot application. This involves defining how authentication and authorization are handled, and securing our endpoints.
Configuration Breakdown:
@Configuration and @EnableWebSecurity enable Spring Security in the application.authenticationProvider() sets up the provider using DaoAuthenticationProvider to handle user details and password encoding.securityFilterChain(HttpSecurity httpSecurity) configures HTTP security, including CSRF protection, basic authentication, and request authorization.passwordEncoder() provides a bean for encoding passwords with BCrypt.Step 1: Start The Server
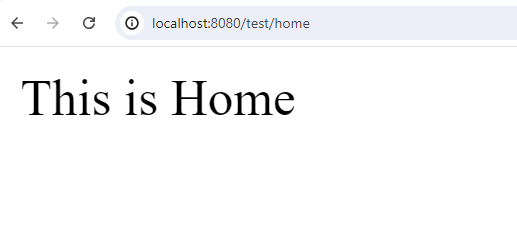
Step 2: Check First Public endpoint it's working or not
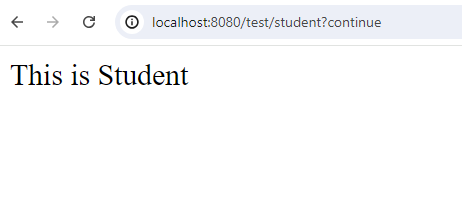
Step 3: Check All secured Endpoints working or not
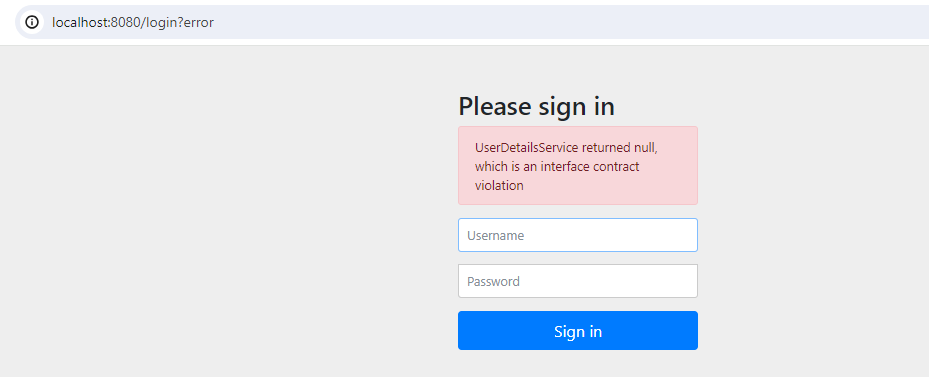
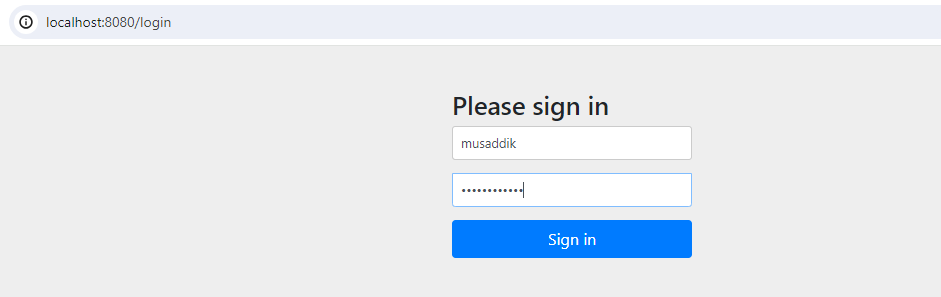
When we try to access any secured endpoint it's redirect to login page.
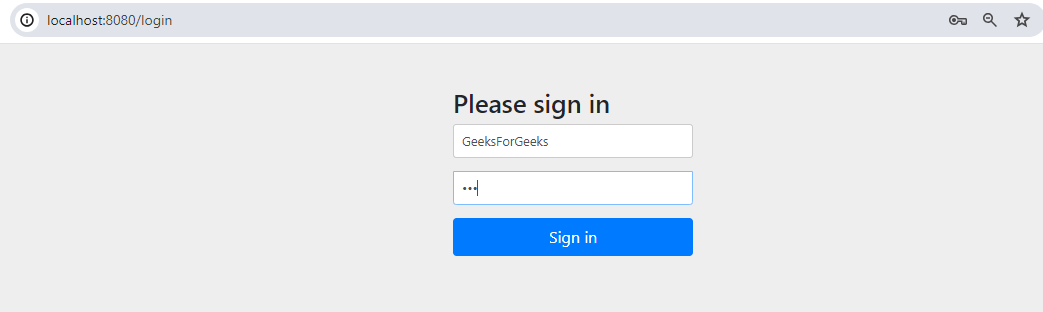
Let's try to access with Any Username & password:
When We are trying to give wrong usename & password it'll fetch the error.
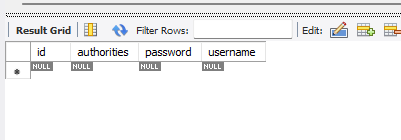
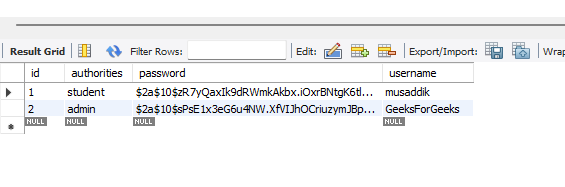
Let's See the what is username & password are stored in our MySQL tables.
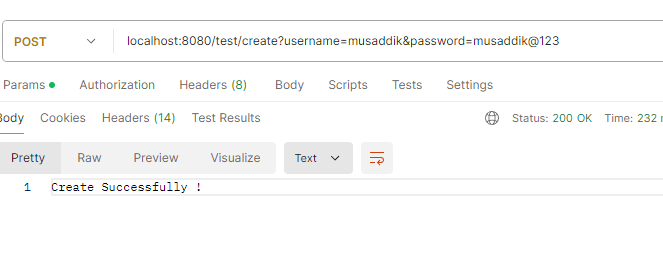
Create a new User.
This user is always have student authority int our case because ewhen we creating the new user this always student authorites our service logic because we want to secure application so we can't give access any user to define it's authority for admin we create admin from database layer or you can define seprate admin for your controller according to you need.
Now let's again check the Database,
We Create Admin manually for security purpose now let's check using this data can we login the endpoints.
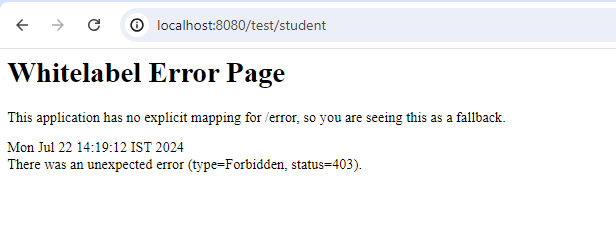
If we try to login with who has admin authority, is it login? let's check,
It returns 403 as status with type Forbidden.
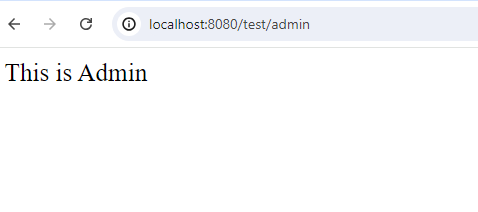
And we are also expecting this because it's unauthorized for user so we cannot access with wrong credential, now let's try to login admin page with admin credential.
In this article, we covered how to implement authentication and authorization in a Spring Boot 3.0 application using Spring Security 6. We moved from the old WebSecurityConfigurerAdapter approach to a more modern, component-based setup. Key steps included:
This setup ensures that your application is both secure and scalable, with proper management of user roles and credentials.