 |
VOOZH | about |
|
VOOZH | about |
Spring Data JPA simplifies database operations in Spring Boot applications by reducing boilerplate code and providing built-in methods for data access. In this article, we will learn how to retrieve records from a MySQL database using the findById() method, which fetches data based on the primary key and returns an Optional for safe null handling.
Follow these steps to create, configure, and run a Spring Boot application that retrieves records from a MySQL database using findById() method in Spring Data Jpa.
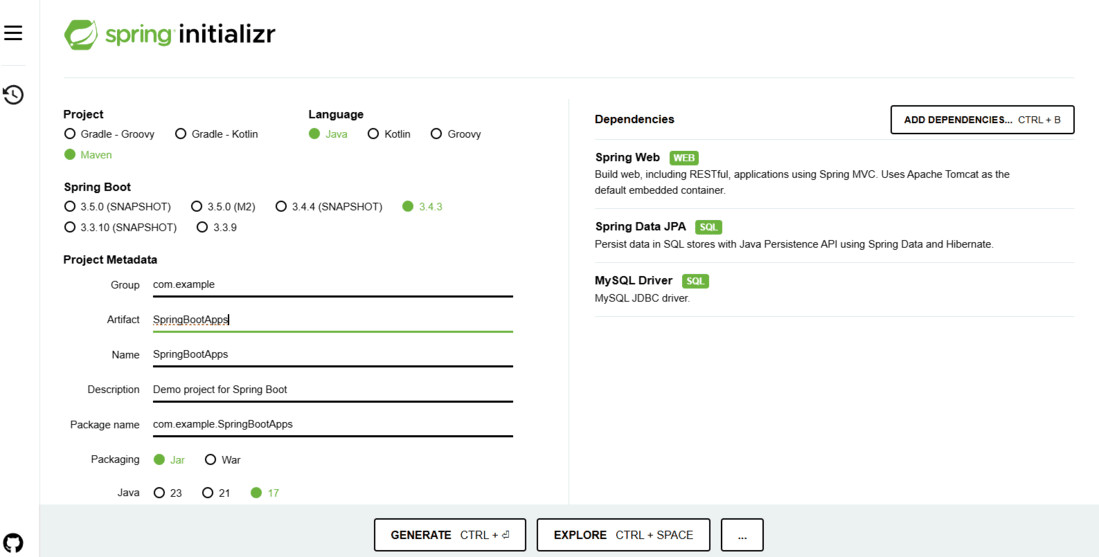
Go to Spring Initializr and generate a Spring Boot project with the following dependencies:
Extract the zip file. Now open a suitable IDE and then go to File -> New -> Project from Existing Sources and select pom.xml. Click on import changes on prompt and wait for the project to sync.
👁 ImageNote: Ensure the same JDK version is selected while importing the Maven project. Also, configure the database connection in application.properties before running the application.
Modify the pom.xml file to include the necessary dependencies:
spring.datasource.url=jdbc:mysql://localhost:3306/userdb
spring.datasource.username=root # replace with your MySQL username
spring.datasource.password=yourpassword # replace with your MySQL password
spring.jpa.hibernate.ddl-auto=update
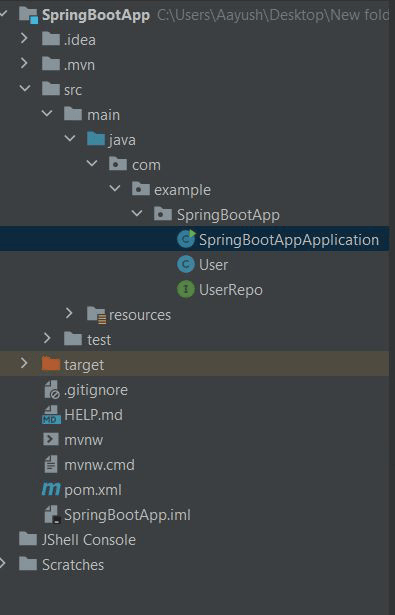
Project Directory Structure:
Create a User entity in src/main/java/com/example/model/User.java:
Define a repository interface in src/main/java/com/example/repository/UserRepository.java:
Create a service to interact with the database in src/main/java/com/example/service/UserService.java:
Implement a controller to handle HTTP requests in src/main/java/com/example/controller/UserController.java:
Start the Spring Boot application using:
mvn spring-boot:run
Output:
👁 Image
Once the application is running, test the API using Postman or a browser:
GET http://localhost:8080/users/1
Expected Output (JSON Response):
{
"id": 1,
"name": "Aayush"
}