In this article, we will be exploringXML-based Injection in Spring. and also creating a sample course management system using ApplicationContext that manages the complete lifecycle of a bean from its creation to destruction in a seamless manner.
XML-based injection
- XML-based injection refers to security vulnerabilities that can occur in Spring applications when untrusted data is used within XML configuration files without proper validation or encoding.
- Spring makes extensive use of XML files like beans.xml, applicationContext.xml and web.xml to define the core application context and wiring.
- When the application initializes, these payloads would be parsed as valid XML by the underlying frameworks and libraries. This allows executing arbitrary code on the server, such as creating or invoking Spring beans.
How Spring uses XML configuration files:
- Spring relies heavily on XML configuration files to define the application context and wiring between application components. The beans.xml file defines Spring beans and their dependencies. The applicationContext.xml file defines the overall application context.
- The web.xml file configures web-specific aspects for Spring MVC apps. Any external data used within these files becomes vulnerable to XML injection.
Common places for XML configuration (beans, context, web):
- Bean definitions: If names, properties etc. of Spring beans defined in beans.xml contain external input, it can lead to code execution.
- Application context: Files set via contextConfigLocation in web.xml or properties are at risk if they contain external values.
- Web configuration: Initializer classes, servlet definitions in web.xml can be abused if they include attacker values.
Step-by-Step Implementation of XML-Based Injection in Spring
Step 1: Create a new Spring Project
- Go to Spring Initializr (https://start.spring.io/) and select Maven or Gradle project.
- Add required dependencies like Web, JPA etc.
- Download the generated project zip file.
- Open the downloaded project zip file in Spring Tool Suite (STS) or your preferred IDE.
👁 Project CreationProject Structure:
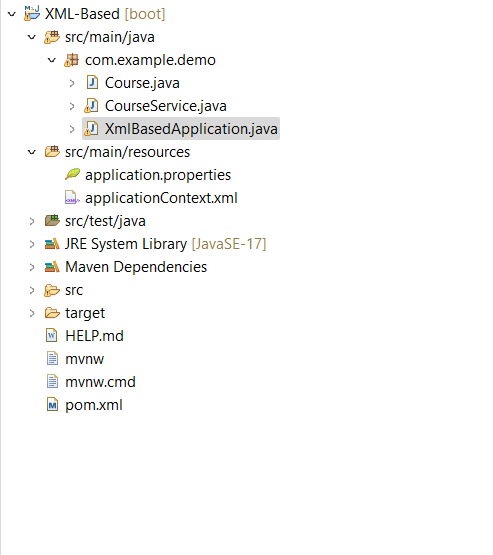
Below is the structure of the Project.
👁 Project StructureStep 2: Model class [Course.java]
The above Course class defines the properties of a course like id, name, fees and duration. Getter and setter methods are provided to access and modify these properties.
Step 3: Create a Service class to manage all courses [CourseService.java]
- The above CourseService class acts as a service to manage course operations. It contains a setCourse() method to inject a Course object dependency.
- addNewCourse() method uses this injected Course object to add a new course, defining dependency injection.
Step 4: Configuration file for Spring beans [applicationContext.xml]
The above XML configuration file defines Spring beans for the Course and CourseService classes, injecting the Course dependency into the CourseService bean.
Step 5: Main Class to run the code
Output:
For better understanding refer to the below output video.
👁 Output Video
