 |
VOOZH | about |
|
VOOZH | about |
Deploying a NodeJS application can be a smooth process with the right tools and strategies. This article will guide you through the basics of deploying NodeJS applications.
To show how to deploy a NodeJS app, we are first going to create a sample application for a better understanding of the process.
Step 1: Create a project folder.
mkdir exampleStep 2: Initialize the node application
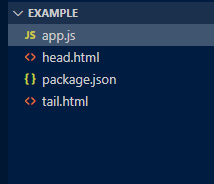
npm init -yStep 3: Create the files as shown in the folder structure and add the following codes.
Step 4: Open the terminal and write the following command to run the server
node app.js 👁 Image
To see your application running, type "localhost:3000" in your browser as URL. We have successfully created the sample application, we are now going to deploy it on the web. There's are many cloud platforms like AWS, Heroku, Digital Ocean, etc.
For this example, we are going to use Heroku since it's easy to use and you can use it to test your apps for free.
NOTE: ALL THE COMMAND ARE PERFORMED INSIDE THE DIRECTORY/FOLDER WHICH CONTAINS YOUR PROJECT
Step 1: Go to https://www.heroku.com/ and register.
Step 2: After completing the registration process, login and go to https://dashboard.heroku.com/apps
Before Proceeding any further, make sure you have installed the latest version of Git on your PC.
Step 3: Go to Getting Started on Heroku with Node.js and download the Heroku Cli for your system.
You can check if Heroku CLI is successfully installed or not by typing the command.
heroku -vIt should look like this
👁 Image
Step 4: Login to heroku using the command line
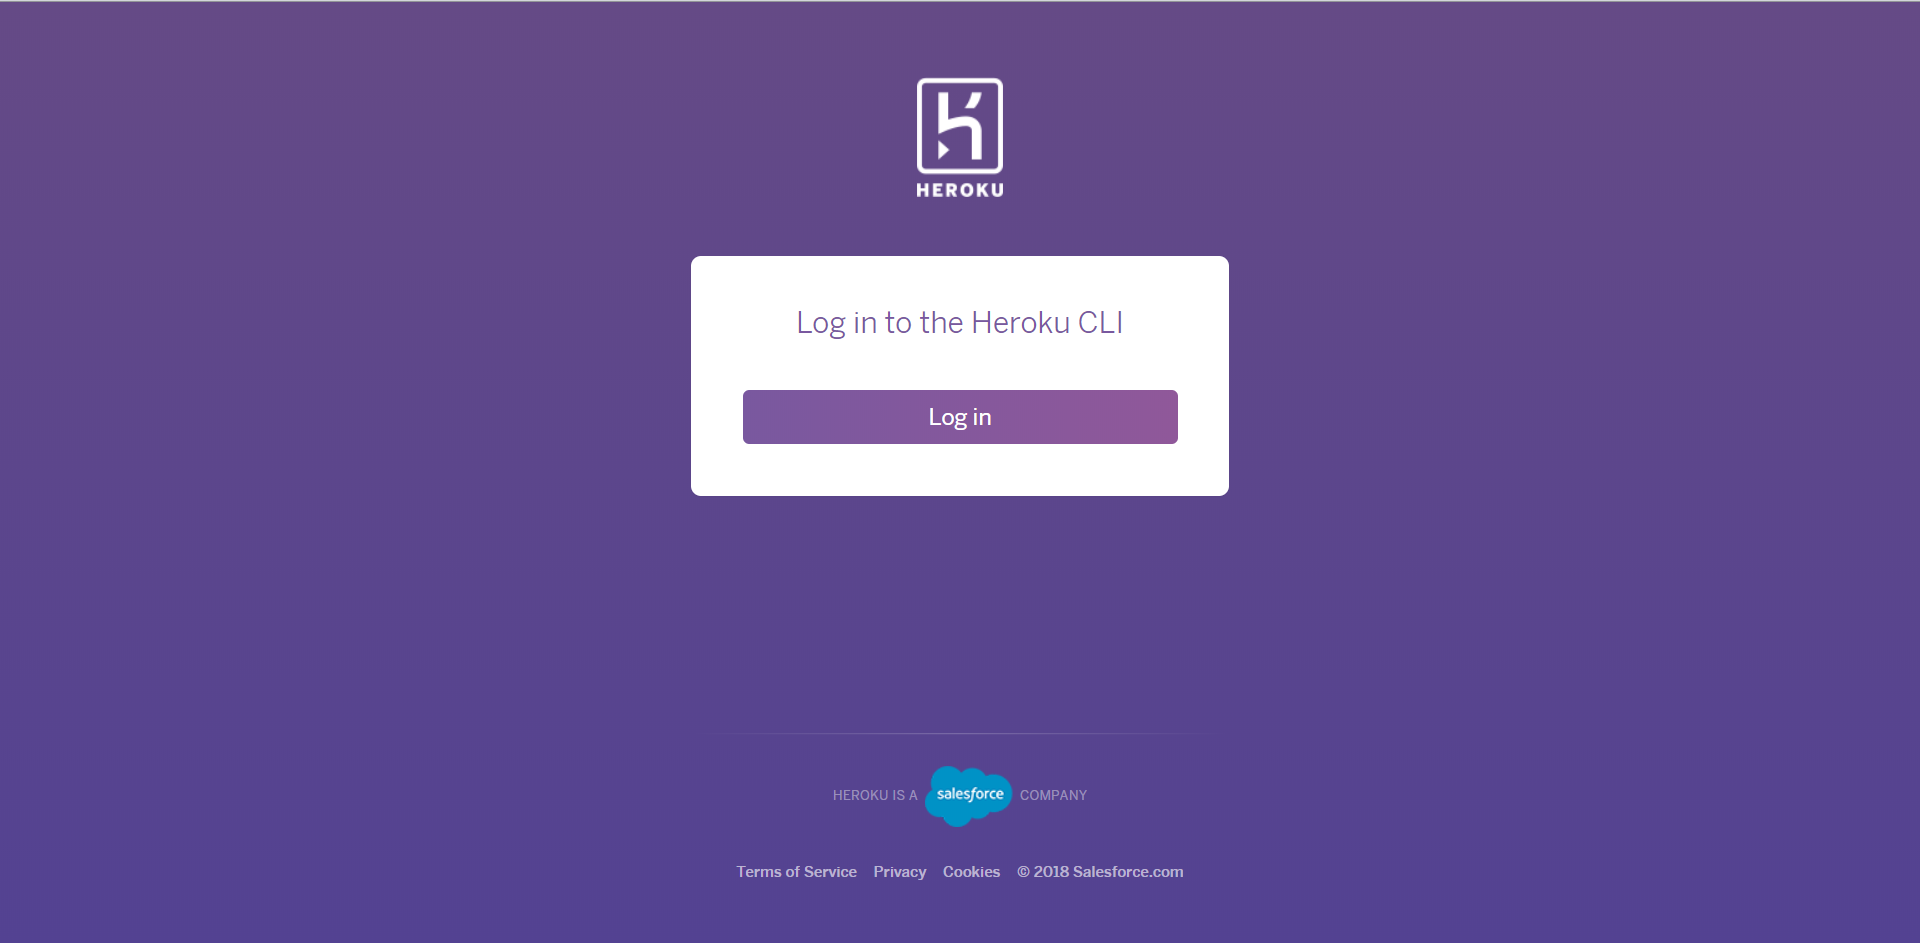
heroku login 👁 ImagePress any key to continue, it will open a new tab in your browser asking you to login in your Heroku account.
👁 ImageClick on Log in Bottom. After you successfully log in, the command line will look like this
👁 Image( Heroku might not connect to Git bash, so use Command Prompt or terminal if it's taking very long to connect i.e. if you were using git bash.
Step 5: Now, make sure we are using Git in the top level directory of our app. We can check if the directory have Git or not by the command.
git status👁 ImageTo make it a git directory, type the command
git init 👁 ImageNow, add and save all the changes using the command.
git add . 👁 ImageNow, we need to commit the files we have added to git. Type
git commit -m "initial commit"👁 ImageStep 6: Create heruko app by command
heroku create👁 ImageThis will create a git remote which is connected to our local git repository
Step 7: Run the following command to deploy the app on heroku server.
git push heroku masterStep 8: After deploying the app run the following command to make sure one instance of app is running.
heroku ps:scale web=1 Step 9: Run the following command to open the app in your browser.
heroku open Now, you might be getting a screen like this
Go to command line and run the following command to check for error. It helps to debug the application.
heroku logs 👁 Image
It says "npm ERR! missing script: start". To fix this problem, we need to set up a start script, the start script tells the server to run "node app.js" after installing the packages.
Step 10: To setup the start script, open package.json inside the example folder and type "start": "node app.js" inside the "scripts" tag.
👁 ImageStep 11: Type the following command in command line We need to push the app to Heroku every time we make changes in it.
git add .
git commit -m "another commit"
git push heroku master
heroku open
Step 12: There's still a problem. The problem is still not fixed. We are using PORT: 3000 but Heroku doesn't. Heroku uses a dynamic port, we cannot fix it to 3000. If we want our application to work on Heroku we need to add the following line in the app.js file
.listen(process.env.PORT || 3000, function(...));
Step 13: Again run the following command.
git add .
git commit -m "another commit"
git push heroku master
heroku open
Congratulations, you have successfully deployed your first web application.
Note: If your application uses MongoDB then you will have to deploy MongoDB server separately on some other cloud platform.