 |
VOOZH | about |
|
VOOZH | about |
Winston is the versatile and popular logging library for Node.js, It is widely used due to its flexibility and powerful features. It allows the developers to log information to various sources (e.g., console, files, databases) and provides robust tools for creating custom logs, handling exceptions, and formatting the output.
The Winston is designed to be simple yet extensible. At its core, it operates using the "transports" which determine where your logs are sent. You can log into the files, databases, or even the external logging services. Winston also supports multiple logging levels, custom formats, and stream handling.
These are the following topics that we are going to discuss:
Table of Content
To install Winston, use the npm format below:
npm install winstonOnce installed, The Winston can be required in your application and used to log the messages:
const winston = require('winston');

const logger = winston.createLogger({
 level: 'info',
 transports: [
 new winston.transports.Console(),
 new winston.transports.File({ filename: 'combined.log' })
 ]
});

logger.info('Information message');
logger.error('Error message');
In above example, The Winston is configured to log at the info level and send logs to both console and a file.
Logging in the Winston is achieved by calling methods like logger.info, logger.error, logger.warn, etc., which correspond to different log levels. These methods automatically format log message and pass it to appropriate transports.
logger.warn('Warning message');This logs a warning message depending on level set in logger configuration.
To create the logger, use winston.createLogger(). This method takes an object where you define log level, transports and any additional settings:
const logger = winston.createLogger({
 level: 'debug',
 transports: [
 new winston.transports.Console(),
 ]
});The Winston is stream-based and each transport can write to the different streams. The info object is passed around internally which includes the metadata like timestamp, level and the message. You can also run the Winston in objectMode if you need to handle the streams of objects instead of strings.
The Winston allows you to customize format of your logs. You can apply different formatting using the winston.format. A few common formats are:
const logger = winston.createLogger({
 format: winston.format.combine(
 winston.format.timestamp(),
 winston.format.simple()
 ),
 transports: [
 new winston.transports.Console()
 ]
});You can combine the multiple formats using winston.format.combine(). This allows you to stack formats on top of each other by enhancing the flexibility of log output.
const customFormat = winston.format.combine(
 winston.format.timestamp(),
 winston.format.printf(({ timestamp, level, message }) => {
 return `${timestamp} [${level}]: ${message}`;
 })
);Winston supports the string interpolation for inserting the dynamic data into log messages using %s placeholders.
logger.info('User %s has logged in', username);You can filter info objects using custom formats or by defining the filters within transports.
const filterOnlyErrors = winston.format((info) => {
 return info.level === 'error' ? info : false;
});

const logger = winston.createLogger({
 format: filterOnlyErrors(),
 transports: [new winston.transports.Console()]
});The Winston allows you to create your custom formats using a format function:
const myFormat = winston.format((info) => {
 info.message = info.message.toUpperCase();
 return info;
});The Winston supports several built-in log levels such as error, warn, info, verbose, debug and silly. These levels are all numeric means lower levels are more critical and the higher levels are more verbose.
The logger outputs logs that match or exceed a set level. If the level is set to warn then it will log warnings and the errors but not info or debug messages.
const logger = winston.createLogger({
 level: 'warn',
 transports: [
 new winston.transports.Console()
 ]
});You can define the custom logging levels in Winston:
const customLevels = {
 levels: {
 critical: 0,
 error: 1,
 warn: 2,
 info: 3
 }
};

const logger = winston.createLogger({
 levels: customLevels.levels,
 transports: [new winston.transports.Console()]
});The Transports in Winston determine where log messages go. The Common transports include:
Console: Logs to console.
File: Writes logs to the file.
Http: Sends logs over the HTTP.The Winston allows using multiple transports of same type such as logging to the multiple files or consoles:
const logger = winston.createLogger({
 transports: [
 new winston.transports.File({ filename: 'error.log', level: 'error' }),
 new winston.transports.File({ filename: 'combined.log' })
 ]
});You can create custom transports by extending the winston.Transport. The Custom transports give you more control over where and how the logs are stored.
The Transports have options like level, silent and the handleExceptions which allow you to fine-tune their behavior.
filename: File path for log file.
level: Logging level for transport.
handleExceptions: Set to true to handle uncaught exceptions.The Winston can capture uncaught exceptions and log them. This is useful in the production environments to track the unexpected errors.
To capture the uncaught exceptions, use handleExceptions option:
const logger = winston.createLogger({
 transports: [
 new winston.transports.Console({ handleExceptions: true })
 ]
});By the default, Winston exits a process after an uncaught exception. You can change this behavior:
logger.exitOnError = false;const logger = winston.createLogger({
rejectionHandlers: [
new winston.transports.Console()
]
});By calling the logger.profile(label), Winston starts tracking time. When you call it again with same label it logs duration between start and the stop points. This is useful for the performance monitoring and identifying slow parts of your code. Profiling logs include the message indicating how long operation took, making it easier to identify the bottlenecks in system.
Streaming logs in the Winston allows you to pipe log output to writable streams such as files or the network connections. This is useful when you want to process or analyze the log data in real-time or store it externally. The Winston supports both object-mode and traditional streaming modes that ensuring compatibility with various stream consumers. You can use logger.stream() method to hook into Winston logs and continuously feed them into any writable stream for further manipulation or the storage.
Querying logs in the Winston enables you to retrieve specific log entries based on defined criteria such as time range or log level. By using logger.query() method you can filter the logs and control number of results returned. This feature is particularly useful for analyzing the historical logs or monitoring application behavior over time. The Query results can be processed or displayed in different formats which allows for easy integration with reporting tools or the dashboards. This functionality enhances the log management and helps with troubleshooting and performance the analysis.
The Winston includes default logger so that you do not need to create one explicitly:
winston.info('This is a default log');For more on using Winston default logger check Winston default logger documentation. This covers how to configure and customize default logger and explains its limitations and some common use cases.
You can await logs to ensure they are written before continuing:
await logger.log('info', 'Message to log');Winston supports an asynchronous logging. For more details on how to ensure the logs are fully written before proceeding refer to Winston logging flow documentation. This explains how the Winston handles I/O with different transports and how to handle logging in an asynchronous contexts.
By default, The Winston sends logs to stdout or stderr. You can route them to console directly if needed. The Winston allows you to control which levels go to stdout or the stderr. For further reading you can explore to Winston Console transport documentation which explains how to modify stderrLevels to route specific log levels to different outputs.
To run the Winston tests, use:
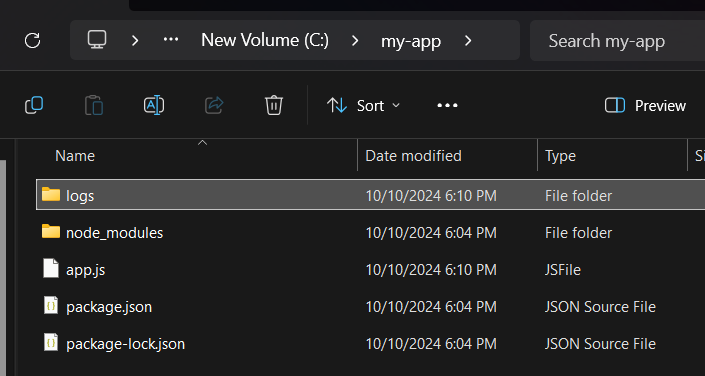
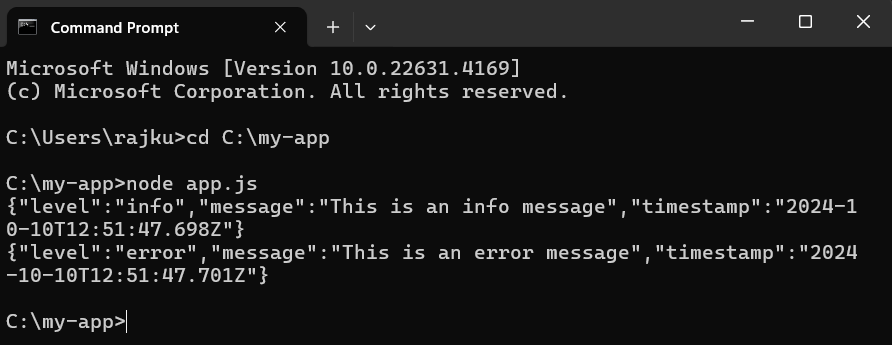
npm testExample: Once the Winston is installed you can start using it in your application. Below is how to set up the basic logging with Winston:
C:\my-app\app.js:Output:
Here, In this example:
Winston is highly versatile and the powerful logging library that caters to wide range of logging needs in the Node.js applications. With support for multiple transports, customizable logging levels and formats, Winston can be easily tailored to meet requirements of any application whether it is logging to the file, database or external services. The library is ability to handle an uncaught exceptions and promise rejections makes it invaluable for the production environments for ensuring critical errors and issues are captured for analysis.