 |
VOOZH | about |
|
VOOZH | about |
The project is a Real-Time Auction Platform developed using Node.js Express.js and MongoDB database for storing details where users can browse different categories of products, view ongoing auctions, bid on items, and manage their accounts. The platform also allows sellers to list their products for auction.
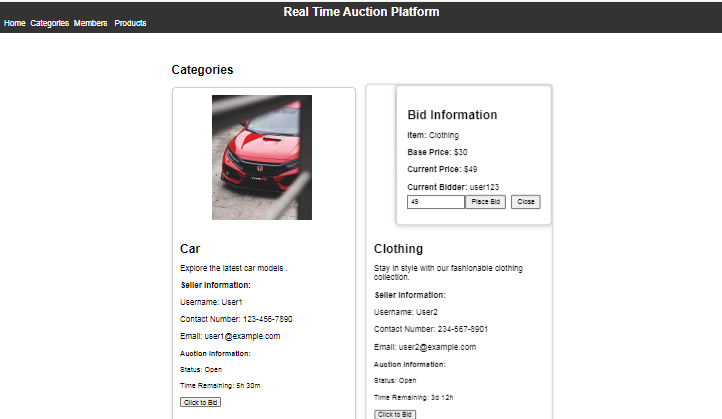
Output Preview: Let us have a look at how the final output will look like.
👁 Screenshot-2024-03-19-004622
Step 1: Create the project folder using the following command.
mkdir auction-platform
cd auction-platform
Step 2: Create a new project directory and navigate to your project directory.
mkdir server
cd server
Step 3: Run the following command to initialize a new NodeJS project.
npm init -yStep 4: Install the required the packages in your server using the following command.
npm install express body-parser cors mongoose👁 Screenshot-2024-03-19-005006
The updated Dependencies in package.json :
"dependencies": {
 "axios": "^1.6.7",
 "body-parser": "^1.20.2",
 "cors": "^2.8.5",
 "express": "^4.18.3",
 "mongoose": "^8.2.1",
}
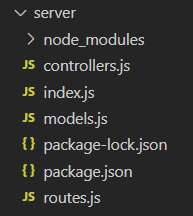
Code Example: Create the required files as shown in the folder structure and add the following codes.
Step 5: Start the Server
In the terminal, navigate to the server folder and run the following command to start the server:
node index.jsStep 6: Go to root directory and create the React application using the following command.
npx create-react-app client
cd client
Step 7: Install the required packages in your application using the following command.
npm i react-router-dom axios styled-components
The updated Dependencies in package.json file will look like:
"dependencies": {
 "axios": "^1.6.7",
 "react": "^18.2.0",
 "react-dom": "^18.2.0",
 "react-router-dom": "^6.22.3",
 "react-scripts": "5.0.1",
 "styled-components": "^6.1.8",
 "web-vitals": "^2.1.4"
}
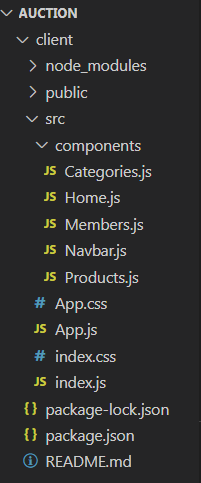
Code Example: Create the following files as shown in folder structure and add the following codes.
npm startOutput: