 |
VOOZH | about |
|
VOOZH | about |
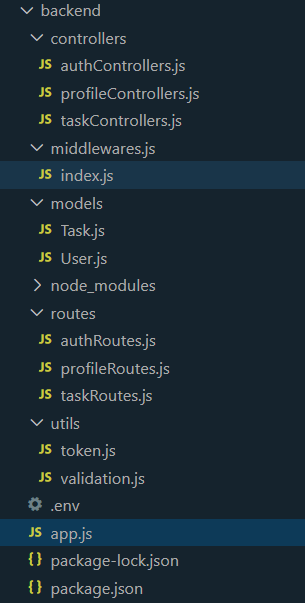
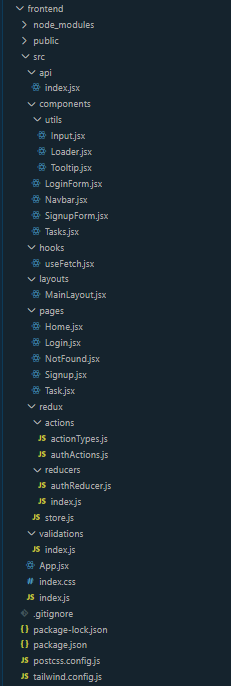
Task Management System is one of the most important tools when you want to organize your tasks. NodeJS and ExpressJS are used in this article to create a REST API for performing all CRUD operations on task. It has two models User and Task. ReactJS and Tailwind CSS are used to create a frontend interface part in which we can add, delete, and update tasks.
Output Preview: Let us have a look at how the final output will look like
👁 Screenshot-2024-02-25-095821
Write the Approach(flow of the app) in bullets points.
Step 1: Create the folder for the project:
mkdir task-manager
cd task-manager
Step 2: Create the server by using the following commands.
mkdir server
cd server
npm init -y
Step 3: Install the required dependencies:
npm i express mongoose nodemon bcrypt dotenv cors jsonwebtokenDependencies(backend): The updated dependencies in package.json file for backend will look like.
"dependencies": {
 "bcrypt": "^5.0.1",
 "cors": "^2.8.5",
 "dotenv": "^16.0.0",
 "express": "^4.17.3",
 "jsonwebtoken": "^8.5.1",
 "mongoose": "^6.2.3"
},
"devDependencies": {
 "nodemon": "^2.0.22"
}
Step 4: Create an .env file and store the following in it.
PORT = 8000
MONGODB_URL = mongodb://localhost:27017
ACCESS_TOKEN_SECRET = ENTERTEXTHERE
Step 5: Now add the following code in the respective files
Step 6: To start the server run the following code.
nodemon app.jsStep 7: Now go to the project's root directory and create the frontend application
npx create-react-app frontend
cd frontend
Step 8: Install the required dependencies.
npm i axios react-redux react-router-dom react-toastify redux redux-thunkStep 9: To use Tailwind CSS in the react application, first we need to install it
npm install tailwindcss@latest postcss@latest autoprefixer@latestThen we will create a tailwind configuration file
npx tailwindcss initNow setup the tailwind.config.js file
module.exports = {
 content: [
 "./src/**/*.{js,jsx,ts,tsx}",
 ],
 theme: {
 extend: {
 colors: {
 "primary": "#24ab8f",
 "primary-dark": "#268d77",
 },
 animation: {
 "loader": "loader 1s linear infinite",
 },
 keyframes: {
 loader: {
 "0%": { transform: "rotate(0) scale(1)" },
 "50%": { transform: "rotate(180deg) scale(1.5)" },
 "100%": { transform: "rotate(360deg) scale(1)" }
 }
 }
 },
 },
 plugins: [],
}
Now include tailwind css in index.css file
@tailwind base;
@tailwind components;
@tailwind utilities;
Now you can use classes of Tailwind CSS in your files.
Dependencies(Frontend): The updated dependencies in package.json file for frontend will look like.
"dependencies": {
 "@testing-library/jest-dom": "^5.17.0",
 "@testing-library/react": "^13.4.0",
 "@testing-library/user-event": "^13.5.0",
 "axios": "^1.6.7",
 "react": "^18.2.0",
 "react-dom": "^18.2.0",
 "react-redux": "^9.1.0",
 "react-router-dom": "^6.22.1",
 "react-scripts": "5.0.1",
 "react-toastify": "^10.0.4",
 "redux": "^5.0.1",
 "redux-thunk": "^3.1.0",
 "web-vitals": "^2.1.4"
}
Step 10: Now add the following code in respective components in frontend part
Step 11: Now start the react application
npm start