 |
VOOZH | about |
|
VOOZH | about |
For developers working in corporate environments, admin privileges to install software might be restricted. But if we’re looking to explore PostgreSQL on our own, here’s a step-by-step guide on installing PostgreSQL without admin rights on a Windows system. Follow this guide to set up PostgreSQL manually, create a database, and verify the installation without requiring administrative permissions.
This section covers the entire process of manually setting up PostgreSQL, from downloading binaries to configuring our environment for easy access. By following these steps, you’ll have PostgreSQL running on your system, enabling us to work with databases seamlessly without admin access.
To begin, we’ll need the PostgreSQL binary files rather than the standard installer:
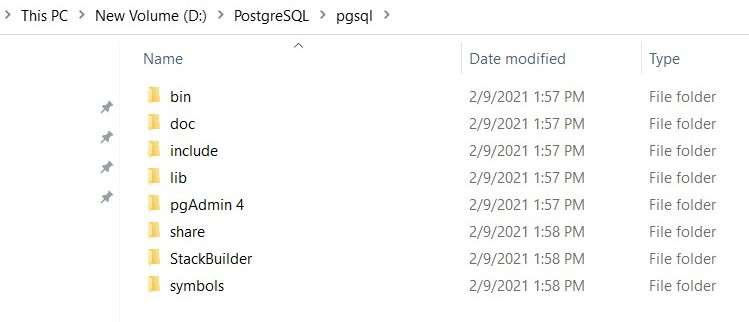
D:\PostgreSQL.After downloading, follow these steps to organize PostgreSQL on your system:
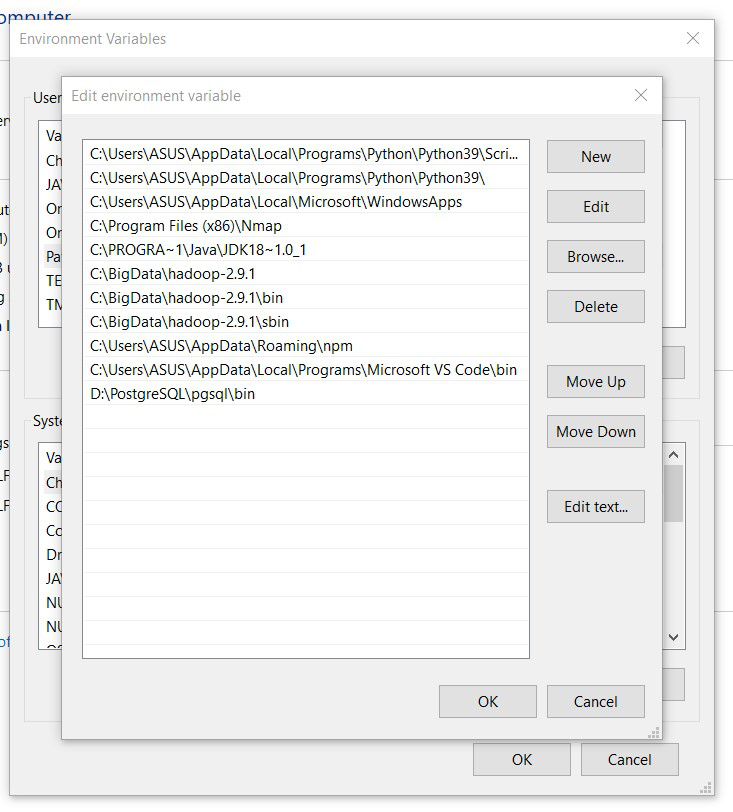
D:\PostgreSQL\pgsql) to serve as your PostgreSQL directory.Adding PostgreSQL to your Environment Variables allows you to run PostgreSQL commands from any command prompt window:
bin directory, such as D:\PostgreSQL\pgsql\bin.Well, Congratulations!!. At this point, we have successfully configured PostgreSQL in your windows system.
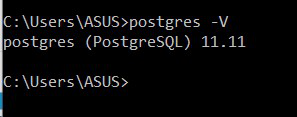
To verify if it is installed properly, use the following commands. Hence, the below command checks the PostgreSQL server version:
postgres -VThe below command checks the PostgreSQL client version:
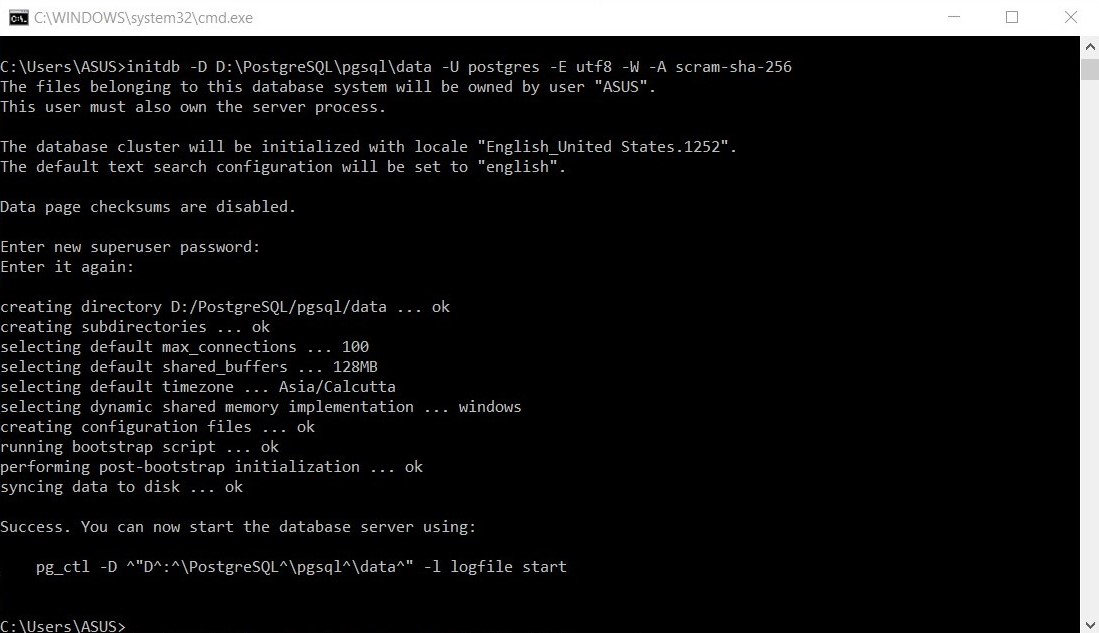
psql -VNow it is time to initialize the database and associate a user to this. The database will be initialized at the location given by us (data folder in this case). The command for this is as follows:
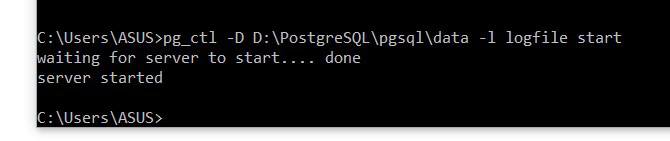
initdb -D D:\PostgreSQL\pgsql\data -U postgres -E utf8Start the database by running the following command. This command starts PostgreSQL and logs its activities in a logfile.
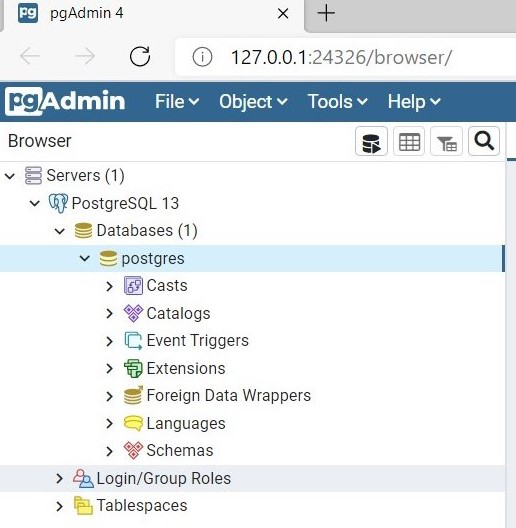
pg_ctl -D D:\PostgreSQL\pgsql\data -l logfile startOnce our server is running, we can create a new database using either psqlor pgAdmin. Click on the Database section to create a new database for our work purpose and begin using it. Here’s the command to create a sample database named school.
CREATE DATABASE school;To stop the database, use the same command used for start database as used in Step 8 and replace start by stop.
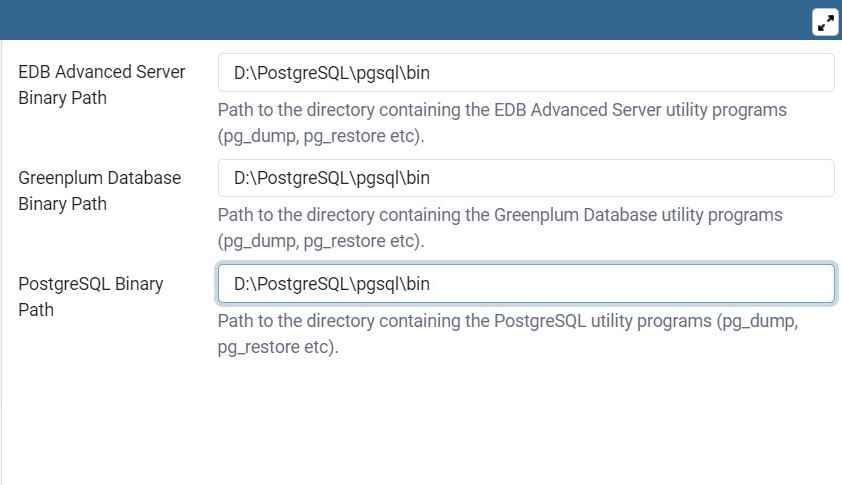
pg_ctl -D D:\PostgreSQL\pgsql\data -l logfile stopTo access advanced utilities in pgAdmin like backup, restore, and upgrade, set up the binary paths:
bin path (e.g., D:\PostgreSQL\pgsql\bin).With this guide, we can now install PostgreSQL on Windows without admin rights and have complete control over the database environment. By following these steps, we’ll be able to fully use PostgreSQL, create and manage databases, and work with pgAdmin4 without needing administrator permissions on our machine. This setup allows developers to explore PostgreSQL's powerful capabilities in restricted environments, maximizing productivity and flexibility.