 |
VOOZH | about |
|
VOOZH | about |
Adam (Adaptive Moment Estimation) is an optimizer that combines the best features of two optimizers i.e Momentum and RMSprop. Adam is used in deep learning due to its efficiency and adaptive learning rate capabilities.
To use Adam in TensorFlow we can pass the string value 'adam' to the optimizer argument of the model.compile() function. Here's a simple example of how to do this:
model.compile(optimizer="adam")
This method passes the Adam optimizer object to the function with default values for parameters like betas and learning rate. Alternatively we can use the Adam class provided in tf.keras.optimizers. Below is the syntax for using the Adam class directly:
Adam(learning_rate, beta_1, beta_2, epsilon, amsgrad, name)
Here is a description of the parameters in the Adam optimizer:
Let's now look at an example where we will create a simple neural network model using TensorFlow and compile it using the Adam optimizer.
We will create a simple neural network with 2 Dense layers for demonstration.
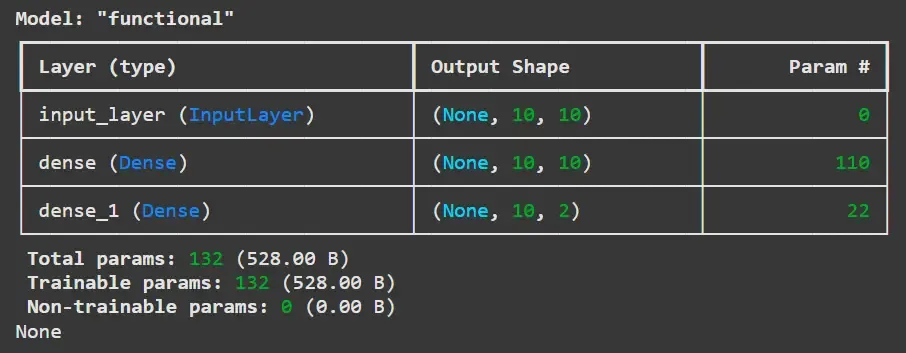
Now, we will create an instance of this model and print the summary to inspect the architecture.
Output:
Before training the model, let's print out the initial weights for the layers.
Output:
For this example we will generate random data to train the model.
Now we compile the model using the Adam optimizer, the categorical cross-entropy loss function and accuracy as the evaluation metric.
Output:
{'name': 'adam', 'learning_rate': 0.0010000000474974513, 'weight_decay': None, 'clipnorm': None, 'global_clipnorm': None, 'clipvalue': None, 'use_ema': False, 'ema_momentum': 0.99, 'ema_overwrite_frequency': None, 'loss_scale_factor': None, 'gradient_accumulation_steps': None, 'beta_1': 0.9, 'beta_2': 0.999, 'epsilon': 1e-07, 'amsgrad': False}
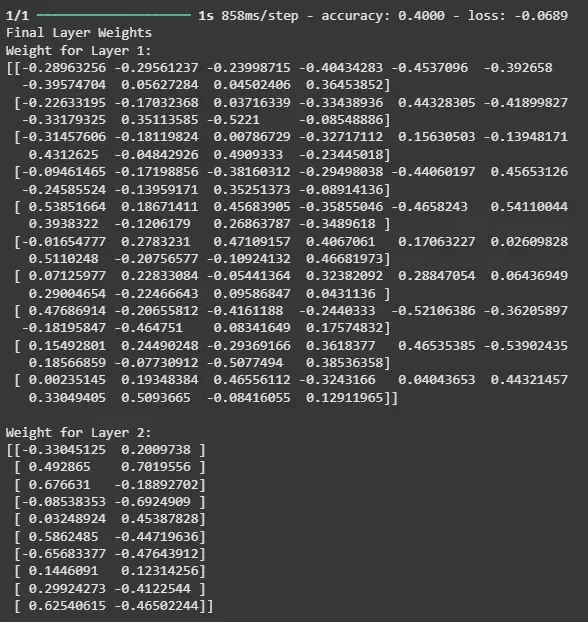
The output shows the default configuration of the Adam Optimizer. Now, let's train the model using the dummy data we generated and check the weights of the model after training.
Output:
The output shows how well the model is performing on the training data based on the loss and accuracy and also allows you to observe how the model's weights have changed as a result of the training process.