 |
VOOZH | about |
|
VOOZH | about |
In this article, we will guide you through the creation of a blog post recommendation system using Django. Our article covers the integration of a user-friendly login system with a registration form, ensuring a seamless experience for your website visitors. Additionally, we have implemented a sophisticated search functionality that allows users to tailor their searches based on preferences and level ranges. This adaptive search system takes into account the varying levels of traffic, providing an efficient and personalized browsing experience for users exploring your blog.
Using this Blog Post Recommendation using the Django system user see the recommended blog according to their preference and also set by the traffic on the blog and also read the article by one simple click. To install Django follow these steps.
To start the project use this command
django-admin startproject core
cd core
python manage.py startapp book
Now add this app to the ‘settings.py’.
INSTALLED_APPS = [
 "django.contrib.admin",
 "django.contrib.auth",
 "django.contrib.contenttypes",
 "django.contrib.sessions",
 "django.contrib.messages",
 "django.contrib.staticfiles",
 "book",
]
File Structure
models.py: This Django code defines two models, "Emenitites" and "Blog." "Emenitites" has a name field, while "Blog" includes fields for blog name, description, price, and a ManyToMany relationship with "Emenitites." Both models use the "__str__" method to display their names, likely for representation in a web application.
views.py : This Django code defines several views. The "home" view renders a page displaying all amenities. The "api_blogs" view processes API requests, filtering blogs based on price and amenities. The "login_page" and "register_page" views handle user authentication and registration, displaying appropriate messages and redirecting users. The "@login_required" decorator ensures that only authenticated users can access the "home" and "api_blogs" views.
core/urls.py :This Django URL configuration file includes the main project's URL patterns. It routes the base URL to the 'book.urls' app, allowing for additional URL patterns to be defined in the 'book.urls' module. The 'admin/' path is also included for Django's admin interface.
book/urls.py: In this Django code snippet, URL patterns are defined for various views. The patterns include a home page (''), an API endpoint for blogs ('api/blogs'), and pages for user login ('login/') and registration ('register/'). These patterns are mapped to corresponding views imported from the 'views' module.
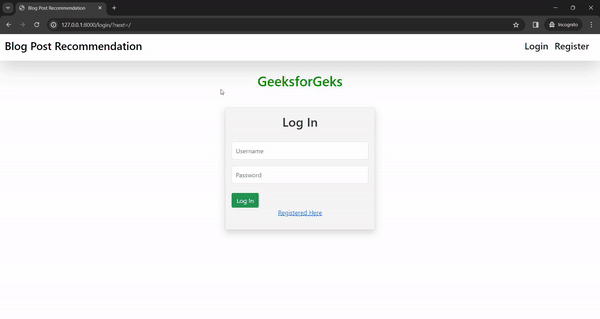
login.html: This HTML code is for a basic login page within a Bootstrap-styled container. It includes fields for a username and password, a “Login” button, and a link to create a new account. The page uses some custom CSS for styling and includes external libraries for additional styling.
register.html: This HTML code is for a simple registration page. It includes fields for a username and password, a “Register” button, and a link to log in. The page uses Bootstrap and Font Awesome for styling and includes custom CSS for additional styling.
home.html : This HTML document creates a webpage for a blog post recommendation system using Django. It includes a navigation bar, styling with Materialize CSS and Font Awesome, and dynamic content loading. The page allows users to select blog types and filter by traffic using a range input. The JavaScript function "getBlogs()" fetches and displays recommended blogs based on user selections, with each blog presented in a card format.
base.html: This HTML document is a template for a webpage using Django. It loads static files, includes Bootstrap and Font Awesome for styling, and creates a navigation bar with login and register links. The title is "Blog Post Recommendation," and it provides a block named "start" for content to be added in derived templates. The page also features a header with "GeeksforGeeks" and includes optional JavaScript with Bootstrap for additional functionality.
admin.py: Here we are registering our models.
Run these commands to apply the migrations:
python3 manage.py makemigrations
python3 manage.py migrate
Create super user by the following command, and then create username, email and password.
python manage.py createsuperuser
Now go to http://127.0.0.1:8000/admin and data to the database.
Run the server with the help of following command:
python3 manage.py runserver
Output
👁 ezgifcom-video-to-gif-converter