 |
VOOZH | about |
|
VOOZH | about |
We will create a simple Django-based newsletter app that allows users to subscribe and unsubscribe using a single form with multiple submit buttons. By leveraging Django's form handling and CSRF protection, we will capture email inputs and store or remove them from the database based on user interaction.
To create the simple newsletter Django app, follow the below steps:
Prerequisites:
Run the following command to create a new Django project:
django-admin startproject newsletter
Navigate to the project directory:
cd newsletter
Next, create a new Django app inside your project. The app will handle the logic and templates for the newsletter functionality.
Run the following command to create the app:
django-admin startapp appnewslatter
Create a new urls.py file inside the "appnewslatter" folder. Now, your project directory should look like the below image.
After creating the app, you need to add it to the INSTALLED_APPS list in your settings.py file, which can be found in newsletter/settings.py. Open the settings.py file and add 'appnewsletter' to INSTALLED_APPS:
INSTALLED_APPS = [
# Other apps
'appnewsletter',
]
Now, set up the URLs for the app by editing the urls.py files.
In newsletter/urls.py, include the URLs of the appnewsletter app:
Next, create a urls.py file inside the appnewsletter directory and add the URL for the homepage.
Inside the appnewsletter app, create a templates folder to store your HTML files. Inside the templates folder, create a news.html file.
Path: appnewsletter/templates/news.html
Add the following code to create a form with two submit buttons, one for subscribing and one for unsubscribing. Both buttons will perform different actions based on the button clicked.
Here:
In the models.py file, define a model to store the email addresses of the subscribers.
Path: appnewsletter/models.py
This model has a single field userEmail that stores the email addresses of the users who subscribe to the newsletter.
To manage the subscriber emails from the Django admin interface, you need to register the model.
Path: appnewsletter/admin.py
In the views.py file, define the logic to handle form submissions. The home view will check which submit button was clicked using the request.POST dictionary.
Path: appnewsletter/views.py
Now that the model is defined, you need to apply the database migrations to create the table in the database.
Run the following commands:
python manage.py makemigrations
python manage.py migrate
Once you've implemented all the steps, it's time to run the project. Run the Django development server using the following command:
Python manage.py runserver
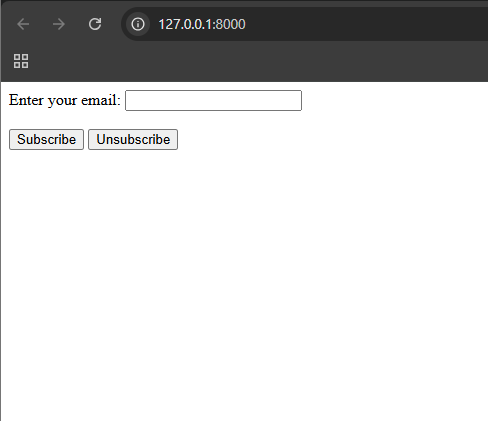
Output
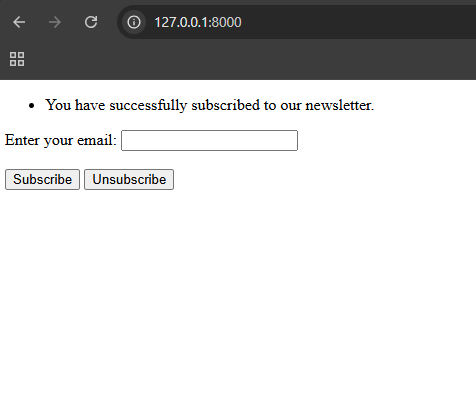
When we enter email and lick on Subscribe button:
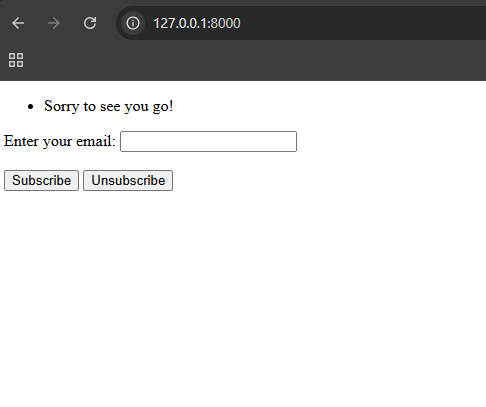
When we again enter the same email and click on Unsubscribe button: