 |
VOOZH | about |
|
VOOZH | about |
Flask is inherently synchronous, meaning each request is processed one at a time. However, modern web applications often require handling multiple tasks simultaneously, such as:
Asynchronous programming allows us to execute multiple tasks concurrently, improving performance and responsiveness.
With Python's built-in asyncio, we can introduce asynchronous behavior in Flask applications, allowing tasks like database queries and API requests to run without blocking the main application thread.
Before using async.io in Flask, let’s understand how asynchronous functions work in Python.
In Python, asynchronous functions are defined using the async def keyword:
Explanation:
To run multiple async functions concurrently, use asyncio.gather():
Explanation:
Now that we have the fundamental understanding of how asynchronus programming works, let's understand how we can implement it in Flask applications with some basic flask app examples:
Flask's traditional database extensions like Flask-SQLAlchemy are synchronous. To perform asynchronous database operations, we can use Tortoise-ORM, an async ORM for Python.
Let's create a basic Flask app that creates a user table, stores user data and fetches it.
Flask does not support async routes by default in a WSGI environment, so to keep using async def routes, we need to install Flask with the "async" extra using this command:
pip install "flask[async]"
Install the Tortoise-orm using this command in terminal:
pip install tortoise-orm aiosqlite
This app wil have features to insert, fetch, and list users asynchronously using Tortoise-ORM.
Code Breakdown:
Adding a user:
1. Run the application using command - python app.py and open Postman Api application to test it.
2. First we need to add a user in the databse, follow these steps to do it:
3. Select POST as the request type.
4. Enter the API URL- http://127.0.0.1:5000/add-user
5. Go to the "Body" Tab, select raw, choose JSON from the dropdown and paste the following in the Body section:
{
"username": "Geek,
"email": "geeks@gfg.org"
}
6. Click send and the user is added in the database.
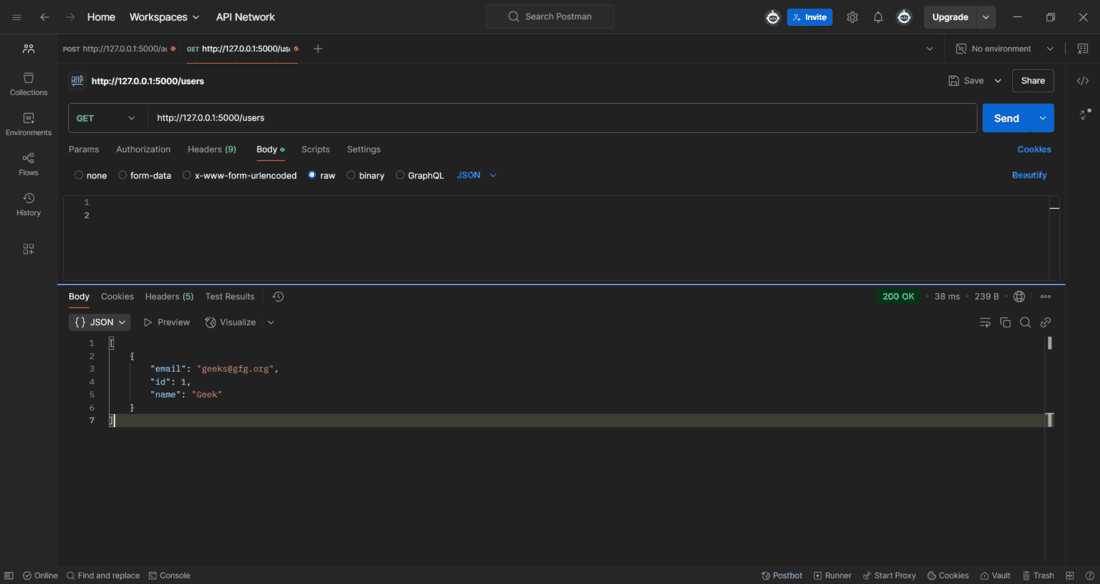
Fetching user data:
To fetch the user data, make a get request to the URL - http://127.0.0.1:5000/users
Flask doesn't natively support background tasks, but we can use asyncio.create_task() for lightweight tasks that run without blocking the main application.
Explanation:
1. background_task() – An asynchronous function that waits for 5 seconds before printing a message.
2. start_task() Route
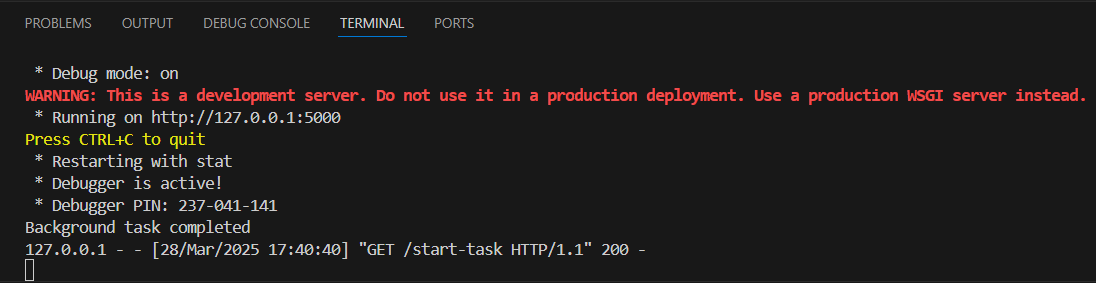
Run the application and open Postman application to make a GET Request on URL- http://127.0.0.1:5000/start-task.
After making the GET request, we will receive a background task completed message in the terminal after 5 seconds of delay.