 |
VOOZH | about |
|
VOOZH | about |
In this article, we are going to apply custom schema to a data frame using Pyspark in Python.
A distributed collection of rows under named columns is known as a Pyspark data frame. Usually, the schema of the Pyspark data frame is inferred from the data frame itself, but Pyspark also gives the feature to customize the schema according to the needs. This can be done easily by defining the new schema and by loading it into the respective data frame. Read the article further to know about it in detail.
The structure of the data frame which we can get by calling the printSchema() method on the data frame object is known as the Schema in Pyspark. Basically, schema defines the structure of the data frame such as data type of a column and boolean value indication (If column's value can be null or not). The schema can be defined by using the StructType class which is a collection of StructField that defines the column name, column type, nullable column, and metadata.
As we know, whenever we create the data frame or upload the CSV file, it has some predefined schema, but if we don't want it and want to change it according to our needs, then it is known as applying a custom schema. The custom schema has two fields 'column_name' and 'column_type'. In this way, we will see how we can apply the customized schema to the data frame by changing the names in the schema.
Syntax: StructType(StructField('column_name_1', column_type(), Boolean_indication))
Parameters:
- column_name_1, column_name_2: These are the column names given to the data frame while applying custom schema.
- column_type: These are the types to be given to columns while applying custom schema.
- Boolean_indication: It takes the input as 'True' or 'False' that defines whether the column contains null value or not.
Example:
In this example, we have defined the customized schema with columns 'Student_Name' of StringType, 'Student_Age' of IntegerType, 'Student_Subject' of StringType, 'Student_Class' of IntegerType, 'Student_Fees' of IntegerType. Then, we loaded the CSV file (link) whose schema is as follows:
Finally, we applied the customized schema to that CSV file by changing the names and displaying the updated schema of the data frame.
Output:
root
 |-- Student_Name: string (nullable = true)
 |-- Student_Age: integer (nullable = true)
 |-- Student_Subject: string (nullable = true)
 |-- Student_Class: integer (nullable = true)
 |-- Student_Fees: integer (nullable = true)
As you know, the custom schema has two fields 'column_name' and 'column_type'. In a previous way, we saw how we can change the name in the schema of the data frame, now in this way, we will see how we can apply the customized schema to the data frame by changing the types in the schema.
Example:
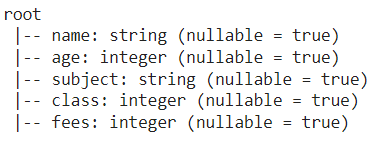
In this example, we have read the CSV file (link), i.e., basically a dataset of 5*5, whose schema is as follows:
Then, we applied a custom schema by changing the type of column 'fees' from Integer to Float using the cast function and printed the updated schema of the data frame.
Output:
root
 |-- name: string (nullable = true)
 |-- age: integer (nullable = true)
 |-- subject: string (nullable = true)
 |-- class: integer (nullable = true)
 |-- fees: float (nullable = true)
The custom schema usually has two fields 'column_name' and 'column_type' but we can also define one other field, i.e., 'metadata'. The metadata is basically a small description of the column. In this way, we will see how we can apply the customized schema using metadata to the data frame.
Example:
In this example, we have defined the customized schema with columns 'Student_Name' of StringType with metadata 'Name of the student', 'Student_Age' of IntegerType with metadata 'Age of the student', 'Student_Subject' of StringType with metadata 'Subject of the student', 'Student_Class' of IntegerType with metadata 'Class of the student', 'Student_Fees' of IntegerType with metadata 'Fees of the student'. Then, we loaded the CSV file (link) whose schema is as follows:
Finally, we applied the customized schema to that CSV file and displayed the schema of the data frame along with the metadata.
Output:
root
 |-- Student_Name: string (nullable = true)
 |-- Student_Age: integer (nullable = true)
 |-- Student_Subject: string (nullable = true)
 |-- Student_Class: integer (nullable = true)
 |-- Student_Fees: integer (nullable = true)

Column 1 : Name of the student
Column 2 : Age of the student
Column 3 : Subject of the student
Column 4 : Class of the student
Column 5 : Fees of the student