 |
VOOZH | about |
|
VOOZH | about |
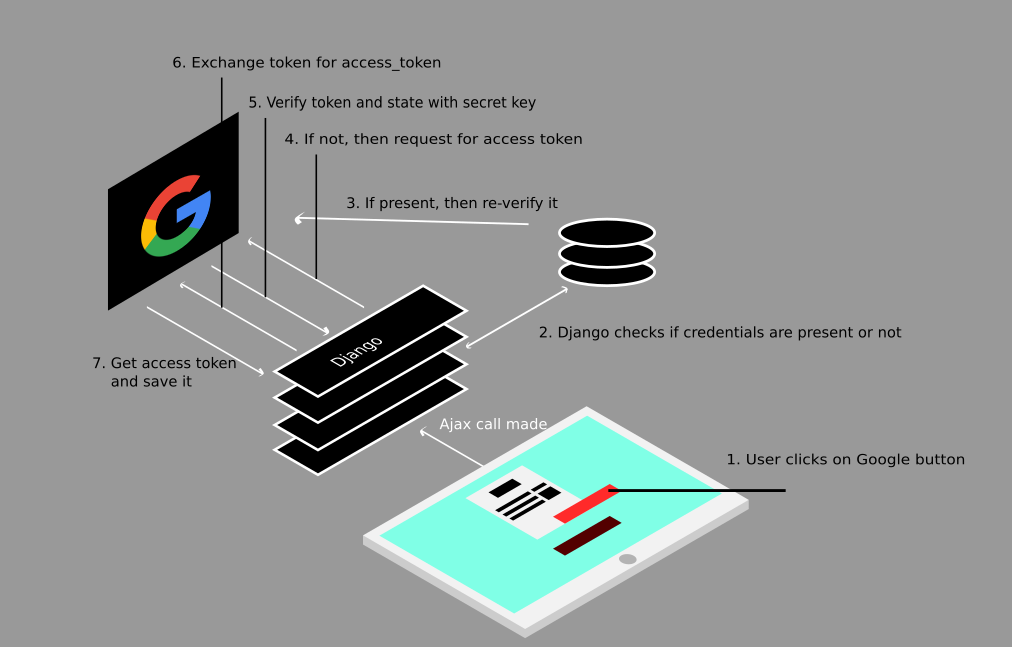
Google OAuth2 is a secure authorization protocol that enables applications to access user data without requiring login credentials. Instead of asking for a username and password, OAuth2 allows users to log in via Google and grants the app permission to access specific services (such as Gmail) on their behalf.
Let's build a Django app from scratch that uses Google OAuth2 to authenticate users and access their Gmail inbox. We’ll use official Google libraries to handle the OAuth flow and interact with the Gmail API.
Consider a project named 'gfg_auth_project' having an app named 'gfg_auth_app'.
Install the required packages:
pip install django google-auth google-auth-oauthlib google-api-python-client
OAuth credentials enable the Django app to securely communicate with Google’s servers. They contain the app’s identity and permissions. A credentials.json file, which includes the client ID, client secret, and redirect URIs, is required for the OAuth 2.0 flow.
Follow these steps to get the credentials file:
For development, enable OAuth over HTTP by setting the environment variable "OAUTHLIB_INSECURE_TRANSPORT" in "manage.py":
Define views for login, callback, and email fetching to handle Google authentication and retrieve emails.
In gfg_auth_app/views.py
In the above views.py:
Template displays the subject, sender, and snippet of each fetched email. If the templates folder does not exist in the "gfg_auth_app" folder, create it. Inside the templates folder, create an "emails.html" file:
Define URL patterns that map specific URL paths to the corresponding views created earlier. This ensures Django can route incoming requests correctly. Create the URL configuration in the app and include it in the project's root URL configuration.
In gfg_auth_app/urls.py:
In gfg_auth_project/urls.py:
When the application URLs are accessed, Django automatically invokes the corresponding view functions.
Start the development server:
python manage.py runserver
Visit: http://127.0.0.1:8000
Output
👁 ImageClicking the "Login with Google" hyperlink redirects to the login page:
👁 ImageAlready logged-in accounts can be selected, or another account can be used. After selecting the account, click the Allow button to grant access. The page then redirects to display the five most recent emails from the selected account:
👁 Image