 |
VOOZH | about |
|
VOOZH | about |
Windows 11 is the most recent version of Microsoft, which brings cool features like improved user experience and efficiency. Windows Copilot is one of such standouts among features as it is an intelligent and powerful tool that serves the purpose of simplifying typical everyday computer operations and tasks. In this article, We will show you how to enable Windows copilot in Windows 11.
Table of Content
It’s always important to update your Windows 11 system before proceeding ahead. Microsoft often comes up with newer versions aimed at strengthening security, increasing stability, and adding more functionality.
Press on the start button, choose “settings” then go to “Windows Update,” and open the tab with the name “check for updates”. Then press this tab and follow the screen commands until you are through with the process of updating your Windows version to ensure that it is up to date. Now you can proceed to the first method.
Step 1: To Enable Windows Copilot open "Settings" from the start menu or use the shortcut key Win + I
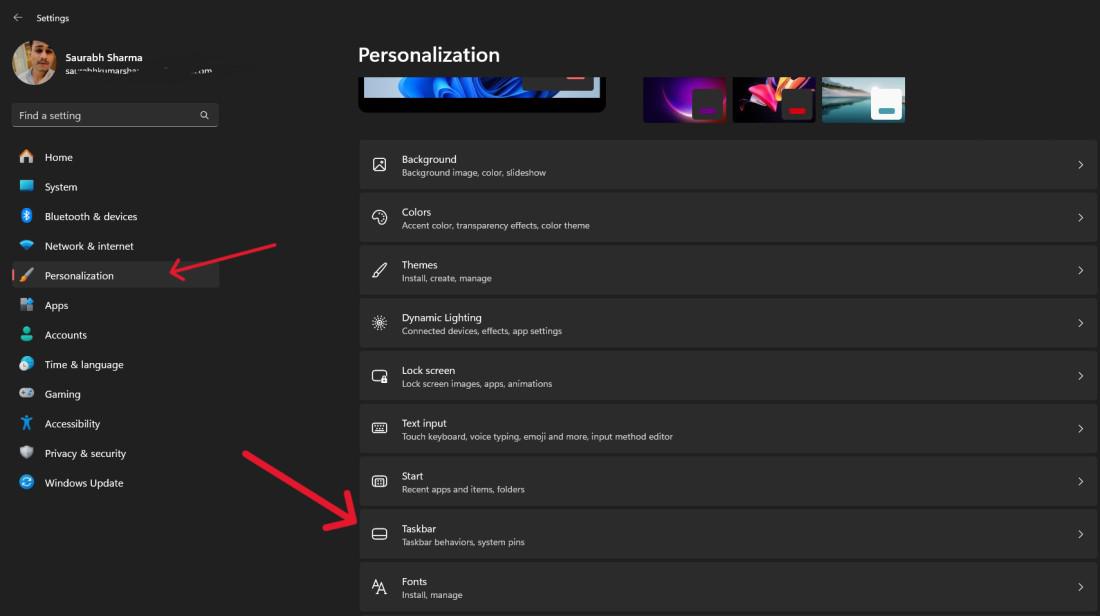
Step 2: After opening the Settings. On Left side click on "Personalization" then on right side click on "Taskbar"
👁 Enable-Windows-Copilot-in-Windows-11
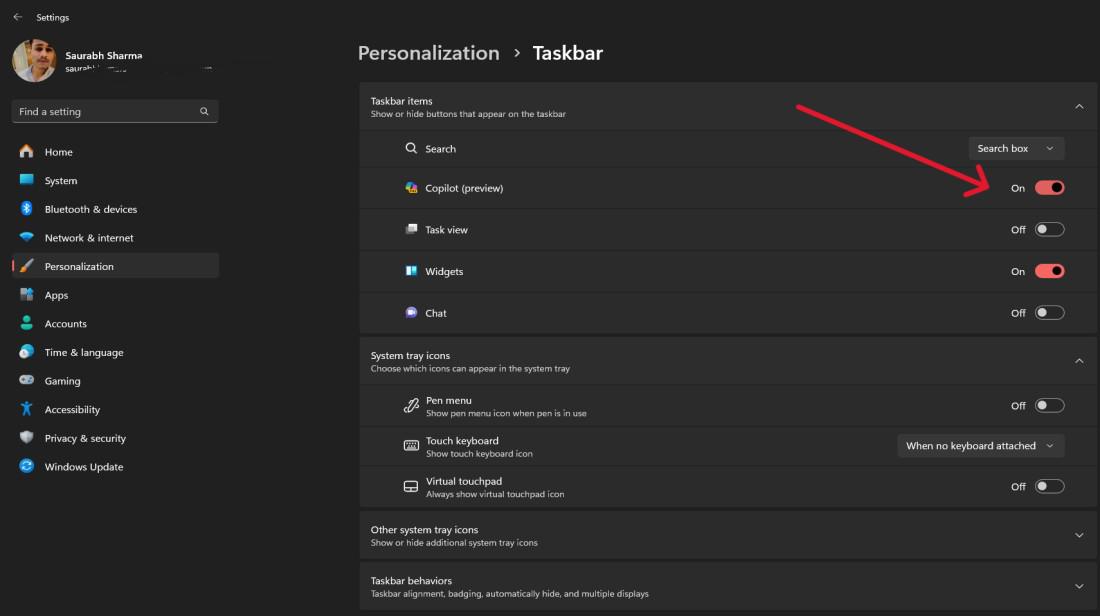
Step 3: Toggle the Copilot switch to enable Windows Copilot.
👁 Enable-Windows-Copilot-in-Windows-11-2
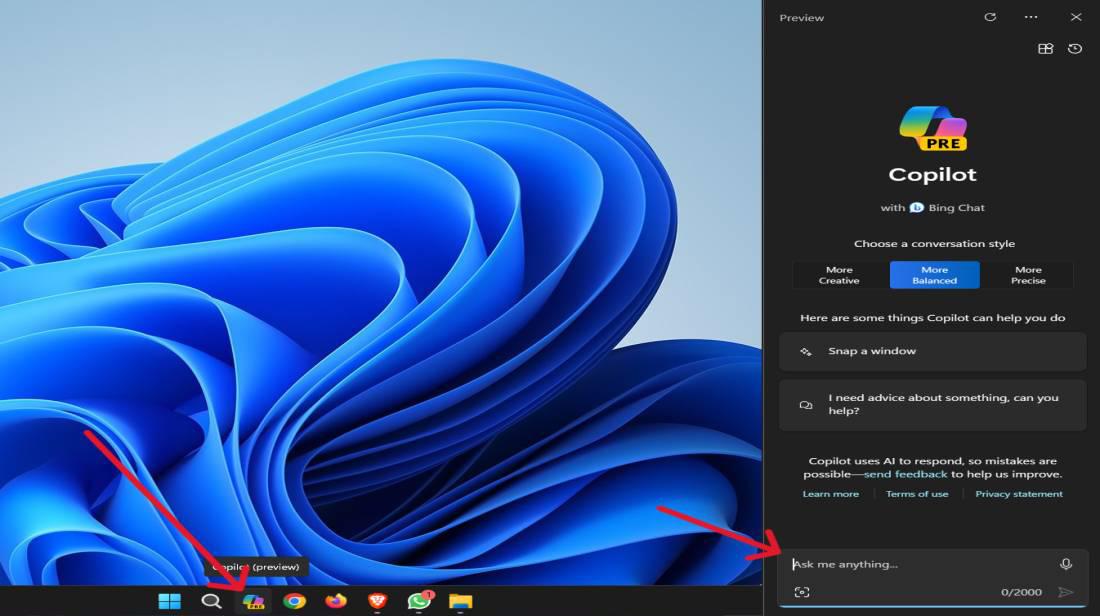
Step 4: On the taskbar, click on the Copilot icon to open Windows Copilot.
👁 How-to-Enable-Windows-Copilot-in-Windows-11-Using-Taskbar
Step 1: Open Start
Step 2: Search for gpedit.msc
Step 3: Click the top result to open the Group Policy Editor
Step 4: Open the following path:
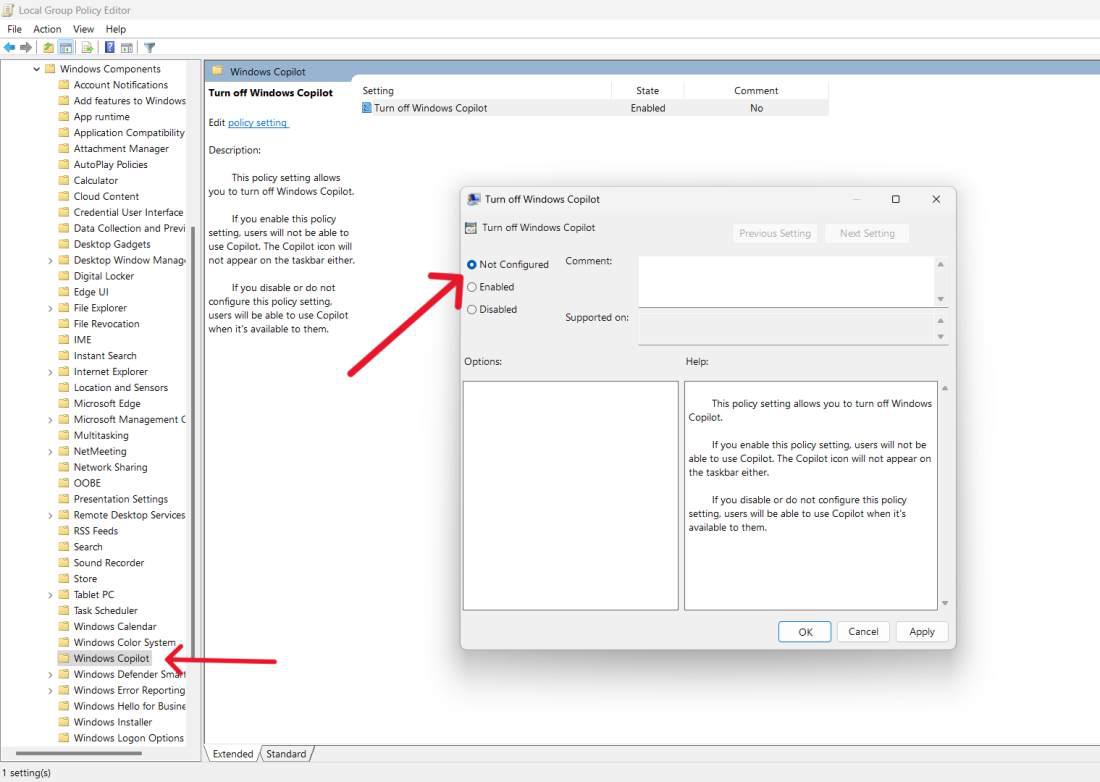
Configuration > Administrative Templates > Windows Components > Windows CopilotStep 5: Double click on Turn off Windows Copilot
👁 How-Enable-Windows-Copilot-Using--Group-Policy-Editor
Step 6: Choose the Not Configured (or Disabled) option.
Step 7: Restart the computer.
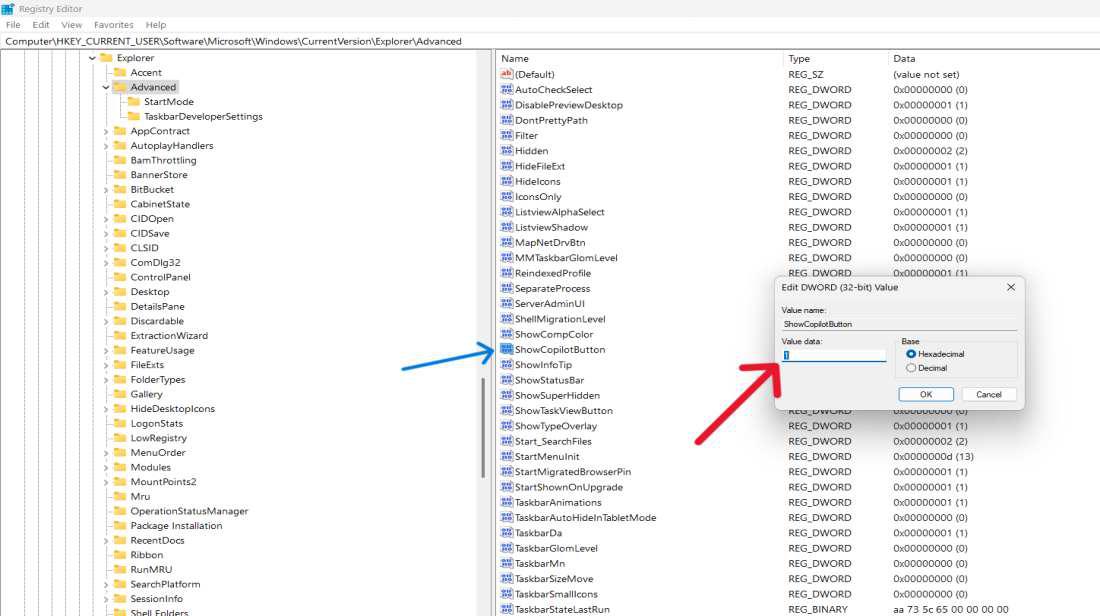
Step 1: Open Run dialog Using the shortcut keys (Win+R) then type regedit hit enter. Click “Yes” if you are asked by User Account Control to allow registry editor to change settings.
Step 2: Go to the Copilot Registry Key. In the Registry Editor, navigate to the following key:
HKEY_CURRENT_USER\Software\Microsoft\Windows\CurrentVersion\Explorer\AdvancedStep 3: To access that feature, double click on ShowCopilotButton DWORD and set it at a value of 1.
👁 How-to-Enable-Windows-Copilot-Using-Registry-Editor
Step 4: Click "OK" button to save.
Step 5: Restart Your PC/Laptop.
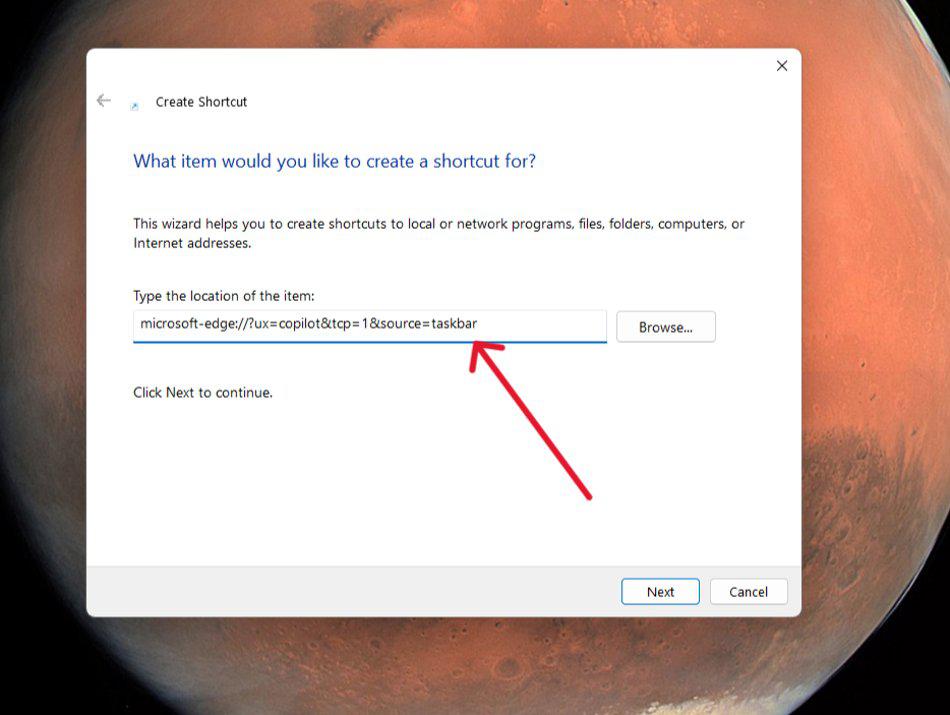
Step 1: Right click on Desktop then from context menu select "New" then click on "Shortcut"
Step 2: Paste this command on input of "Type of the location item:"
microsoft-edge://?ux=copilot&tcp=1&source=taskbar👁 How-To-Enable-Copilot-Using-Shortcut
Step 3: Then Click on "Next" Button
Step 4: Enter the shortcut name.
Step 5: Click on finish button, your shortcut for Windows Copilot will be saved on desktop.
Using Windows Copilot in Windows 11 is easy and enables you to boost your productivity by making it easier to do things on your computer. This means that by utilizing this AI powered aide, you will be able to save time and become more productive when working on Windows 11 innovative functionalities.