 |
VOOZH | about |
|
VOOZH | about |
Zipping and unzipping files is a common task that helps reduce file size or bundle multiple files together for easier sharing. In this guide, we'll cover 3 easy methods to zip and unzip files in Windows 11 for free. Whether you're using built-in features or looking for quick ways to compress files in Windows 11, these methods will make your file management easier. You'll also learn how to extract files in Windows 11 without needing additional software.
Table of Content
A ZIP file, with a ZIP file extension, is a standard type of compressed file that you may encounter. It's like other archive formats. It holds one or more files and/or folders, compressed into a single, smaller file. This makes it easy to move and compress.
Zipped files are important when you want to export multiple files at a time without losing them in between as they use lossless data compression techniques. So let's see how to zip files in Windows. We have suggested here the three most used methods. Let's discuss each method with proper demonstration.
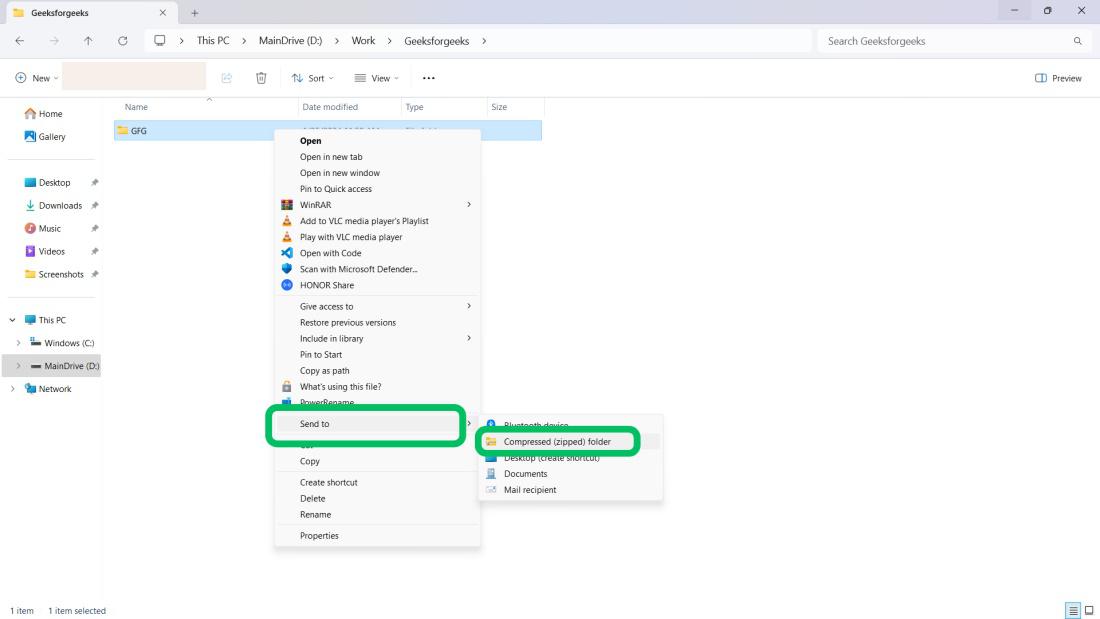
Step 1: Press Win + E to open File Explorer. Select files/folders.
Step 2: Right-click > "Show more options" > "Sent to".
Step 3: Click "Compressed (zipped) folder."
👁 method-1:-zip-files-in-windows-using-file-explorer
Step 4: A new zipped folder (.zip) appears at the same location.
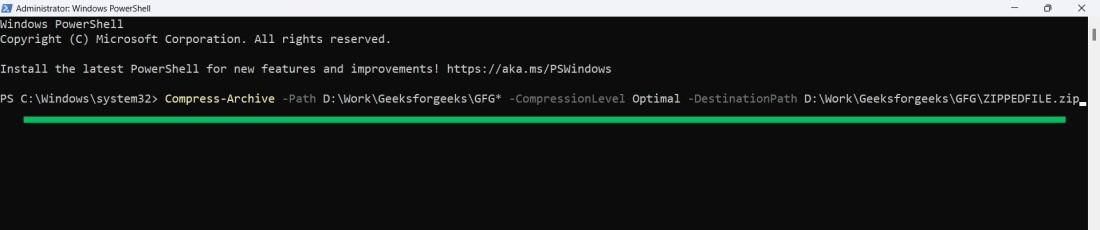
Step 1: Step 1: Press Win + S, type "PowerShell", and open as administrator.
Step 2: In PowerShell, enter the command and press Enter.
Compress-Archive -Path C:\SOURCE\YOUR\FILES\* -CompressionLevel Optimal -DestinationPath C:\DESTINATION\ZIPPEDFILE.zip👁 method-2:-zip-files-in-windows-using-powershell
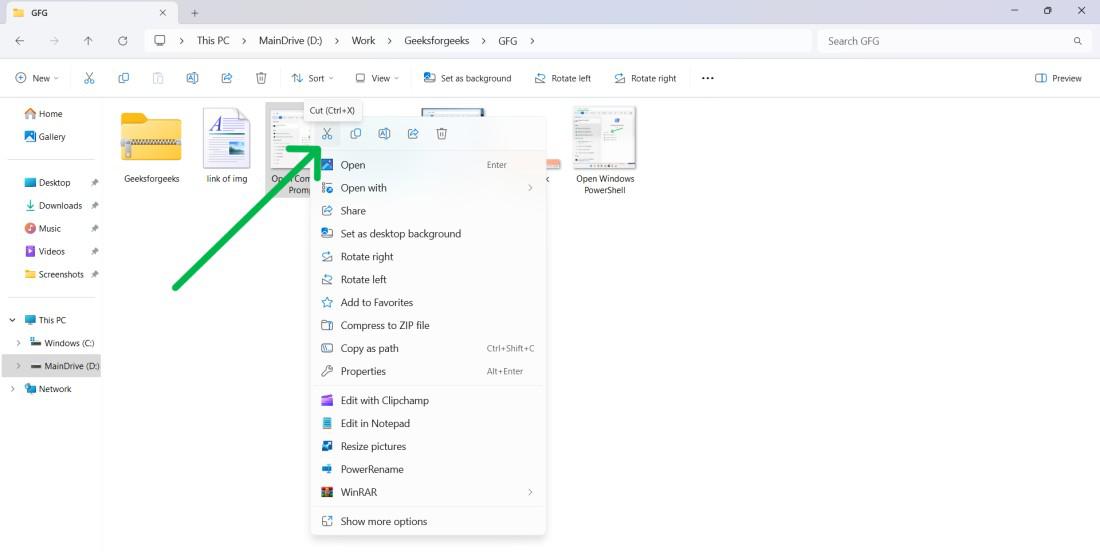
Step 1: Press Win + E to open File Explorer then Select the files or folders you want to compress.
Step 2: Right-click on the file and choose "Cut".
👁 method-3:-zip-files-in-windows-extract-files-individually
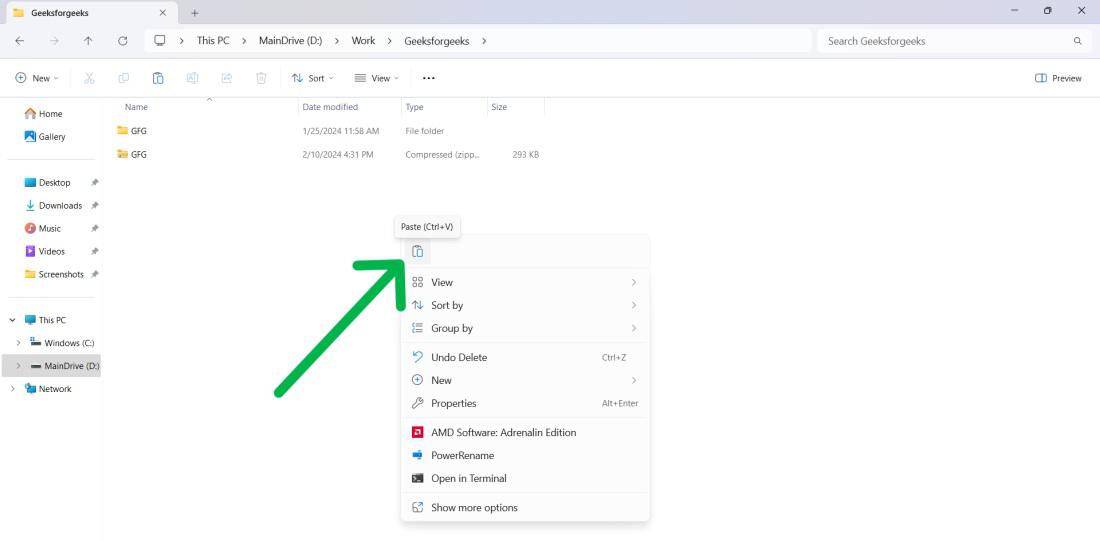
Step 3: Then, Navigate to another folder after that click on space and select "Paste".
👁 method-3:-zip-files-in-windows-extract-files-individually
Hence, we have successfully executed all three methods to zip files in Windows 11.
To extract the content of the zipped files we need to unzip it. We have learned how to zip files in Windows, Now let's see how to unzip files in Windows with proper demonstration.
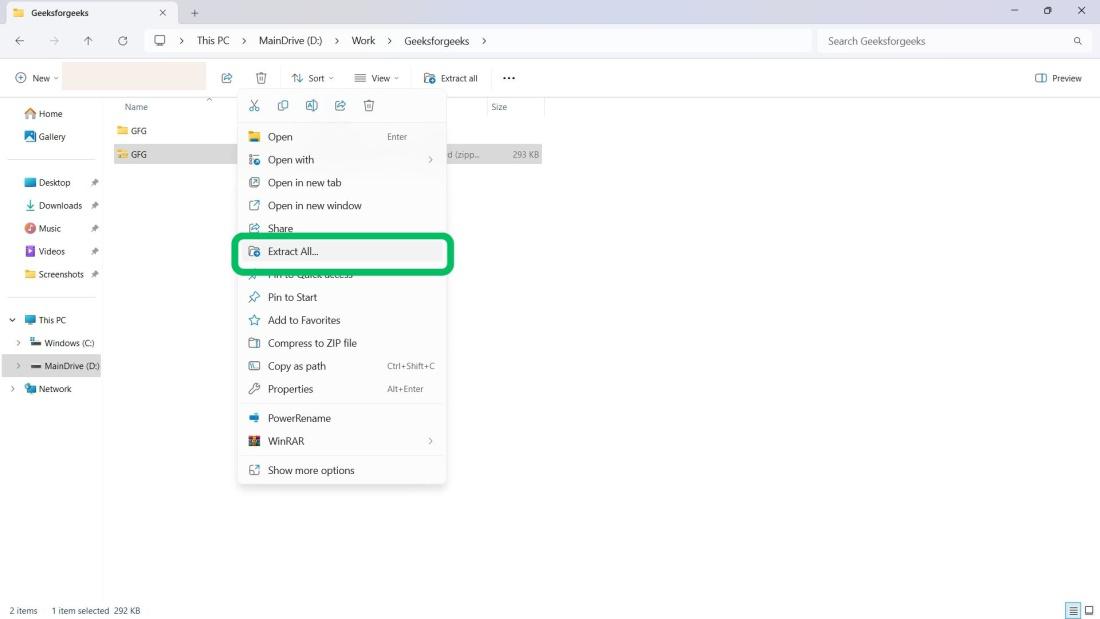
Step 1: Press Win + E to open File Explorer. Select files/folders to extract.
Step 2: Right-click > "Extract All".
👁 method-1:-unzip-files-in-windows-using-file-explorer
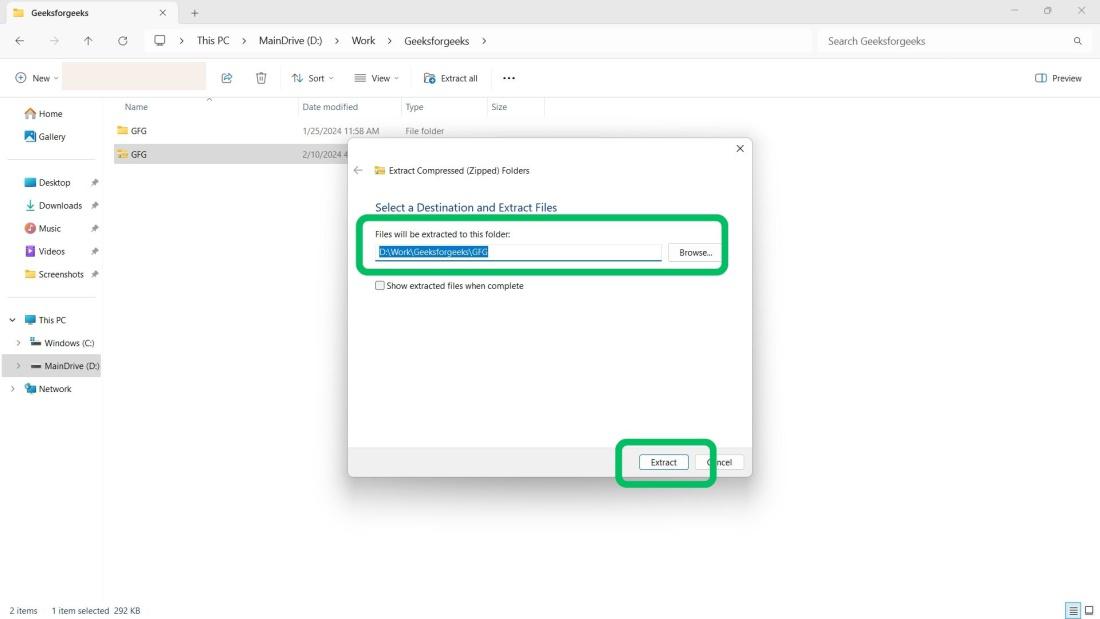
Step 3: Choose the extraction destination.
Step 4: Click "Extract" to unzip the files.
👁 method-1:-unzip-files-in-windows-using-file-explorer
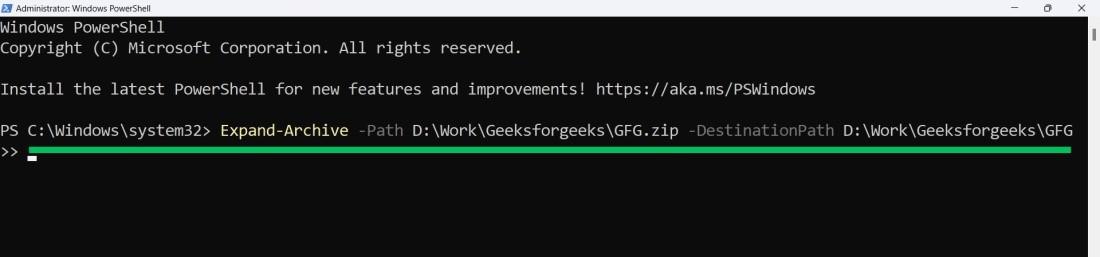
Step 1: Press Windows key + S, type "PowerShell", and open as administrator.
Step 2: In PowerShell, Enter the command and press Enter.
Expand-Archive -Path C:\SOURCE\YOUR\FILES\ZIPPEDFILE.zip -DestinationPath C:\DESTINATION\UNZIP👁 method-2:-unzip-files-in-windows-using-powershell
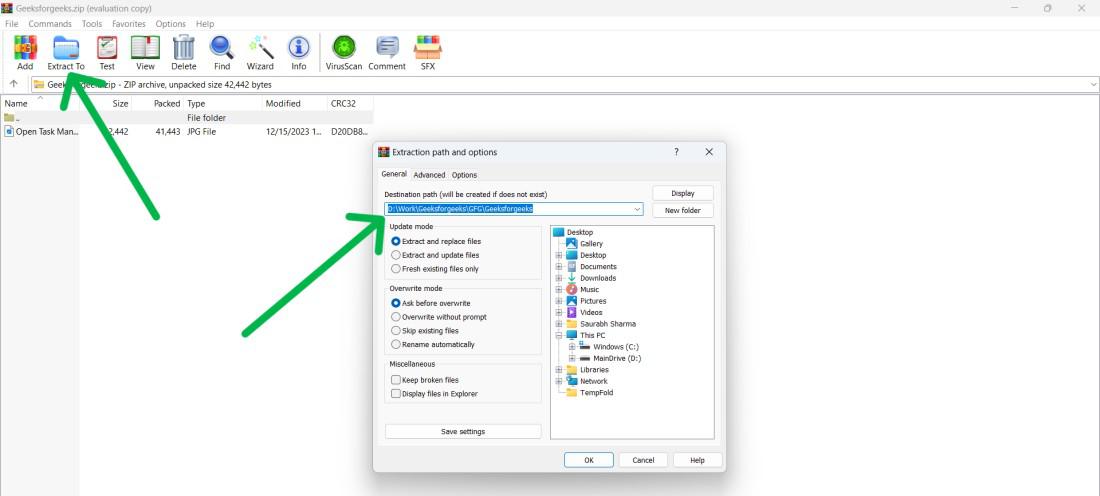
Step 1: Right on the zip folder then hover on "Open With" > "WinRAR archiver".
Step 2: Then, On WinRAR windows click on "Extract to".
Step 3: Choose your desired folder path where you want to extract it.
👁 method-3:-unzip-files-in-windows-using-winrar
Hence, we have successfully executed all three methods to unzip files in Windows 11.
In conclusion, We have shown you 3 Easy Methods to Zip and Unzip files in Windows 11 for Free. You can use File Explorer or PowerShell to package and unpackage folders, files, and archives.