 |
VOOZH | about |
|
VOOZH | about |
Managing machine learning projects can get complicated with multiple models, datasets and settings. Without a proper system, tracking experiments manually is time-consuming and error-prone. MLflow is an open-source tool that helps simplify and organize this process. It streamlines the entire machine learning workflow, making it easier to track experiments, manage models and deploy them efficiently.
MLflow is an open-source platform designed to manage and streamline the entire machine learning lifecycle. It provides a set of tools for tracking experiments, packaging models and deploying them, making it easier to manage the various stages of ML workflows. Whether we are a data scientist, ML engineer or DevOps engineer, MLflow offers a robust solution to track our experiments and manage models throughout their lifecycle.
Let's setup MLflow on our devices,
Install MLflow via pip: We can install MLflow directly from the command line using pip, a package management system for Python.
pip install mlflow
Install Dependencies: Install the common data science libraries such as scit-learn, pandas, matplotlib etc.
pip install scikit-learn pandas matplotlib seaborn
Verify Installation: After installation, verify that MLflow is correctly installed or not by running the version check.
mlflow --version
Start the MLflow Tracking server: MLflow provides a local tracking server where you can log experiments and view them via the web UI. To start the server, run:
mlflow ui
By default, the MLflow UI will be available at http://127.0.0.1:5000. Here, we can track all our machine learning experiments, models and logs.
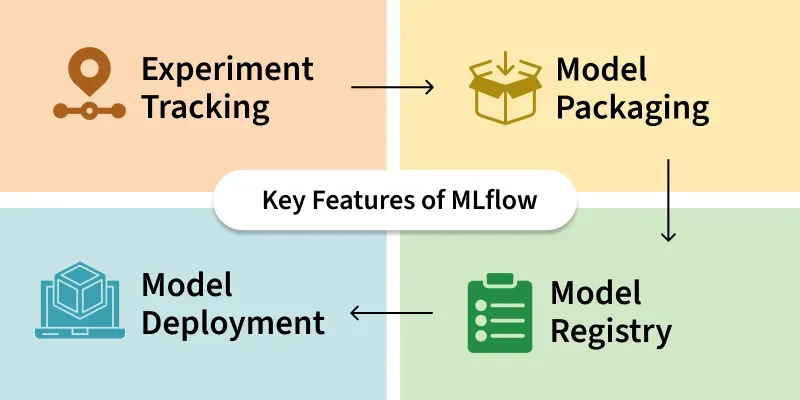
MLflow consists of four core components, each supporting different aspects of the ML lifecycle:
Stage 1: Data Collection and Preparation: In the first stage, we collect and clean our data so it’s ready for training the model. We may need to handle missing data, change the format of our data or split it into training and testing sets.
Stage 2: Model Training: Once the data is ready, the next step is training a machine learning model. This involves using algorithms to create a model that can make predictions based on the data. We will also try different settings (called hyperparameters) to see which gives the best results.
MLflow Tracking helps us log key information during model training, such as:
Example: Training and Tracking a Model with MLflow
Output:
Model trained with accuracy: 1.0000
Stage 3: Experiment Tracking: Tracking experiments is important when testing different models or settings. MLflow lets us record details like hyperparameters, metrics and models for every run. This helps us compare results over time and pick the best model.
We can see all our experiments in the MLflow UI, where we can compare metrics like accuracy and other important results.
Stage 4: Model Packaging: After training a model, the next step is to package it. Packaging means saving the model in a format that can be shared and deployed. MLflow Models provide a standard format to save models. This makes it easier to deploy models that were built using different tools like scikit-learn or TensorFlow.
Example: Packaging a Model for Deployment
Output:
<mlflow.models.model.ModelInfo at 0x79864a9b8050>
This command saves the model in a standard format that can be easily deployed later.
Stage 5: Model Deployment: Once the model is packaged, it’s ready to be deployed in a production environment where it can make predictions on new data. MLflow makes this easier by offering tools for deployment, whether it’s on our local machine or in the cloud. MLflow can integrate with services like AWS SageMaker and Azure ML to deploy models on cloud platforms.
Example: Deploying a Model with MLflow
This command will expose the model as a REST API, which other applications can use to send data and get predictions.
MLflow’s Model Registry helps with tracking model versions and updating models when necessary. We can also log metrics after deployment to see if the model’s accuracy drops over time.