 |
VOOZH | about |
|
VOOZH | about |
FastAPI does not include built-in HTML template rendering like Flask or Django. However, template engines can be integrated easily. The options used are Jinja and Mako. Jinja is used here due to its widespread adoption.
pip install Jinja2
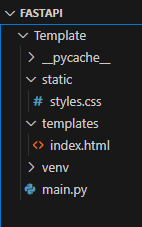
Create a directory named Templates in your project. This is where HTML templates will reside.
Create a file name main.py. Below code sets up a web application that serves static files, uses Jinja2 templates for rendering HTML pages and responds to the root URL ("/") with an HTML page that displays the message "Hello, World!"
Write HTML templates in templates/index.html.
uvicorn main:app --reload
Visit http://localhost:8000 in your browser and you should see "Hello, World!" displayed on the page.
Now, integrate Static files that includes CSS style sheets. For this make little changes in HTML templates as shown below and use url_for() function for integrating static files.
In this example, it would link to a CSS file at static/styles.css with:
Run the FastAPI Application.
uvicorn main:app --reload
Visit http://localhost:8000 in your browser, and you should see "Hello, World!" displayed on the page.
Output
To add an "if-else" statement to your main.py file, we can include it in our jinja template (index.html) and pass the necessary variables from our FastAPI route.
In this code, we've added a message variable in the "read_root" route. Depending on its value, the if-else block in the Jinja template will render different content.
In this example, we've added an if-else block that checks if the message variable is equal to "Hello". Depending on the condition, it will display different content.
Output
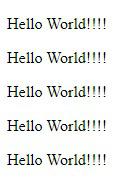
Jinja templates support loop constructs like for to dynamically render repeated content. This allows to iterate over data passed from the backend and display it efficiently in HTML.
In this modified "index.html" file, we've added a for loop using "{% for i in range(5) %}" which will loop five times. In each iteration, it will print the value of the "message" variable.