Build parameters in Jenkins allow you to define variables that can be set by the user when triggering a job. These parameters can include environment configurations, test case arguments, or any other dynamic values needed for the build process.
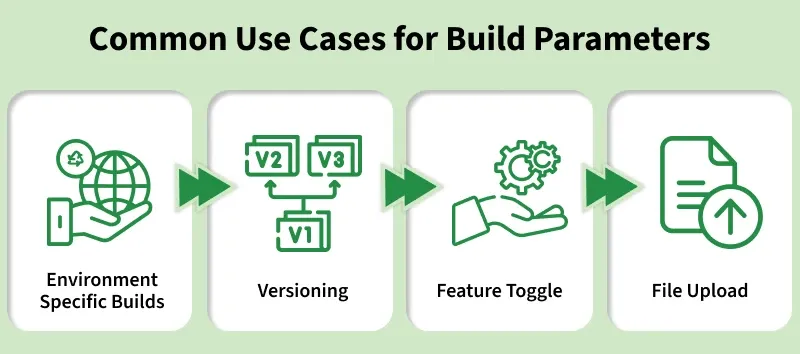
For instance, if you have a Jenkins job that triggers an automation test suite, you can parameterize the environment in which the test is executed (e.g., dev, stage, or QA). This allows you to run the same set of tests in multiple environments without duplicating the job configurations.
Types of Build Parameters
String Parameter:
A simple text box where you can enter a custom string value.
Example: Enter the version number for the software you want to deploy.
Boolean Parameter:
A checkbox that allows users to toggle between true and false.
Example: Enable or disable a specific feature in the build process.
Choice Parameter:
Provides a dropdown list of predefined options for the user to select from.
Example: Select the environment for deployment (e.g., development, staging, production).
File Parameter:
Allows users to upload a file, such as a configuration file or artifact, during the build process.
Password Parameter:
Masks the input for sensitive information, such as passwords or API keys.
These parameters can be configured with default values, which help guide the user when they are triggering the job. For instance, you might provide a default environment value that the user can change if needed.
How to Add Build Parameters to a Job?
Adding build parameters is a straightforward process in Jenkins. Here's how to do it:
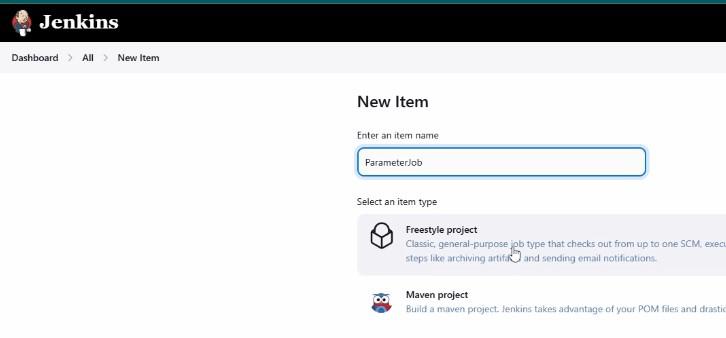
1. Create a New Job: When you create a new Jenkins job or configure an existing one, navigate to the job's configuration section.
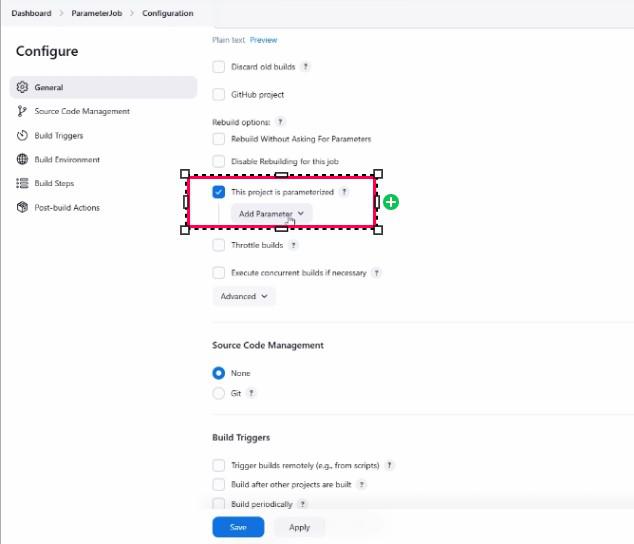
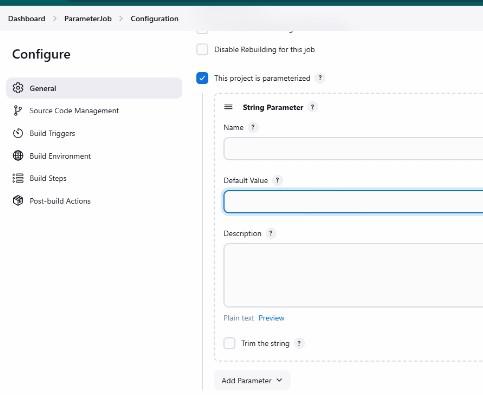
2. Enable Parameterization: Check the option called "This project is parameterized." This will enable the "Add Parameter" option.
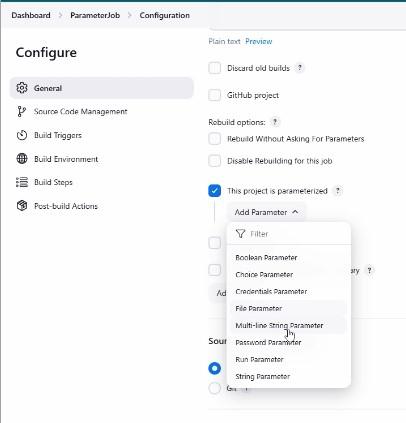
3. Add Parameters: Click "Add Parameter" and select the type of parameter you want to use (e.g., string, choice, boolean). For each parameter, provide:
Name: A unique identifier for the parameter.
Default Value (optional): A default value for the parameter.
Description (optional): A brief explanation of the parameter to help the user understand what input is required.
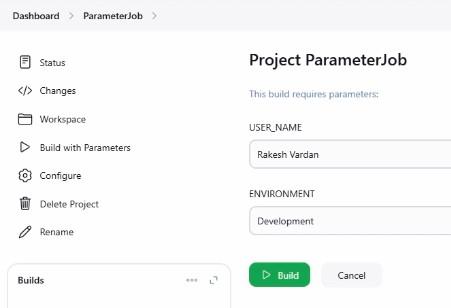
After saving the configuration, Jenkins will prompt users to provide values for the parameters when they click the Build with Parameters button.
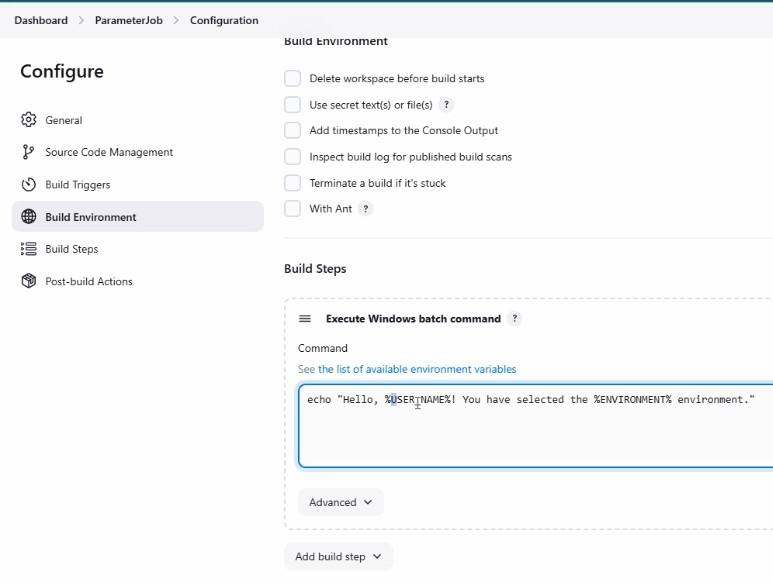
Using Build Parameters in the Build Steps
Once the parameters are configured, you can use them in the build steps. To reference a parameter, use the following syntax:
Windows: %PARAMETER_NAME%
Unix/Linux: ${PARAMETER_NAME}
For example, if you define a string parameter for the environment, you can use it in a build step like this:
echo "Building for environment ${ENVIRONMENT}"
During the build process, Jenkins will replace ${ENVIRONMENT} with the value selected by the user (e.g., dev, stage, or QA).
Example: Creating a Job with Build Parameters
1. Create a Job:
Start by creating a new job in Jenkins and select "Freestyle Project."
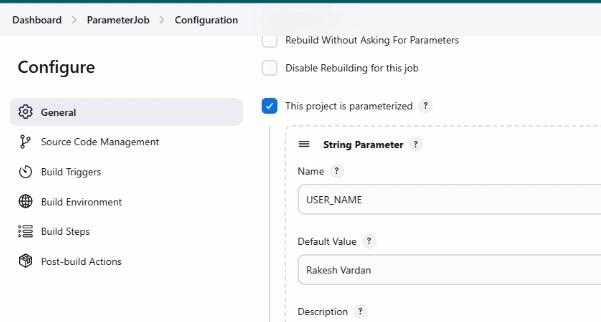
In the General section, check "This project is parameterized."
Click on "Add Parameter" and choose String Parameter for the username and Choice Parameter for the environment.
2. Configure Parameters:
For the String Parameter, name it "USERNAME" and provide a default value like "Rakesh Fardhan."
For the Choice Parameter, name it "ENVIRONMENT" and provide options like dev, stage, and QA.
3. Add Build Step:
Add a build step, such as Execute Windows Batch Command, and use the parameters in the script:
echo "Hello ${USERNAME}, you have selected the ${ENVIRONMENT} environment."
4. Run the Job:
When triggering the job, Jenkins will prompt you to enter or select values for the parameters. If no value is provided, the default will be used.
For example, if the user selects "QA" for the environment and provides a custom username,
Output might be:
Hello James, you have selected the QA environment.
You can try with the Different Environment with the various value which are available it will also change the Console Output with the same when running.
