Looking to run Windows from a USB drive? Whether you're using it for troubleshooting, testing, or as a portable version of your operating system, booting Windows from a USB drive can be extremely useful. With the right tools and setup, you can create a bootable Windows USB drive that lets you carry a portable version of Windows anywhere. In this guide, we’ll show you how to run Windows from a USB, including creating the drive and getting your system to boot from it.
How to Run Windows From a USB Drive?
Users can run their Windows operating system by following the below-mentioned methods -
Method 1: Download the Bootable image
- Go to the official page of Microsoft Windows to download the boot image for Windows 10.
- Using a Computer browser you will not get the download option for boot image so use a Mobile device for downloading.
- Select edition and language and click on Confirm.
👁 Screenshot-2024-04-07-234026
Method 2: Configure USB Drive
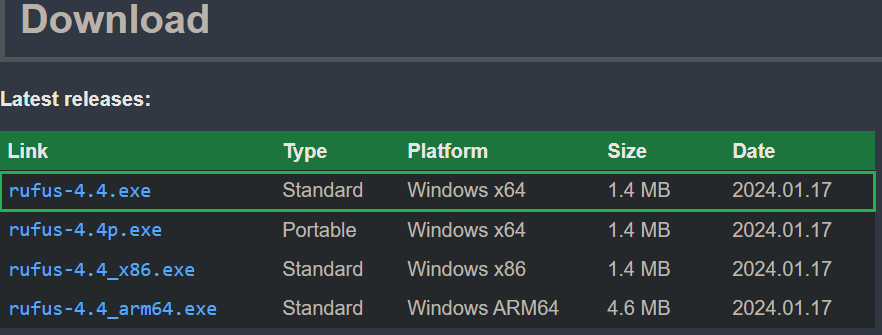
- Download the latest version of Rufus from the official website which will be used to flash the boot image into a USB drive.
👁 Screenshot-2024-04-07-121554
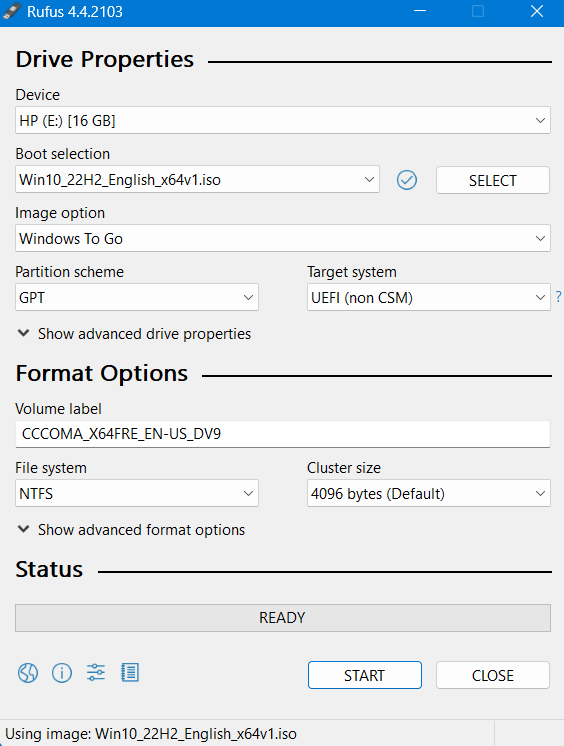
- Insert a USB Drive of minimum 16GB of storage into the computer and run Rufus. Select the iso file for Windows 10 in Boot Selection.
👁 Screenshot-2024-04-07-225808
- For Image Option choose Windows To Go.
- Use Partition scheme as GPT.
- Leave other fields as it is and click on Start.
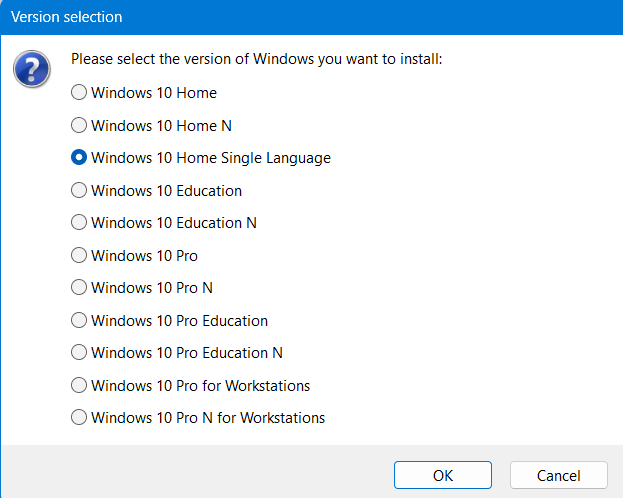
- On the next screen choose the suitable Windowsedition and click on OK.
👁 Screenshot-2024-04-07-225825
- Now configure the Windows User Experience as per your requirements.
- Once done press OK.
👁 Screenshot-2024-04-07-225848
Wait a few minutes for Rufus to flash the boot image, once completed you can close the application.
Method 3: Change Boot Priority
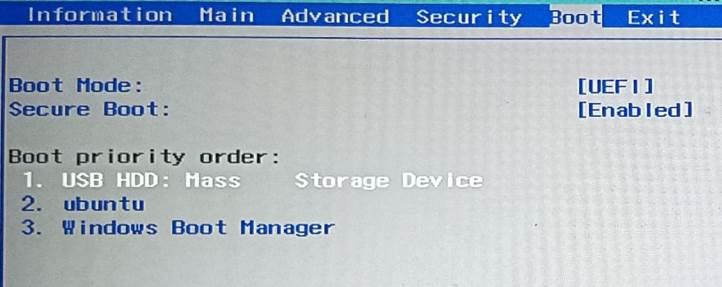
- Restart the computer and open BIOS Settings.
- To know the BIOS key, check the manufacturer's website.
- On the BIOS menu, go to the boot section and select USB device as the highest priority.
- Disable secure boot if you face any issues during startup.
👁 Boot-Priority
Method 4: Setup Process
As the installation process is already completed while flashing the boot image. We will start the setup process when the computer restarts.
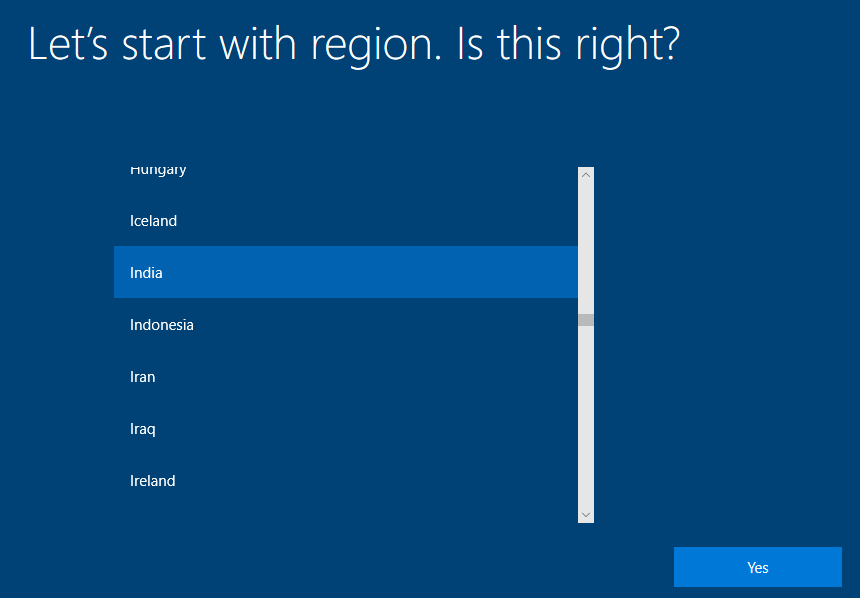
- Choose the region based on your location and click on Yes.
👁 Screenshot-2024-04-08-094931
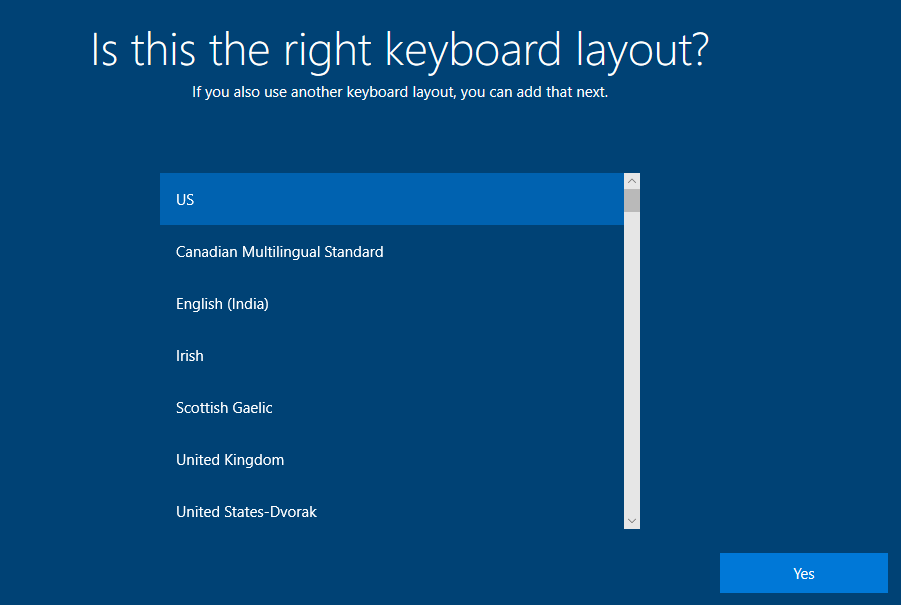
- Choose the correct keyboard layout or add a new keyboard layout and then click on Yes.
👁 Screenshot-2024-04-08-095007
- Carefully read the Windows 10 License Agreement and click on Accept.
👁 Screenshot-2024-04-08-095036
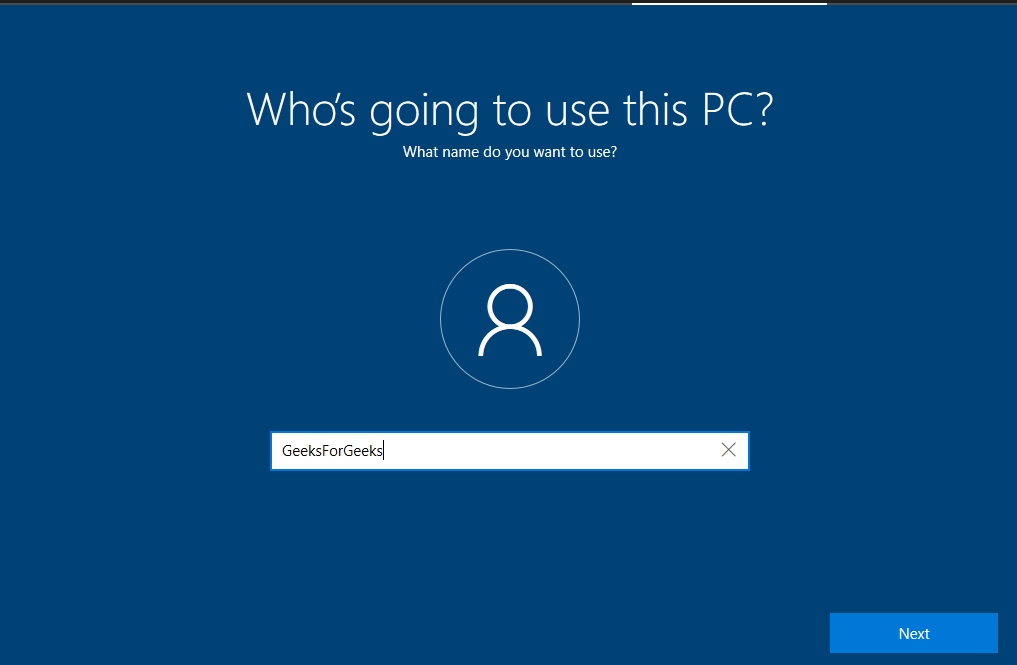
- Now, Create a User for the PC. Write your username and click on Next.
👁 Screenshot-2024-04-08-095124
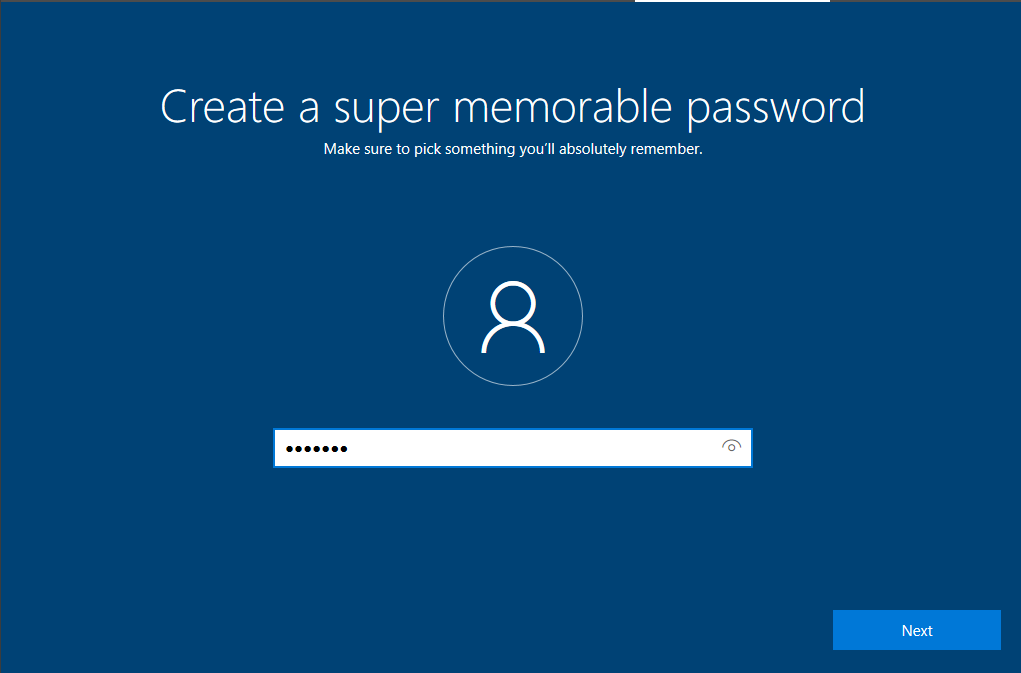
- Enter a strong password that you can remember easily and click on Next.
- Set up security questions and answers on the next screen to reset your suit password in case you forgot.
👁 Screenshot-2024-04-08-095142
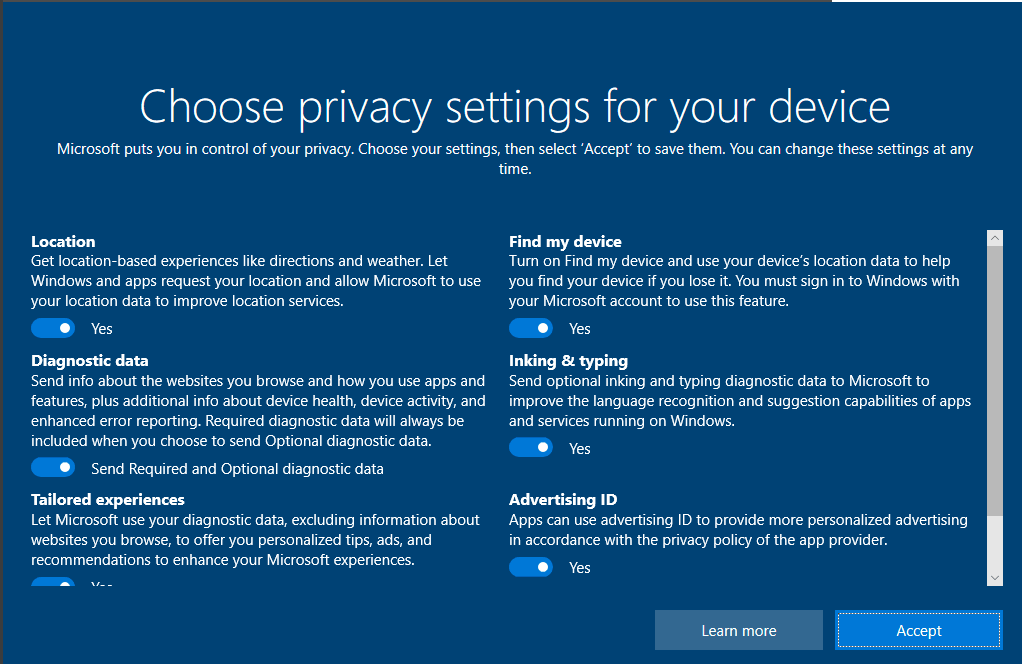
Now wait for a few minutes and Windows will complete the rest of the setup for you. During this, the PC can be restarted automatically for several times.
Method 5: Explore Windows
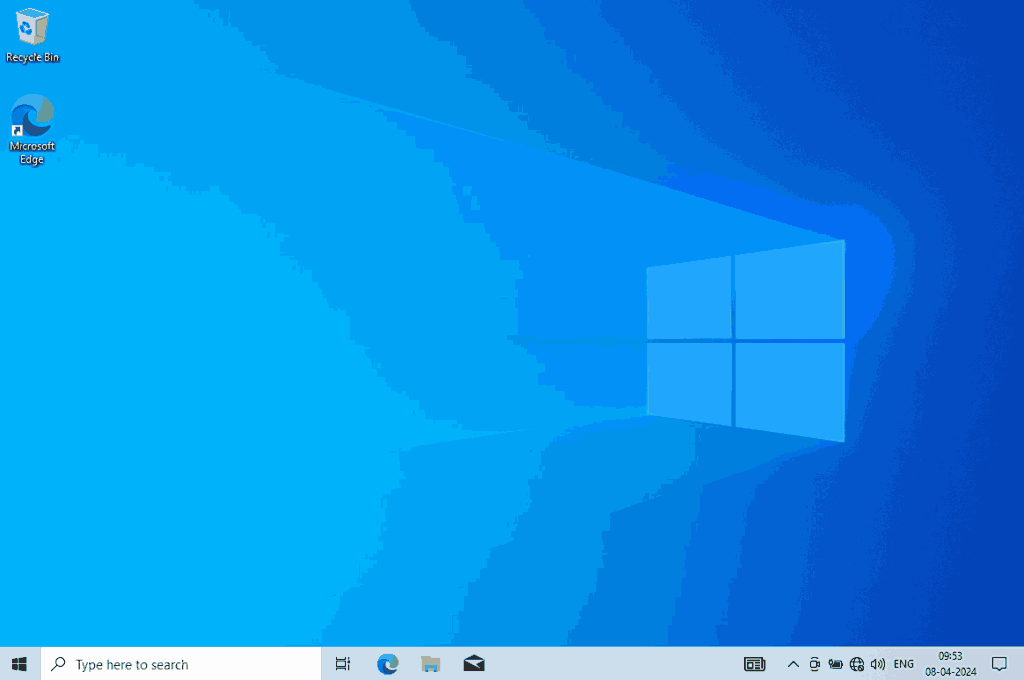
Once the setup is completed you will be taken to the home screen of Windows 10.
👁 Screenshot-2024-04-08-095616_11zon
- This looks the same as the Windows running on stand-alone PCs.
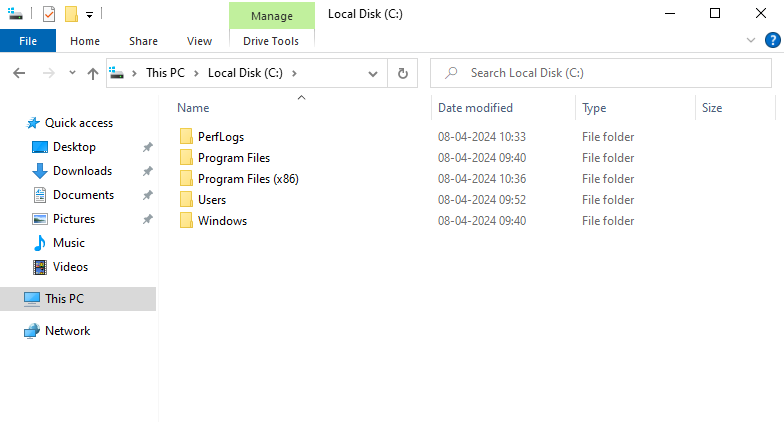
- To check the folders you can go to File Explorer and check the C drive.
👁 Screenshot-2024-04-08-095643
- As you can see this contains the same file structure as any other Windows machine. As the whole OS is running from the USB Drive you will see only a single Drive here with the storage capacity the same as the USB Disk.
👁 Screenshot-2024-04-08-103624
Conclusion
Using a bootable Windows USB drive is a great way to have a portable, fully functional Windows environment wherever you go. By following the steps in this guide, you can easily run Windows from a USB drive, making it perfect for testing or emergencies. Whether you're looking to install Windows on an external USB driveor simply need a portable version of your OS, this setup gives you flexibility and convenience.
Also Read
